Will you lose SEO rankings when you migrate from HubSpot CMS to WordPress? Not if the migration is sequenced correctly and every URL is 301-redirected one-to-one before cutover. When ranking damage does happen, it almost always traces back to a broken or missing redirect.
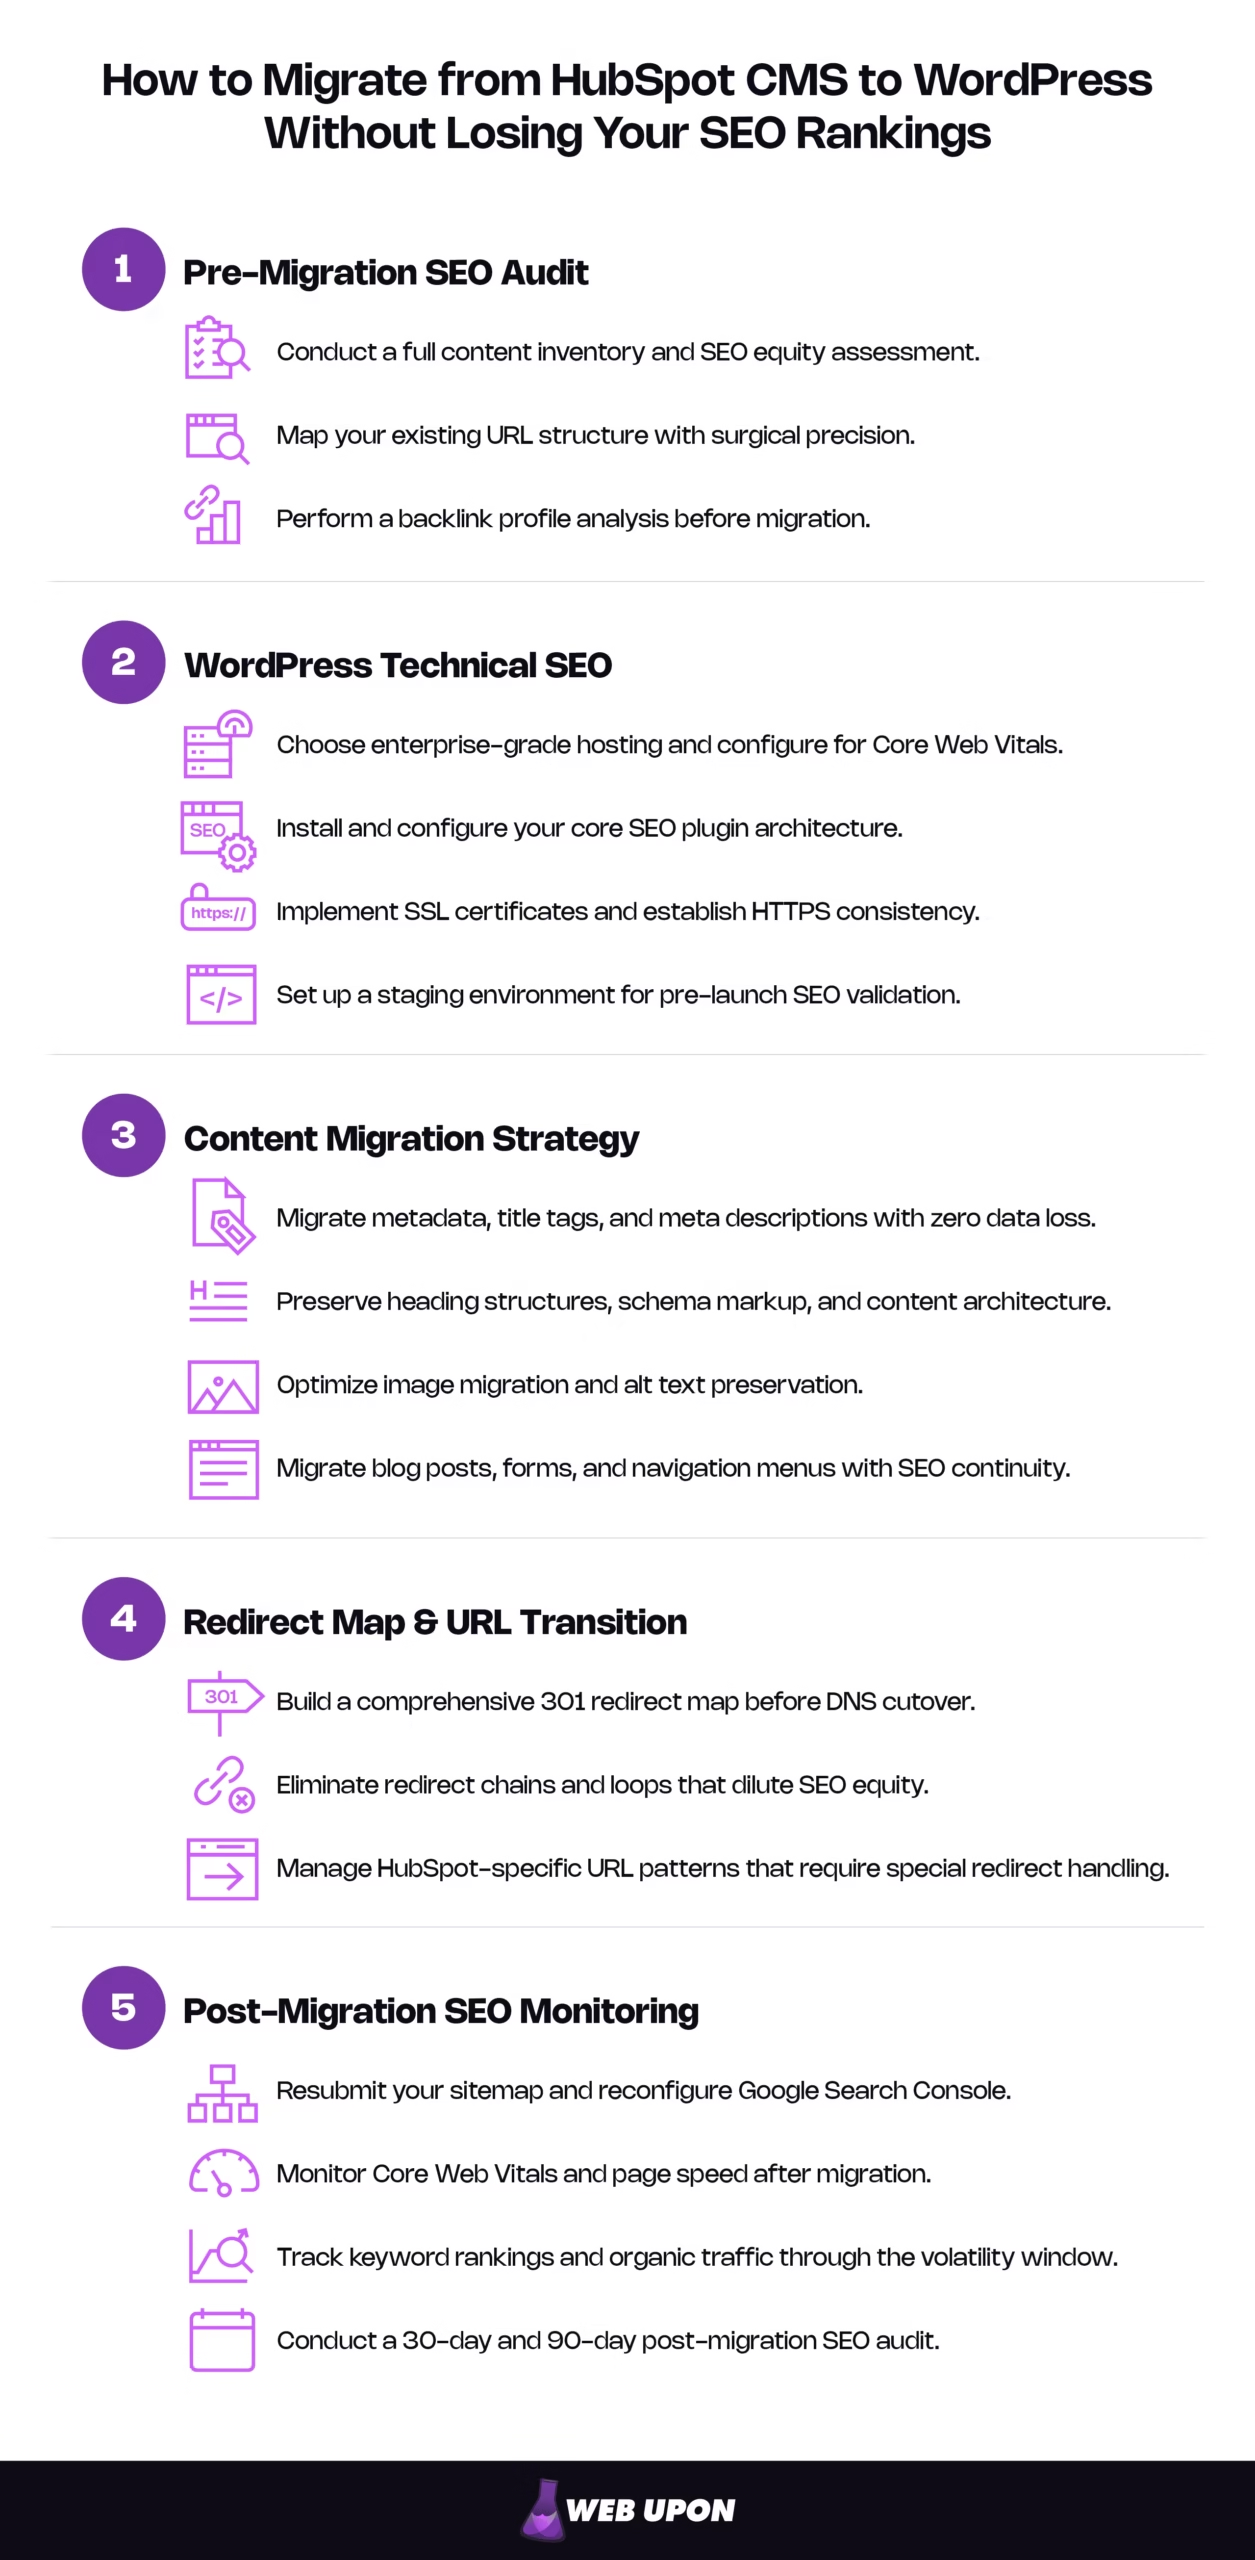
A migration from HubSpot CMS to WordPress protects your SEO when it’s run as an equity-preservation project, not a content copy-paste. Work in five sequenced phases: (1) audit and baseline, (2) build technical SEO foundation on Wordpress, (3) migrate content with metadata and schema intact, (4) map every URL to a one-to-one 301 redirect, and (5) monitor through the volatility window.
Each phase of the process guards a specific asset:
| # | Phase | What it protects | Key risk if skipped |
| 1 | Pre-migration SEO audit | Your measurable baseline (rankings, traffic, links) | You can’t defend equity you never measured |
| 2 | WordPress technical SEO foundation | Crawlability, page speed, index integrity | Weak infrastructure caps performance from day one |
| 3 | Content migration | Metadata, schema, headings, images, lead data | Silent signal loss you won’t see until rankings slip |
| 4 | Redirect map & URL transition | Link equity, rankings, existing crawl paths | Broken redirects collapse rankings on cutover day |
| 5 | Post-migration monitoring | Recovery and early damage detection | Small failures compound into large, lasting losses |
Remember one thing above all: the 301 redirect map is the make-or-break moment. Content can be re-migrated. Metadata can be re-imported. But a broken redirect map severs the connection between your earned authority and your new site, at the exact moment Google is re-crawling every URL you own. Everything else in this guide is preparation for that step, or cleanup after it.
What happens to HubSpot forms and lead data after migration? Forms rebuild in WordPress with their original URLs and metadata intact, so the pages keep their SEO value. Lead data is more nuanced: some HubSpot-native attribution — original-source and first-touch in particular — doesn’t port one-to-one and should be re-established in GA4, not assumed to transfer. Treat attribution as a rebuild, not a copy.
Set your expectations honestly now, and you’ll stay calm later: a well-run migration protects the large majority of your equity and then passes through a window of ranking fluctuation, commonly two to six weeks while Google re-evaluates the new site, with most pages settling within a few weeks and larger sites taking longer.
A capable in-house team can own the inventory, the baseline, and much of the WordPress build. The phases where an experienced enterprise SEO partner most reduces risk are redirect mapping, schema migration, and post-launch monitoring, where mistakes are both expensive and nearly invisible until it’s too late. If you want your baseline validated before anyone touches a file, a formal pre-migration SEO audit is where to start.
1. Pre-Migration SEO Audit: Protecting Your Equity Before You Touch a Single File
You cannot protect what you haven’t measured. Every task in this phase feeds one deliverable: a numeric baseline you can hold the finished migration against.
Conduct a Full Content Inventory and SEO Equity Assessment
Crawl the entire HubSpot CMS environment and catalog every indexed URL — blog posts, landing pages, pillar pages, system pages, all of it. Anything you miss now is something you can’t redirect later, and an un-redirected URL is a dropped thread of authority.
Then find where your value actually lives. Pull your highest-traffic and highest-converting pages from Google Search Console and HubSpot analytics, and lock in the numbers: current rankings, organic traffic, backlink profile. This is the benchmark you’ll defend after launch. Without it, you can’t tell a routine wobble from a genuine wound.
A handful of pages usually carry a disproportionate share of your organic worth. Flag the ones with real domain authority, inbound links, and lead-attribution data as non-negotiable preservation priorities. Your redirect map will protect them first.
Replicate this “SEO asset inventory” table to anchor the phase:
| Page URL | Organic traffic | Top keywords / rankings | Backlinks | Preservation priority |
| /example-pillar/ | 4,200/mo | “example term” (#2) | 38 | Critical |
| /blog/example-post/ | 1,900/mo | “example term” (#5) | 12 | High |
| /old-landing/ | 60/mo | — | 0 | Low / consolidate |
Map Your Existing URL Structure With Surgical Precision
Export a full URL inventory from HubSpot CMS — subdirectories, blog slugs, and HubSpot’s own patterns, starting with the default /blog/ prefix that HubSpot applies through its editable blog-slug setting. Now reconcile those against WordPress permalink conventions before migration, not on launch day. HubSpot and WordPress make different default assumptions about how a URL is built, and discovering that conflict at cutover is how avoidable errors sneak in.
Decide early: preserve the existing URLs, or restructure them? Preservation is almost always the lower-risk path, because every change threatens rankings unless a correct redirect backs it. Watch your topic-cluster URLs and pillar-page paths especially closely. They tend to hold concentrated equity, and their slugs rarely translate cleanly into standard WordPress permalinks.
Perform a Backlink Profile Analysis Before Migration
Using a reputable backlink analysis platform, extract every external link pointing at your HubSpot domain, sorted by target URL and the linking site’s authority. Backlinks are the one asset you can’t rebuild on your own, which makes this the analysis that sets your redirect priorities.
Pinpoint which pages are link targets, so redirect mapping protects those inbound signals first. Flag any links aimed at pages you plan to consolidate, delete, or restructure, then plot the path that keeps their equity flowing. The output is a backlink preservation matrix: your most-linked pages cross-referenced against your planned WordPress architecture. It’s the short list of redirects you are not allowed to get wrong.
2. Technical SEO Infrastructure Setup in WordPress Before Content Arrives
With the baseline captured, the work turns from measuring to building. The goal is a WordPress environment ready to hold your equity before a single page moves, and it has to be migration-specific. Your real challenge isn’t “set up WordPress.” It’s replicating, and ideally beating, the managed performance HubSpot handed you for free.
Choose a Hosting Provider and Configure for Core Web Vitals Compliance
Pick an enterprise-grade host built for WordPress, and prioritize Time to First Byte and server response time — both feed straight into Largest Contentful Paint. Stand up a Content Delivery Network on day one to reproduce the global consistency HubSpot’s infrastructure gave you automatically. Turn on server-level caching before any content arrives, so your first indexed URL is already fast instead of fast eventually.
Here’s the part that changes how you validate all of it. Google scores LCP, CLS, and Interaction to Next Paint against real-user field data at the 75th percentile — not against the lab number a testing tool flashes at you. The “good” targets are concrete: LCP of 2.5 seconds or less, INP of 200 milliseconds or less, and CLS of 0.1 or less. INP, which replaced First Input Delay in 2024, is the metric many sites fail, because it measures how fast the page answers a real tap or click and lives or dies by your JavaScript. A clean lab score is encouraging. The field data from real visitors is what actually moves rankings. Build for the person on the slow phone, not for the test.
Install and Configure Your Core SEO Plugin Architecture
Before content migration begins, install a dedicated WordPress SEO plugin the moment setup is done so metadata is under your control from the first page forward. Set your default meta-title and meta-description templates deliberately; their whole job is to stop auto-generated metadata from silently overwriting the titles you’ll carefully carry across in Phase 3. Generate an XML sitemap and confirm its structure matches your planned URLs. Then switch off the WordPress defaults that quietly work against you — chief among them, the duplicate content spun up by category and tag archive pages.
Implement SSL Certificates and Establish HTTPS Consistency
Confirm SSL and enforce full HTTPS before you migrate anything, so no mixed-content signal ever undermines a crawl. Match the security posture of your HubSpot setup to avoid a trust-signal regression showing up in Search Console. Set HTTPS canonicalization at both the server level and inside your SEO plugin, closing the door on duplicate indexing between HTTP and HTTPS. Test all of it on staging. Never in production.
Set Up a Staging Environment for Pre-Launch SEO Validation
Build the entire migration on a staging environment that mirrors production — same caching, same CDN routing — so what you validate is what you’ll actually ship. Then keep staging out of the index, and mind this trap: a robots.txt disallow won’t reliably hide a URL that gets discovered or linked. Pair WordPress’s search-engine-visibility setting with password protection, so a stray crawl can’t hand you a duplicate-content problem before you’ve even launched.
Staging is where you earn your confidence. Validate every redirect, confirm metadata survived, and check page speed under production-like conditions. Run a full crawl with a site-crawling tool to surface broken links, missing metadata, and structural cracks before a single one reaches a live URL.
3. Content Migration Strategy: Transferring Assets Without Destroying SEO Signals
The container is ready. Now the content moves, and this is where invisible signals go missing. Canonical tags, structured data, alt text, publish dates: none of it shows on the rendered page, so nobody notices when it quietly fails to make the trip. The fix is to refuse to work from memory. Work from a map.
Every HubSpot field needs a known WordPress destination:
| HubSpot field | WordPress destination |
| Meta title | SEO plugin title field |
| Meta description | SEO plugin description field |
| Canonical URL | SEO plugin canonical field |
| Image alt text | Media library alt attribute |
| Topic cluster association | Custom taxonomy |
| Author | WordPress author / custom field |
| Publish date | Post publish date |
| Schema / structured data | Schema plugin configuration |
Migrate Metadata, Title Tags, and Meta Descriptions With Zero Data Loss
Export all HubSpot metadata — custom meta titles, meta descriptions, canonical tags — through HubSpot’s native export tools or API before you transfer a word of content. Map each field to its WordPress post or page and import it straight into your SEO plugin. Never let auto-generation fill these in; that’s how a sharply targeted title becomes a generic one without anyone deciding it should.
Once the metadata lands, audit it. Confirm character counts held, keyword targeting stayed intact, and nothing got truncated or scrambled by an encoding error. Any HubSpot-specific field without a WordPress twin — topic-cluster associations, for one — gets rebuilt as a custom taxonomy or plugin configuration rather than abandoned.
Preserve Heading Structures, Schema Markup, and Content Architecture
Audit the heading hierarchy on every migrated page and confirm the H1/H2/H3 structure survived the trip out of HubSpot’s editor. Search engines read headings to understand a page, and page builders don’t always keep them faithful. An SEO-conscious HubSpot CMS to WordPress web design rebuild protects heading structure and layout in the same pass.
Recreate all structured data — Article, BreadcrumbList, Organization, and FAQPage — with a dedicated WordPress schema plugin, then validate every type in Google’s Rich Results Test before launch. Schema is easy to lose precisely because it’s invisible, yet Article, Breadcrumb, and Organization markup still earn rich results and sharpen topical clarity. One caveat worth knowing: Google retired FAQ rich results in May 2026, so FAQPage no longer produces a SERP enhancement. Keep it for reader clarity and AI-answer visibility, not for a rich result. Check that internal linking patterns and anchor-text distribution survive the move into WordPress blocks too. A thorough post-migration content audit — each new page held up against its HubSpot original — is the net that catches truncation and formatting loss before a crawler does.
Optimize Image Migration and Alt Text Preservation
Export your media with original filenames intact. A descriptive filename carries value in image search that a bulk export will happily overwrite with a string of digits, so guard it. Verify every alt-text attribute lands in the WordPress media library rather than getting stripped in transit.
While the images are in your hands, make them better than you found them: compress and optimize to cut file size with no visible quality loss for LCP and switch on lazy loading.
Migrate Blog Posts, Forms, and Navigation Menus With SEO Continuity
Move every blog post with its publish date, author, categories, and tags attached — those signals feed content freshness and topical authority. Rebuild HubSpot forms in WordPress with a compatible plugin, keeping the original landing-page URLs and metadata so hard-won equity isn’t reset to zero. Recreate navigation menus to mirror your existing internal linking; the crawl paths search engines already mapped are an asset, not a redesign brief. And sweep the migrated content for hardcoded HubSpot-domain links, updating each to its correct WordPress URL.
Your forms and their URLs migrate cleanly, but your lead attribution does not — at least, not entirely. Some HubSpot-native data (original-source and first-touch especially) is set and managed inside HubSpot and simply doesn’t port one-to-one into WordPress. Plan to re-establish it in GA4 rather than assume a perfect handoff. A professional GA4 setup is the realistic replacement for HubSpot’s built-in attribution, and treating it as a rebuild spares you an unpleasant discovery three months in.
4. Redirect Management and URL Transition: The Make-or-Break SEO Moment
Everything so far was rehearsal for this. Content can be re-migrated and metadata re-imported, but a broken redirect map is what actually collapses rankings on cutover day. It cuts the wire between your earned authority and your new URLs at the precise moment Google re-crawls the whole site.
This is the deliverable, made concrete — a sample 301 redirect map:
| Old HubSpot URL | New WordPress URL | Priority | Redirect type | Status |
| /blog/example-post | /example-post/ | Critical | 301 | Verified |
| /pillar/topic-cluster | /topic-cluster/ | Critical | 301 | Verified |
| /old-landing-page | /new-landing-page/ | High | 301 | Verified |
| /thank-you-page | /thank-you/ | Medium | 301 | Pending |
Build a Comprehensive 301 Redirect Map Before DNS Cutover
Create a one-to-one mapping document that ties every HubSpot URL to its WordPress destination, with no source URL left orphaned. Every one of these is a 301 — a permanent redirect, not a 302. Only the permanent signal tells Google to consolidate on the new URL and update the index; a 302 signals a temporary move and keeps the old URL in results. It’s a quiet, common, costly mistake, and it’s entirely avoidable.
Sequence implementation by value: the top-traffic pages, the highest-ranking keyword URLs, and the most-linked pages your audit already flagged. Wherever you can, implement redirects at the server level through your host rather than leaning entirely on a WordPress plugin — Google recommends permanent server-side redirects where technically possible. Server-level redirects resolve faster and skip the PHP processing that plugin redirects pile on at scale — the same overhead that can quietly erode the page speed you fought for in Phase 2. Then test every redirect in staging: confirm a genuine 301 status code, and confirm no chain runs longer than a single hop.
Eliminate Redirect Chains and Loops That Dilute SEO Equity
Hunt the chains — a HubSpot URL redirecting to an intermediate WordPress URL that redirects again. Permanent redirects don’t lose PageRank on their own, but Google still advises pointing each old URL straight at its final destination: every extra hop adds latency for users, isn’t supported by every crawler and browser, and slows how cleanly Google consolidates signals on the new page. So flatten each chain to a direct, single-hop 301. This matters most on your highest-authority pages, where fast, unambiguous consolidation protects the equity you can least afford to strand. Point the old URL straight at its final home, not through a series of waypoints.
Then find the loops — the dead ends born when a server rule and a plugin rule contradict each other on the same URL. A loop doesn’t merely dilute equity; it makes a page unreachable, a hard failure a crawler flags on sight. Enterprise-scale redirect mapping is exacting, invisible when it’s right, and catastrophic when it’s wrong — which is exactly the kind of work teams hand off to de-risk.
Manage HubSpot-Specific URL Patterns That Require Special Redirect Handling
HubSpot’s URL conventions create predictable failure points, and naming them in advance is half the fix. Map the default /blog/ prefix to your WordPress blog permalink structure with precise 301s. Handle topic-cluster and pillar-page slugs that standard WordPress permalinks won’t accept as-is. Redirect HubSpot system pages, thank-you pages, and form-confirmation URLs to their WordPress equivalents to preserve both SEO value and lead-attribution continuity. And don’t forget the machine-readable endpoints: HubSpot’s auto-generated RSS feeds, sitemaps, and robots.txt paths all need redirecting or replacing, or they’ll resurface as crawl errors in Search Console the week after launch.
5. Post-Migration SEO Monitoring and Recovery Protocol
Cutover isn’t the finish line. The first 90 days decide whether the migration holds, and disciplined monitoring is how you catch damage while it’s still small enough to undo. The whole point of this phase is to see problems early, before they compound.
Give the vigilance a shape, so it’s a cadence and not a panic:
| Checkpoint | What to check |
| Day 1 | Redirects resolving, sitemap submitted, GSC configured, Core Web Vitals baseline |
| Week 1 | Index coverage, crawl errors, early ranking movement |
| 30-day | Full technical crawl, broken links, metadata integrity, indexing anomalies |
| 90-day | Backlink equity confirmation, sitemap accuracy, consolidation opportunities |
And learn the difference between weather and a warning, because mistaking one for the other leads to panic edits that cause the very damage you feared:
| Normal volatility | Red flag |
| Rankings fluctuate for 2–6 weeks | Rankings drop sharply and stay down past week 4 |
| Impressions dip, then recover | Pages fall out of the index entirely |
| Individual keywords wobble | Traffic drops sitewide, not page by page |
| Temporary crawl-stat changes | Persistent crawl errors on priority URLs |
Resubmit Your Sitemap and Reconfigure Google Search Console
Submit the new WordPress XML sitemap to Google Search Console the moment DNS cuts over. If the domain or subdomain changed, add the WordPress domain as a new property and verify ownership through your DNS provider. Watch the Index Coverage report every day for the first 30 days — it’s your earliest warning system for de-indexing, crawl errors, and redirect failures. Lay impressions and clicks against your pre-migration baseline so a real keyword drop gets investigated in days, not uncovered in months.
Monitor Core Web Vitals and Page Speed After Migration
Run Google PageSpeed Insights and a Core Web Vitals check on your priority pages within 24 hours of launch to set a post-migration baseline, then measure it against your HubSpot benchmarks and fix any regression in LCP, CLS, or INP without delay. Tune caching and CDN settings to close the gaps, remembering that HubSpot’s managed infrastructure may have handed you advantages you now have to earn deliberately. Audit mobile specifically — mobile Core Web Vitals feed Google’s page experience ranking signal and are usually the harder ones to pass.
Get the timing right in your head, or you’ll chase ghosts: Core Web Vitals are scored from a rolling 28-day window of real-user data, so a fix you ship today won’t fully register for weeks. The green lab score right after the fix is reassuring, but the field data is the number that moves rankings so resist the urge to keep re-tuning while the window catches up. For the infrastructure gap specifically, our HubSpot CMS to WordPress speed optimization works exactly for this.
Track Keyword Rankings and Organic Traffic Through the Volatility Window
Start rank tracking before launch, capturing a pre-migration snapshot of your top 50–100 keywords. Expect a fluctuation window afterward, commonly two to six weeks in practice, as Google re-crawls and re-weighs the new architecture. That’s the re-evaluation working as designed, because a 301 is a strong signal but not an instant one. As a working rule of thumb, treat a drop beyond roughly 20% that hasn’t recovered by week four as a symptom to chase — a redirect failure, lost metadata, or a content-structure problem — and trace it to its cause. Track traffic at the page level, never the domain level, so you can see exactly which page is hurting and why.
Conduct a 30-Day and 90-Day Post-Migration SEO Audit
At 30 days, run a full technical crawl for crawl errors, broken internal links, missing metadata, and indexing anomalies that surfaced after launch. At 90 days, audit the backlink profile to confirm links to your old HubSpot URLs are passing equity cleanly through their 301s — the proof the redirect map did its job. Review the XML sitemap for accuracy: every intended page in, every redirected URL out, nothing orphaned or low-value submitted for indexing. Then use the 90-day mark for WordPress SEO strategies and structured post-migration content audit that routinely turns up consolidations, URL fixes, and schema wins that let you finish above your old baseline instead of merely level with it.
Migrate from HubSpot to WordPress Without Losing SEO
A migration from HubSpot CMS to WordPress keeps its SEO equity when it runs as five deliberate phases: measure the baseline, build the foundation, move the content with its signals intact, map every URL to a one-to-one 301, and monitor closely through the volatility window.
Be honest about the outcome and you’ll manage it well. A well-executed migration preserves the large majority of your equity and passes through a normal two-to-six-week window while Google re-evaluates the new site. That window is expected, and the discipline of the five phases is what keeps it short and shallow.
So keep the goal in view. The freedom you’re migrating toward is only worth it if the equity that made your site valuable survives the trip. The places an expert SEO partner most reduces risk are redirect mapping, schema migration, and post-launch monitoring: high-impact, hard to see, unforgiving of small mistakes. If you’d rather not stake years of rankings and lead flow on a first attempt, bring in Web Upon to de-risk the migration.