
Instructions on Using the Tool

Understanding the technical details of digital images, such as aspect ratio, resolution, pixel density, and how to resize or modify images to fit specific dimensions, is essential. An image that is 96 x 96 pixels features an equal width and height, thereby having a square aspect ratio which equates to a 1:1 ratio. This equal proportion is advantageous for creating avatars, icons, or user profile pictures for use across a variety of platforms. The 96 x 96 pixel resolution is considered modest, ideal for smaller visual components where extreme detail is not a necessity. Pixel density, which is expressed in pixels per inch (PPI), varies with the display size and cannot be altered simply by changing the image size.
Creating a 96px by 96px photo involves resizing the image using a digital tool that can scale the image down or up to the desired dimensions. During this process, maintaining the image quality is a key concern. It’s important to consider factors like the original image’s resolution and the resizing method used. Some converters retain quality better than others by employing various algorithms that manage how pixels are added or removed during resizing.
Key Takeaways
- A 96 x 96 pixel image is square with a straightforward 1:1 ratio, fitting for icons and avatars.
- The resolution and pixel density affect visibility; recognition of size and scaling impacts are key in conversion.
- Using specialized tools, one can effectively resize images while striving to preserve their original quality.
Understanding 96×96 Pixel Images
When we tackle the topic of 96×96 pixel images, we’re looking into a specific square size commonly used for icons and profile pictures. Our exploration includes understanding its dimensions and why the aspect ratio matters.
Size and Dimension
At their core, 96×96 pixel images are composed of exactly 9,216 pixels. Each pixel represents one building block of color that combines to form the entire image. Specifically, the dimension means that the image is 96 pixels wide and 96 pixels tall, creating a perfect square. For context, an image with these dimensions can be displayed clearly on digital platforms without taking up significant storage space.
- Width: 96 pixels
- Height: 96 pixels
- Total Pixels:
- 96 pixels (width) × 96 pixels (height) = 9,216 pixels
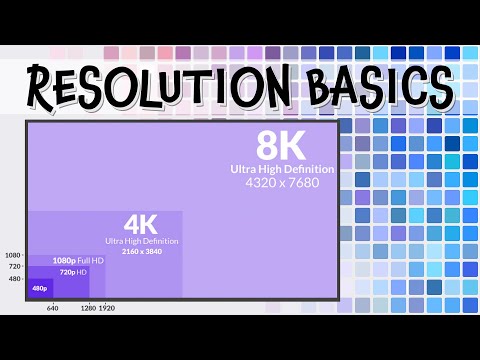
In terms of resolution, which describes the detail an image holds, a 96×96 pixel image may be considered low resolution when compared to modern high-resolution displays. However, for small graphics like icons, such a resolution is often sufficient.
Aspect Ratio and Its Importance
The aspect ratio of an image is the proportional relationship between its width and height. In the case of a 96×96 pixel image, the aspect ratio is 1:1, indicating that the width and height are equal. This balance is particularly crucial for images that need to be uniformly scaled without distortion.
- Aspect Ratio: 1:1 (square)
Understanding the aspect ratio is important because it affects how an image fits within different spaces on a webpage or application. A 1:1 aspect ratio ensures that the 96×96 pixel image maintains its integrity when resized and is particularly useful for designing web graphics that require a consistent shape and size.
Image Conversion Process
Converting an image to a 96 x 96 pixel format involves choosing an appropriate image format and following a specific set of steps to achieve the required dimensions and quality. We will guide you through the necessary formats to consider and the conversion process.
Choosing the Right Image Format
Selecting the correct image format is crucial for conversion because each format has its distinct advantages and use cases. For instance:
- JPEG: Best for photographs and images with gradients.
- PNG: Ideal for images that require transparency and lossless compression.
- WEBP: Provides superior compression with minimal loss in quality, fit for web images.
- BMP: Offers high quality but with larger file sizes, usually not suitable for web.
- TIFF: Frequently used for storing images intended for print, due to high quality.
- ICO: Used for creating small icons for websites or applications.
- GIF: Suitable for simple animations and images with limited color palettes.
- SVG: Perfect for vector graphics that need to scale without losing quality.
- EPS: Often used for vector images in professional graphic design workflows.
- PDF: Can contain images and text, best for documents that must be printed or shared.
Step-By-Step Conversion
To convert an image to 96 x 96 pixels, follow these steps:
- Open Your Conversion Tool: Use a reliable image editing tool or online converter that supports your source and target formats.
- Upload Your Image: Import the image you wish to convert.
- Choose Your Output Format: Decide on the format from the list above that best suits your needs.
- Adjust Image Settings: Set the resolution to 96 x 96 pixels. Ensure the aspect ratio is maintained if necessary, to prevent distortion.
- Export Your Image: After the adjustments, export the image in your chosen format.
By carefully selecting the correct image format and following these conversion steps, we can effectively produce a properly sized and formatted 96 x 96 pixel image.
Image Quality and Optimization

When we talk about image quality and optimization, we focus on achieving the best visual clarity while also managing file size efficiently. Both these aspects are fundamentally important for web use, sharing, and storage.
Maintaining Image Quality
To maintain image quality when resizing an image to 96 x 96 pixels, we need to consider the aspect ratio and resolution. The aspect ratio must remain consistent to avoid distortion, which might mean cropping the image to fit the dimensions. It is also critical to start with the highest resolution possible before resizing to preserve image quality. Here are key points to consider:
- Aspect Ratio: To maintain the original aspect ratio of a photo, ensure it is proportional to a 96 x 96 square format.
- Resolution: High-resolution images can be downsized to 96 x 96 pixels without significant quality loss, whereas low-resolution images may become pixelated.
- Pixel Density: A higher pixel density (PPI) in the original image will typically yield better results when scaled down.
Reducing File Size
Optimizing an image’s file size without sacrificing image quality is achieved by compression. We compress files to make them more manageable for web use and to save storage space. Here are efficient methods to consider:
- Lossless Compression: Reduces file size without losing quality by removing unnecessary metadata.
- Lossy Compression: Significantly reduces file size by slightly lowering image quality, which often remains visually acceptable.
Proper compression can result in a well-optimized image that retains enough quality for its intended use while ensuring the file size is not excessively large.
Tools and Platforms for Image Resizing

When we talk about resizing images to a specific dimension such as 96×96 pixels, our focus is on identifying reliable tools and platforms that make this process straightforward and efficient. We’ll explore various options that cater to different user needs, from free online tools that work directly in your browser to robust software for Mac and PC, while also considering the privacy implications of online platforms.
Free Online Tools
Free online tools are a convenient option for quickly resizing images without the need to download and install software. These tools typically offer an upload feature, where we can select our images directly from our computer or a cloud storage service. For example, a MIA can be used for simple operations like resizing. After an image is uploaded, we can often use a resizer tool to specify the desired 96×96 pixels size. Some platforms might also allow for batch processing, enabling us to resize multiple images at once. These services are usually intuitive and user-friendly, making them a great resource even for those of us who are not tech-savvy.
Software for Mac and PC
For more advanced features and greater control over the resizing process, software solutions for Mac and PC can be installed. These programs usually offer a broader range of functionalities, such as batch resizing, aspect ratio locking, and advanced scaling methods. Software might also include additional image editing features, allowing us to enhance our images alongside resizing them. Notable software options include Adobe Photoshop for intricate image manipulation or GIMP as a free alternative. These require a bit more skill to navigate, but the results can be precise and tailored to our exact needs.
Privacy Considerations in Online Platforms
When using online platform services to resize images, we should be mindful of our privacy. It is crucial to consider what happens to our images once they are uploaded to a server—especially if they contain sensitive information. Some online tools may retain copies of our images for a period or use them for other purposes. We should read the platform’s privacy policy to understand how our data will be managed. To mitigate privacy risks, we can look for services that guarantee deletion of our images after processing or opt for offline software where the resizing process is done locally on our own device.

