Originally posted on August 19, 2024 @ 6:53 am

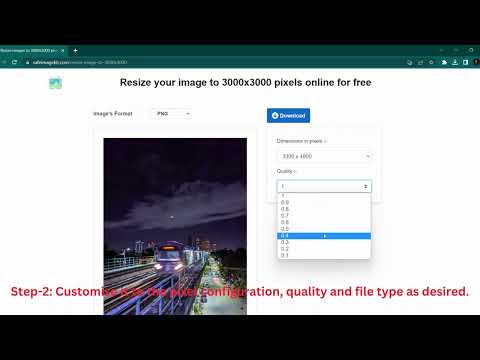
Instructions on Using the Tool

Creating an image with the dimensions of 820 x 312 pixels involves understanding several key aspects. The aspect ratio of this image is approximately 2.628:1. This ratio ensures that your image maintains a proportional width and height, essential for displays that require these specific dimensions, like social media cover photos.
An image resolution of 820 x 312 pixels provides adequate clarity for digital use, ensuring that the picture is sharp and clear without being unnecessarily large in file size. Pixel density, or DPI (dots per inch), plays a crucial role in determining the image’s quality on different screens. For most digital platforms, a standard DPI of 72 is sufficient.
To create or convert an image to 820 x 312 pixels, several online tools and software solutions can assist. Programs like Photoshop or free tools like GIMP allow precise adjustments to image dimensions and resolution, ensuring your image meets the specified requirements. It’s essential to preserve the aspect ratio during resizing to avoid distortion.
Key Takeaways
- The aspect ratio of an 820 x 312 pixel image is approximately 2.628:1.
- An 820 x 312 pixel resolution ensures clear, adequate quality for digital use.
- Various tools like Photoshop and GIMP can resize images to 820 x 312 pixels.
Understanding Image Resolution and Aspect Ratio

When dealing with an 820 x 312 pixel image, it is crucial to understand how resolution, aspect ratio, and pixel density impact the overall clarity and quality of the image. These factors heavily influence the visual output and the exact steps needed to optimize images for different platforms.
Pixel Resolution: Clarity Defined
Resolution refers to the number of pixels (tiny individual points of color) in an image, often measured in pixels per inch (PPI). An 820 x 312 pixel image means it has 820 pixels horizontally and 312 pixels vertically. Higher resolution images contain more pixels, which translates into greater clarity and detail. For instance, a higher resolution helps when displaying the image on larger screens without losing sharpness.
Aspect Ratio: The Shape of Images
Aspect ratio is the proportional relationship between the width and the height of an image. For an 820 x 312 image, the aspect ratio is 820:312. This can be simplified by dividing both numbers by their greatest common divisor, which results in an aspect ratio of approximately 41:15. It dictates how the image will fit on various screens and layouts. Using an aspect ratio calculator can help us to quickly convert dimensions and understand different image aspect ratios.
Pixel Density and Image Quality
Pixel density measures how many pixels fit in a certain physical area of an image, usually in PPI or dots per inch (DPI). An image with a high pixel density will appear sharper because it crams more visual information into the same space. For example, if our 820 x 312 image is displayed on a small screen, a higher pixel density will enhance the visual experience by showing finer details. Conversely, if stretched onto a larger screen without increasing pixel density, it could appear blurry.
Understanding these elements ensures we can create images that maintain their quality across different devices and applications. Knowledge of resolution, aspect ratio, and pixel density is essential for optimizing images, especially for projects requiring specific dimensions like 820 x 312 pixels.
The 820px x 312px Image Format
The 820px x 312px image format is often used for specific display standards. Understanding where and how to use this format can help ensure optimal image presentation across various platforms.
Common Uses and Standards
The 820 x 312 pixel image format is frequently used for social media headers, especially on platforms such as Facebook. Facebook’s cover photo slot recommends an image of these exact dimensions due to its ratio, ensuring that visuals are clear and well-framed.
For image files, popular formats like jpg, jpeg, png, and webp are common. These formats are supported on most platforms and offer a good balance between quality and compression, which helps in faster upload times without compromising visual integrity. It’s important to avoid using animated formats like gif unless static imagery suffices.
Preparing Images for Specific Platforms
When preparing an 820 x 312 pixel image for upload, start by ensuring that your photo is of the correct resolution and aspect ratio. Tools like the 820 x 312 Pixel Image Converter can simplify the resizing process.
After resizing, save the image in the suitable format:
- JPG/JPEG: Best for photographic images due to their compression ability.
- PNG: Ideal for images that require transparency or are graphic-heavy.
- WEBP: Offers superior compression capabilities without losing quality.
Before uploading, check the platform-specific guidelines. For instance, although Facebook recommends this size for cover photos, other social media sites like LinkedIn or Twitter might have different dimension requirements. Adjust image settings to meet these guidelines to avoid unwanted cropping or distortion.
Adjusting Image Sizes: Tools and Techniques

When adjusting an 820 x 312 pixel image, it is important to choose the right tools and methods for resizing. Various software solutions and online services make this task simple, while understanding manual conversion steps ensures we maintain the quality of the image.
Software Solutions for Resizing
Using specialized software can make resizing images straightforward. Programs like Adobe Photoshop, GIMP, and even Preview on macOS offer robust features for image resizing and cropping.
To resize an image in Adobe Photoshop, we can use the “Image Size” option under the “Image” menu. In Preview, open the image, go to “Tools” and select “Adjust Size.” GIMP offers similar resizing tools under the “Scale Image” option. These tools also allow us to maintain aspect ratios, ensuring our image doesn’t get distorted.
Using Online Services
Online tools are a convenient option for resizing images without the need to download additional software. Websites like ResizeImage.net, PicResize, and Online-Convert provide easy-to-use interfaces.
We simply upload our image, enter the desired dimensions (820 x 312 pixels), and follow the instructions to resize and crop the image. After the image adjustment, these services let us download the resized image instantly. These tools are typically free and accessible from any device with an internet connection.
Manual Conversion: Step by Step
Manual resizing ensures precision and is useful when using basic tools. First, we choose a tool like MS Paint for Windows or Preview for macOS.
In MS Paint, open the image, navigate to “Resize” under the “Home” tab, and enter the new dimensions. Remember to uncheck the “Maintain aspect ratio” box if necessary. In Preview, similar steps apply: open the image, select “Tools,” then “Adjust Size.”
For manual conversions, it’s crucial to maintain image quality. Ensure the resolution and pixel density match the intended use, whether it’s for web or print.
By using these methods, we ensure our 820 x 312 pixel image meets our specific needs without compromising quality. These tools and techniques make image resizing accessible and efficient, catering to both beginners and experienced users.
Navigating File Types and Quality

Choosing the right image file type and optimizing it for different uses can significantly impact the quality and performance of your visuals. We’ll discuss the strengths and limitations of various image formats and how to optimize them for both web and print.
Understanding Different Image Formats
When working with images, selecting the appropriate file type is crucial. The most common formats include JPEG (JPG), PNG, GIF, WEBP, BMP, and HEIC.
- JPEG is excellent for photographs due to its compression that maintains a good balance between file size and quality.
- PNG is ideal for images requiring transparency, such as logos, with lossless compression that preserves quality.
- GIF supports animations but is limited to 256 colors, making it best for simple graphics.
- WEBP provides superior compression for web use, supporting both lossy and lossless formats.
- BMP is an older format that provides high quality without compression but results in large file sizes.
- HEIC is used mainly in Apple devices, offering efficient compression and high-quality images.
Selecting the right file type depends on your image’s purpose and the required balance between quality and file size.
Optimizing Your Image for Web and Print
Optimizing images for different uses ensures they load quickly on the web and print clearly. For web use, consider compressing images to reduce loading times without significantly impacting quality. Tools like TinyPNG or JPEGmini can help.
- For web: Use formats like JPEG for photos and PNG for images needing transparency. WEBP is also a good choice due to its efficient compression.
- For print: High resolution is a must. Use JPEG or PNG to maintain quality, and ensure the resolution is set to at least 300 DPI (dots per inch).
When preparing images for print, it’s important to consider CMYK color profiles instead of RGB to match printing capabilities. Adjusting these settings can make a significant difference in the final output quality.
By understanding different image formats and how to optimize them for web and print, we can ensure our visuals strike the right balance between quality and performance across various mediums.

