
Instructions on Using the Tool

Diving into the world of **big, crystal-clear images** like a 6000 x 6000 pixel snapshot? You’re stepping into a zone where the nitty-gritty of image resolution, how wide versus how tall, and how packed with pixels it gets really matter. Picture this: A 6000px square image is like a perfect square cookie—each side matches making it totally even and super pleasing to the eye, thanks to its 1:1 aspect ratio. This means you’re looking at a pic where the height and the width are the same, giving you that sweet balance that just feels right. And talk about sharp details! With such a high resolution, you’re getting an image so clear and detailed, it’s perfect for everything from snapping breathtaking photos to creating designs that make people say “wow.” So, if you’re into making visuals that pop off the screen, understanding these basics will make your work stand out. Keep reading, and you’ll find out why mastering these image insights could be your secret weapon in the visual world.
The pixel density, which refers to the number of pixels per inch (PPI), plays a significant role in the perceived sharpness of an image on various displays. Converting an image to have 6000×6000 pixels may involve scaling up a smaller image or downscaling a larger one. Either process requires careful attention to maintaining the quality of the image. Sophisticated image editing software or dedicated converters can achieve this while preserving the original’s integrity. Understanding how to correctly convert to and from a 6000 x 6000 pixel dimension without sacrificing quality is a skill, ensuring that the final product is suited for both digital and print mediums.
Key Takeaways
- A 6000 x 6000 pixel image offers an aspect ratio of 1:1, lending itself to a variety of professional uses with its symmetrical balance.
- The conversion to or from 6000px x 6000px dimensions must be done meticulously to maintain image clarity and detail.
- High-resolution images at these dimensions require understanding pixel density and its impact on image quality across different mediums.
Understanding Resolution and Aspect Ratios
In our exploration of image conversion, it’s crucial to understand that an image’s aspect ratio and resolution are foundational to its clarity and suitability for different applications.
The Importance of Image Ratio
Aspect ratio refers to the relationship between the width and height of an image. It is denoted as a pair of numbers separated by a colon. Common aspect ratios include 16:9 for widescreen formats, 4:3 for standard displays, and 1:1 for square images. For instance, a 6000 x 6000 pixel image has a 1:1 aspect ratio, meaning it’s as wide as it is tall.
Image Resolution Explained
Resolution is the term we use to describe the number of pixels that compose an image. More pixels usually mean more detail. Resolution is expressed in terms of width and height, with our example image being 6000px by 6000px. Pixel density, often measured in pixels per inch (PPI), affects the sharpness of an image on various screens. A high pixel density means a crisper image, especially noticeable in print. A resolution like ours, with a high number of pixels, allows for significant detail and large-scale printing without loss of quality.
The Conversion Process
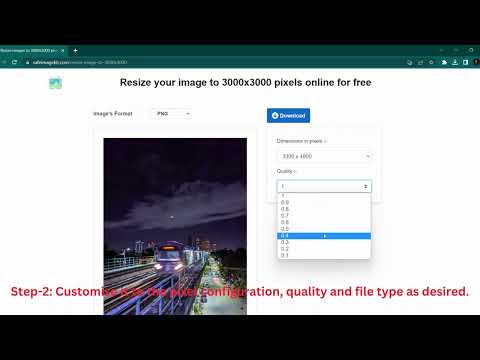
Converting an image to a 6000px x 6000px size involves selecting an efficient resizing tool and following a specific set of instructions to achieve the desired result without loss of image quality.
Choosing the Right Image Resizer Tool
When we look to convert an image, it’s crucial to choose a resizer tool that supports a variety of image formats like JPG, PNG, GIF, WebP, BMP, SVG, ICO, TIFF, and EPS. A reliable image resizer should be capable of handling high-resolution conversions without compromising the image’s integrity. Preferably, the tool should be available online and be free to use. An optimal tool allows users to upload images easily, resize them, and maintains the image quality at large pixel dimensions.
Step-by-Step Guide to Convert Your Image
- Select a resizer tool that ensures your image’s resolution and quality remain intact post-resizing.
- Upload your image to the chosen tool. It’s important that the tool doesn’t overly compress or damage the image during upload.
- Navigate to the resize settings and enter 6000px for both the width and height to maintain the 1:1 aspect ratio for a square image.
- Be sure that the tool provides real-time previews to verify that the resizing process preserves the pixel density and overall sharpness.
- Once satisfied, finalize the conversion and download the resized image. Ensure that the tool allows you to download in the original format or choose from other available formats if necessary.
Optimizing Image Quality

When dealing with a 6000px x 6000px image, it’s critical to balance file size with quality, and understand the relationship between DPI and print size to preserve the integrity of the photo.
Balancing File Size and Quality
We must consider that higher quality images typically mean larger file sizes. However, a larger file can be detrimental when sharing or uploading due to bandwidth constraints. Utilize an image file size calculator to estimate potential file sizes after adjustments. To resize a photo without losing quality, select a photo resizer tool that offers a balance between pixel dimensions and compression levels. Here’s a quick reference:
- High Quality (300 DPI Print)
- File Size: Large
- Use Case: Professional printing
- Medium Quality (150 DPI Web)
- File Size: Moderate
- Use Case: Online sharing, satisfactory print
- Low Quality (>72 DPI Thumbnail)
- File Size: Small
- Use Case: Quick preview or icon
Understanding DPI and Print Size
DPI stands for dots per inch, crucial for printing. A higher DPI suggests a higher resolution print. For example, at 300 DPI, a 6000px x 6000px image translates to a 20-inch x 20-inch high-quality print. It’s beneficial to use a pixels to print size calculator for precision. Here, DPI connects directly to print size and image quality:
- DPI: Determines how many pixels will be displayed per inch
- Print Size: Decides the physical dimensions of the image when printed
- Image Quality: High DPI equals better quality as more detail is preserved
Aligning the DPI with the intended print size while keeping the file manageable ensures that the image’s quality is optimized for its purpose. Remember, increasing an image’s DPI without altering the pixel dimensions does not improve its quality—it must be done at the photo’s original resolution.
Practical Applications and Tips
Converting and optimizing images to a 6000px x 6000px resolution can enhance visual content across various platforms. We’ll explore specific tips for using these images on social media and web pages, and how to adapt them for an array of devices.
Using Images on Social Media and Web Pages
Facebook and Instagram often have specific requirements for image resolution and size limits. For example, when we’re creating ads or posts, we need to ensure our images meet the platform standards to maintain quality without exceeding size limits.
- Facebook recommends images that are at the least 1200 x 628 pixels for ads.
- Instagram typically favors square images, making a 6000 x 6000 pixel image ideal in maintaining high quality even after Instagram compresses the photo.
To adapt a 6000px x 6000px image for these platforms, we can:
- Crop the image using templates that are pre-sized for the platform’s requirements.
- Adjust the image to fit within specific size limits to avoid automatic compression.
- Select images that are visually effective even when cropped to different aspect ratios.
This ensures that the images we use on social media or web pages remain clear and engaging to viewers.
Adapting Images for Various Devices
For smartphones and tablets, pixel density is a critical aspect because these devices often have high-resolution displays. When we convert an image to 6000 x 6000 pixels, it’s also essential to consider pixel density, which is measured in pixels per inch (PPI).
Here’s how we can adapt high-resolution images effectively across devices:
- We use high-resolution images as a base to ensure that, when scaled down, the image remains sharp on high-PPI devices.
- Creating different versions of the image, optimized for various devices, allows us to provide the highest quality experience no matter the user’s device.

