
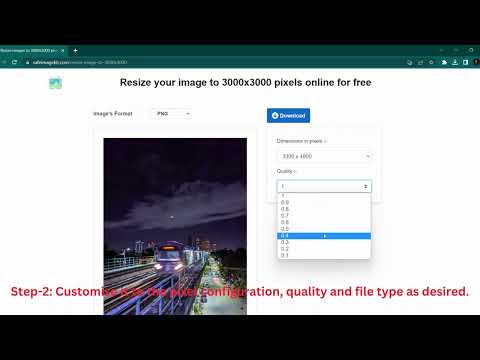
Instructions on Using the Tool

In the realm of digital photography, it’s vital to grasp the particulars of resolution, ratio, and the density of pixels. For an image measuring 588 by 331 pixels, the aspect ratio illustrates the ratio of the image’s width compared to its height, approximating a 16:9 aspect ratio, which is frequently found in high-definition video content. The resolution, denoted by the 588 by 331 pixel size, highlights the image’s total pixel count, a factor that determines the sharpness and clarity of the photograph.
Pixel density, often measured in pixels per inch (PPI), is important when considering how an image will appear on various devices. Typically, the higher the pixel density, the sharper the image appears. When you need to convert or resize a 588×331 pixel image, it’s a straightforward process with the right tool. Online image resizers are readily available, allowing you to upload and convert your image to the desired dimensions without the need for complex software.
Key Takeaways
- The ratio of a 588×331 image is roughly 16:9, which is ideal for high-definition displays.
- Pixel density affects image clarity on different screens and devices.
- Online image resizers provide a simple solution to convert and resize images to suit various needs.
Understanding Image Basics

When working with images, it’s essential to grasp the fundamentals of pixels and resolution, as well as the various image formats and file types. We’ll explore these critical components to help you understand how they affect image quality and file size.
Defining Pixels and Resolution
Pixels are the tiny dots that make up a digital image, each a single point of color. The resolution of an image is determined by its width and height in pixels, which we refer to as its dimensions. For instance, an image that is 588 pixels wide and 331 pixels high has a specific aspect ratio, or proportion, of its width to its height. Aspect ratio is a critical factor since it influences how an image will display on different devices without distortion.
The term pixel density refers to the number of pixels within a physical area, such as an inch or centimeter, often denoted as PPI (pixels per inch). Higher pixel density usually means finer details and sharper images. The resolution can also affect the image quality; a higher resolution means more detail but often results in larger file sizes. We always aim to balance resolution with acceptable file size to maintain both quality and efficiency.
Image Formats and File Types
Choosing the correct image format is crucial for preserving the quality of an image and ensuring it is suitable for its intended use. Common image formats include JPEG, BMP, PNG, GIF, WEBP, SVG, TIFF, ICO, and HEIC. Each has its unique properties:
- JPEG is widely used for photos due to its ability to compress images to a smaller file size, though it can result in a loss of quality if compressed too much.
- BMP files are uncompressed, retaining quality at the cost of large file sizes.
- PNG supports transparency and lossless compression, making it ideal for web graphics.
- GIF allows for animation and also supports transparency but is limited to a 256-color palette, which is far less than JPEG or PNG.
- WEBP is a modern format that provides excellent compression and quality, including support for animations.
- SVG files are vector-based, allowing images to scale without a loss in clarity, perfect for logos and icons.
- TIFF is often used in professional photography and desktop publishing for its non-compressed quality.
- ICO is specifically for icons on Windows platforms.
- HEIC offers high-quality image compression and is used by Apple devices.
Each format is designed with specific uses in mind, and choosing the right one can impact both the quality and usability of an image. We must consider if the image will be viewed on the web, printed, or both, to determine the best format and resolution to use.
How To Resize 588 x 331 Pixel Images

When we handle digital images, ensuring they fit specific dimensions without sacrificing quality is vital. Our focus in this section is guiding you on resizing a 588 x 331 pixel image to meet your requirements.
Using Image Resizers
Image resizers are tools we can use to adjust the dimensions of an image. For instance, if we have a JPEG, PNG, or JPG image that we need to resize, an online image resizer can be a convenient solution. We’ll want to start by uploading our image to the tool. Afterward, a straightforward interface typically allows us to enter new values for width and height, converting our image to the desired dimensions.
- Step by Step:
- Upload your image to the resizer.
- Input the new dimensions (e.g., 1024px x 768px).
- Click resize or convert.
- Download the resized image.
Understanding Aspect Ratios
To maintain the image’s original composition when resizing, we should consider the aspect ratio. The aspect ratio is the width to height ratio of the image and maintaining it prevents distortion. The original 588 x 331 image has a unique aspect ratio (about 16:9 when rounded), and we must preserve this during the resizing process. Tools with an aspect ratio calculator can help us find the new dimensions without changing the image’s proportion.
- Common Aspect Ratios:
- 16:9 for widescreen displays
- 4:3 for standard displays
- 1:1 for square images
- 16:10 as another widescreen option
Practical Tips for Maintaining Quality
Maintaining our image’s quality while resizing is crucial. To prevent pixelation and ensure image quality, we might need to compress the image file but carefully so as not to degrade its appearance.
- Quality Preservation:
- Use a high-quality original image.
- Resizing should be minimal to avoid loss of details.
- Sharpening after resizing can improve the look of the image.
- Choosing the right format (JPEG for photos, PNG for graphics) helps.
By following these steps and tips, we can resize our 588 x 331 pixel images effectively, preserving aspect ratios and maintaining quality.
Advanced Image Conversion Techniques
When we discuss advanced image conversion techniques, we focus on optimizing for web performance and ensuring the best visual quality at the smallest possible file size. Let’s explore how to attain an efficient online presence through image optimization and compression.
Optimizing Images for the Web
To enhance website performance, we optimize images to balance quality and file size. First, selecting the correct file format is crucial. JPEG is ideal for photographs, while PNG is better for images requiring transparency. For animations, GIFs are standard, but consider the newer, more efficient WEBP format for improved compression and quality. When preparing images, resizing to the required dimensions affects both the visual result and the file size. A pixel to print size calculator can help convert image dimensions for specific print sizes, ensuring clarity and sharpness.
Additionally, DPI (dots per inch) is a key factor when preparing an image for print, impacting the overall sharpness and detail. For online use, a DPI of 72 is standard as most monitors cannot display a higher density. A higher DPI, around 300, is needed for clear printed images. Use a formula to maintain the aspect ratio while scaling:
New width / Original width = Percentage scale
New height = Original height x Percentage scale
Scaling Images and Calculating Dimensions
Upscaling or downscaling images requires a resizer that maintains the integrity of the photo. When we upscale (enlarge) or downscale (reduce), keeping the original aspect ratio is essential to avoid distortion. Tools like online resizers offer a user-friendly interface to resize images with precision. To quickly identify new dimensions:
- Dimension Calculation: Enter the desired width, and the tool calculates the height automatically, or vice versa, maintaining the ratio.
- Percentage Scaling: Adjust the dimensions based on a percentage to uniformly scale the image.
Remember, excessive upscaling can lead to loss of detail and pixelation, so it’s best to start with the highest resolution possible.
File Optimization and Compression
The last pivotal step in advanced image conversion is file optimization and compression, crucial for decreasing file size without significant quality loss. We often measure compression efficiency in kilobytes saved while maintaining visual fidelity. Several online tools can compress images, often with adjustable settings to balance file size and quality.
- Optimized Compression: Strive for the highest compression level with minimal visual quality loss to improve performance and reduce page load times.
- ISP Adjustments: Some image compression tools automatically adjust based on the end user’s Internet Service Provider (ISP), ensuring optimal performance across different internet speeds.
By incorporating these advanced image conversion techniques into our workflow, we not only enhance visual appeal but also contribute to faster internet performance, creating a better user experience through well-optimized content.

