Originally posted on March 20, 2024 @ 5:36 am

Instructions on Using the Tool

Within the domain of digital photography, the dimensions and resolution of an image are crucial for both its clarity and its adaptability. We employ the 4 x 3 pixel image converter as a precise tool to modify and set images to a perfect 4 by 3 ratio. This ratio, calculated by dividing the width by the height, results in a slightly wide rectangular shape, taller than it is wide. This aspect ratio is widely favored for digital photos, offering a harmonious and traditional feeling, reminiscent of the iconic 35mm film format. Mastering the art of adjusting a picture to comply with this specific ratio is vital for numerous uses, ranging from website creation to digital picture displays.
Resolution and pixel density are key factors that contribute to the clarity and detail of an image. We often measure resolution in pixels per inch (PPI), which indicates how many pixels are found in one inch of the image display. To create a 4px x 3px photo, it is crucial to maintain the correct aspect ratio while ensuring that each pixel is mapped correctly to retain the integrity of the image’s detail and prevent distortion. By understanding these core concepts, we can optimize image quality, tailoring it to the requirements of different digital platforms and devices.
Key Takeaways
- A 4 x 3 aspect ratio provides a balanced rectangular image, reminiscent of traditional photography.
- Resolution and pixel density are integral to the image’s clarity, with 4px x 3px being a baseline for this aspect ratio.
- We use a 4 x 3 pixel image converter to accurately scale and optimize photos for diverse digital applications.
Understanding 4×3 Image Ratio
In this section, we’re focusing on the significance and application of the 4×3 image ratio, a standard aspect ratio for display.
Exploring Aspect Ratios
Aspect ratio is the width of an image in relation to its height. It is expressed as two numbers separated by a colon, indicating how many units wide an image is for every unit in height. Common aspect ratios include 16:9, 4:3, and 1:1, each providing a different visual experience. 16:9 is widely used in modern televisions and computer monitors, providing a wide, cinematic view. 1:1 is a square format, often seen in social media platforms that favor symmetry.
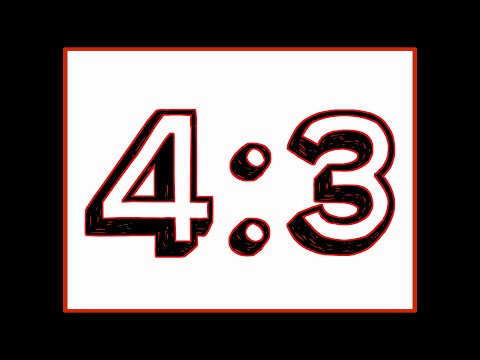
4:3 Ratio in Modern Media
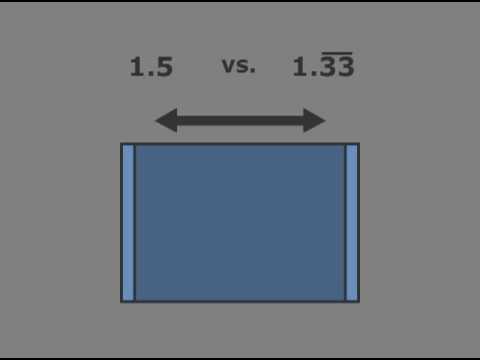
The 4:3 ratio, equivalent to a 1.33:1 ratio, was once the standard for television and computer displays before the widespread adoption of the 16:9 widescreen format. Despite being less common now, 4:3 is still prevalent in mediums such as classic films, standard-definition video, and some digital photography. This ratio offers a more concentrated view that can lend a vintage or traditionalist aesthetic to the content.
Creating a 4×3 Pixel Image
In our discussion, we focus on the technical process of creating a tiny 4×3 pixel image, which can be a nuanced task requiring attention to software choice and image formats.
Choosing the Right Software
To begin our image creation, our software selection is crucial. High-quality image editing software like Adobe Photoshop is capable of precise resize operations, but free online platforms are also there to serve us when simplicity and cost are our primary concerns. It is vital that the chosen software supports different image formats such as png, jpg, jpeg, webp, bmp, tiff, svg, and others, to ensure that our final product can be utilized across various applications and platforms.
Steps to Resize to 4px x 3px
Resizing an image to such a small size as 4px by 3px requires a series of steps:
- Open the image within the chosen editing software.
- Locate the image resize or rescale function in the software’s menu.
- Enter “4” and “3” into the respective width and height fields, ensuring that the ‘Maintain Aspect Ratio’ option is unchecked, as maintaining the original ratio will not apply to our unique use case.
- Apply the changes, and our image will be resized.
During the resize process, keep an eye on the pixel density as it could significantly affect the quality of resized images – though, at such a small size, individual pixel color will be more important than density.
Image Formats and Conversion
Once we have our image at the correct size, it’s time to save and convert it to the desired format. Here’s a quick guide:
- PNG: Ideal for images that require transparency.
- JPG/JPEG: Suitable for photographs and images with gradients but does not support transparency.
- BMP: Uncompressed raster images, which means high quality but larger file size.
- TIFF: Often used in the printing industry, supports high-quality images.
- WebP: A modern format that provides superior lossless and lossy compression for images on the web.
- SVG: A vector format that is not suitable for 4×3 pixel images as it is usually used for images that need to scale without loss of quality.
Using “Save As” or “Export” options present in most software, we can select our desired format. If needed, we can utilize free online conversion tools that allow us to convert our 4×3 pixel image into different formats, which can be especially handy when working from a mobile device.
Optimizing Image Quality and Resolution

When working with images, particularly when converting to a specific size like a 4px by 3px photo, we must prioritize clarity and detail without unnecessarily inflating the file size. Our goal is to achieve the best balance between image quality and resolution, ensuring the highest quality within the confines of pixel density and file size constraints.
Understanding Pixel Density
Pixels are the basic building blocks of digital images, with pixel density determining the level of detail in the image. A 4px by 3px image will have a relatively low pixel density and therefore might not carry much detail. However, when we scale images or utilize them in various applications, the right optimization methods can ensure that images retain the highest possible quality. It’s vital to understand that an increase in pixel density leads to higher resolution and potentially better image quality.
- Pixel Density: A measurement of the number of pixels within a given area, typically per inch (PPI).
- Resolution: The total number of pixels horizontally and vertically, which contributes to the overall detail in an image.
Balancing File Size and Quality
To maintain the highest quality of an image during conversion, we should minimize the compression artifacts while also keeping an eye on the file size. Optimizing an image often involves adjusting formats and compression levels to balance crispness with the practicalities of file size – especially for web usage where loading times are a factor.
- File Size: Larger file sizes can mean better image quality but might be impractical for web use. We aim for the smallest file size without compromising on the quality.
- Image Quality: This refers to the fidelity and clarity of an image which is affected by resolution and pixel density.
By achieving a harmony between file size and quality, images can be both efficient and visually impressive. Applying these principles when converting images to sizes as small as 4px by 3px ensures the outcome is the best it can possibly be within given limitations.
Practical Uses and Applications

Before diving into the specifics, it’s key for us to note how a 4 x 3 pixel image converter is a vital tool in crafting tailor-made visuals for web platforms and personal projects. These micro images can range from simple icons to complex graphics designed for specific needs.
Web and Social Media Graphics
For social media, optimizing images is crucial for engagement. On platforms such as Facebook and Instagram, images with a compressed size yet clear resolution can load faster and appear neater on various devices. A 4 x 3 pixel image converter aids in resizing graphics to fit the designated spots on these platforms. Grasping the correct pixel density ensures that text and shapes within social media graphics remain sharp, even after compression.
- Tools: Free image converters available on the internet
- Customization: Adjusting text and image shapes for optimal display
- Destination: Primed for social media feeds and profile pictures
Professional and Personal Projects
In professional and personal undertakings, we often encounter situations where a precise image size is required. Whether it’s for a web user interface component or a custom avatar image, a 4 x 3 pixel image can serve as a fundamental building block. These tiny images, comprised of 12 distinct pixels, can be graphic elements in larger designs, or stand alone to convey simplicity in a highly stylized manner.
- Applications: Designing interface elements, creating personalized icons
- Quality Management: Ensuring resolution and aspect ratio are suitable for the intended use
- Compression Needs: Balancing image quality with file size for efficient loading times

