
Instructions on Using the Tool

When you’re messing around with pictures, knowing the nerdy stuff can really make them pop. Imagine a magic wand that turns your images into super sharp 4000 x 4000 squares. That’s right, no lopsided pics here, just perfect balance, making everything look just right. Why 4000 x 4000, you ask? Well, that’s the sweet spot for super clear, high-def images where every little detail counts. This magic number is all about how many tiny dots fit into an inch, which is a big deal for making your pictures look sharp as a tack, especially on paper. You’ll see, fiddling with this could turn your photos from meh to wow!
Shifting such high-resolution images into different sizes or formats requires an understanding of how resolution and aspect ratio work in tandem. The ratio remains constant at 1:1 for a 4000px square image. However, altering the dimensions without the correct aspect ratio can lead to stretching or compressing of the visual content. While resizing, it is imperative to maintain the pixel density to keep the image crisp and clear. Image converters facilitate this process, supporting various formats like JPEG, PNG, and TIFF, ensuring that the quality is not compromised during the conversion.
Key Takeaways
- A 4000 x 4000 pixel image converter adjusts images to a specific resolution while maintaining quality.
- The aspect ratio of 1:1 is crucial for preserving image proportionality and preventing distortion.
- Properly converting and resizing images ensures clarity and detail are retained across different formats.
Understanding Resolution and Pixel Density

When we talk about image quality, resolution and pixel density are at the core of the discussion. Let’s dive into what these terms mean and how they relate to the quality of a photo.
Pixels and Resolution Explained
Resolution is a term often used to describe the amount of detail an image holds, and it is directly tied to the number of pixels in the image. A pixel is the smallest unit of a digital image or display that can be displayed and controlled. It’s like a tiny dot of color that, when combined with millions of others, forms a complete image.
If we consider an image with dimensions of 4000 x 4000 pixels, it means the image is composed of a grid with 4000 pixels along both its width and height, which equates to 16 megapixels overall. The aspect ratio, which is the ratio of the width to the height of an image, would be 1:1 for a 4000 x 4000 image, indicating that the image is perfectly square.
- Total pixels: 16,000,000 (16 Megapixels)
- Aspect ratio: 1:1 (square)
Calculating Pixel Density
Pixel density, commonly measured in DPI (dots per inch), refers to the number of pixels per inch on a digital display or within a digital image. We calculate this by dividing the total number of pixels on one axis by the length of that axis in inches.
To calculate the pixel density for a 4000px by 4000px photo, we first need to know the size of the display or print. For instance, if we want to print this image on a 10-inch by 10-inch paper, we would use the following calculation:
- Pixel density (DPI) = 4000 pixels / 10 inches = 400 DPI
This tells us how densely the pixels are packed together and affects how sharp the image appears. A higher DPI value typically indicates better quality and sharpness of the printed image. It’s crucial to understand these fundamentals, as they directly impact the final quality of your photos or prints.
Aspect Ratios and Image Dimensions
Before we delve into the specifics, it’s essential to grasp that aspect ratios shape the width and height relationship of images, ensuring a consistent display across different screens and formats.
Common Aspect Ratios
- 16:9: This widescreen format is prevalent in HD televisions and monitors, providing a broad view suited to video content.
- 4:3: A traditional format that was once standard for television and computer screens, still used in photography.
- 3:2: Commonly used in cameras, particularly DSLRs, offering a slightly wider field than 4:3.
- 1:1: A square format, gaining popularity on social media platforms for its neat and uniform visual presentation.
| Ratio | Dimensions | Best Use Case |
|---|---|---|
| 16:9 | 4000px x 2250px | HD Video, Wide images |
| 4:3 | 4000px x 3000px | Standard photography, Computer screens |
| 3:2 | 4000px x 2667px | DSLR Cameras, Print photos |
| 1:1 | 4000px x 4000px | Social media, Profile pictures |
Adjusting Image Dimensions While Maintaining Ratio
To change image dimensions while keeping the same aspect ratio, we need to scale both width and height by the same factor. If we’re aiming for a 1:1 ratio and want to transform a 3:2 image, we’ll reduce the longest side to match the shorter side, ensuring the image remains proportional.
When adjusting from one common aspect ratio to another, it’s essential to estimate the impact on the image. Size reduction or enlargement must respect the existing ratio to prevent the image from becoming distorted. For instance, to convert a 16:9 image to 4:3, we would adjust the dimensions to align with 4:3 while ensuring that each side is reduced or expanded proportionally.
Converting and Resizing 4000px Images
Converting and resizing images to a 4000px by 4000px resolution involves careful manipulation to maintain quality. We’ll explore how to use tools effectively and keep your images looking sharp.
Using an Image Resizer Tool
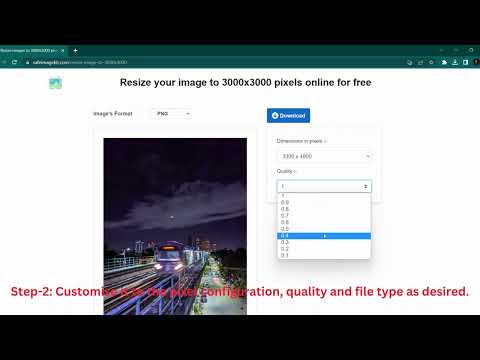
When you need to resize an image to, or from, a 4000px square dimension, an image resizer tool is a go-to solution. Many of these tools are available online and can be accessed for free. They offer a straightforward interface where you can specify the desired dimensions or use a built-in image file size calculator to adjust the print and file size.
Step-by-Step Guide to Resize Images
- Choose your resizer: Find an online image resizer that suits your needs.
- Upload your image: Use the tool’s upload feature to add your image.
- Specify dimensions: Enter ’4000’ x ’4000’ in the dimension fields.
- Adjust settings: Consider aspect ratio or apply compression settings.
- Resize: Let the tool process the image and resize it accordingly.
- Download: Save the newly resized image to your device.
Maintaining Image Quality During Conversion
To maintain image quality during conversion:
- Resolution: Keep the resolution high for a clear, crisp image.
- File size: Be aware that a larger resolution will increase the file size.
- Pixel Density: Higher pixel density means more detail in the same space.
- Compression: Use minimal compression to avoid loss of detail.
By following this guide, we can create 4000px images that are perfect for high-quality prints or digital use while keeping the details sharp and the file size manageable.
Supported Image Formats and Considerations
When converting to a 4000px x 4000px photo, understanding the different image formats and their respective implications for ratio, resolution, pixel density, and image quality is essential. We will also discuss how your choice of format affects the file size and privacy of your images.
Format Differences: JPG, PNG, WEBP, and More
Various image formats cater to different needs and use cases. JPG (or JPEG), a commonly used format for digital photography, allows for efficient compression but can result in a loss of quality, especially with repeated saving. PNG files support transparency and are ideal for web graphics, providing lossless compression but typically larger file sizes compared to JPG. WEBP, a modern format, offers superior compression methods, often delivering smaller sizes than both JPG and PNG without sacrificing quality. Formats like TIFF and BMP deliver high quality but at the cost of larger file sizes, while GIF is suited for simple graphics and animations.
SVG and ICO are vector-based formats, with SVG used for scalable web graphics, maintaining quality at any size, and ICO primarily for creating icons with transparent backgrounds. Specifications such as pixel density and ratio directly relate to these formats, with denser images usually bearing higher file sizes.
Choosing the Right Format for Your Needs
When creating a 4000px x 4000px image, consider the end-use. For web purposes, where loading speed and bandwidth are factors, WebP might be the optimal choice. For print, where the highest quality is paramount, TIFF may be preferable. If maintaining image quality through multiple edits is a concern, PNG is a good option, as it does not lose quality with file manipulation. In contrast, for general photography where size is a more significant concern than minute quality differences, JPG could be sufficient.
Impact of Format on Image Quality and File Size
The format directly affects image quality and file size. Choosing a lossless format like PNG or TIFF will result in higher quality images but with increased file sizes. On the other hand, lossy formats like JPG reduce file size by compressing the image, at the risk of quality degradation. This trade-off needs careful consideration, especially for high-resolution images like a 4000px x 4000px photo. Privacy can also be a concern, as some formats can include metadata that reveals information about the image or its creator.

