Originally posted on March 23, 2024 @ 3:21 am

Instructions on Using the Tool

In the world of digital images, understanding the specifics of resolution, aspect ratio, pixel density, and conversion processes is essential to creating visuals that both serve their intended purpose and maintain high quality. A 200 x 200 pixel image converter aids in this process by transforming images into a specified dimension of 200 pixels by 200 pixels, which is often required for profile pictures on various platforms.
When considering image conversion, it’s important to comprehend that the aspect ratio of an image refers to the proportional relationship between its width and height. For a 200px by 200px photo, this ratio is 1:1, meaning the image is perfectly square. The resolution, in this case, would be described as 200 pixels per edge, resulting in a total of 40,000 pixels. Pixel density, which is the number of pixels per inch (PPI) displayed on screen, directly affects image quality and clarity. A higher PPI typically translates to a finer, sharper image appearance. To ensure the best user experience, image converters must carefully manage these criteria while maintaining the integrity of the image during the conversion process.
Key Takeaways
- Image converters allow for precise adjustments to an image’s dimensions and serve specific online requirements.
- The aspect ratio, resolution, and pixel density are critical factors in maintaining image clarity upon conversion.
- Effective conversion demands careful consideration to preserve image quality while optimizing for user experience.
Understanding Image Basics

Before diving into specifics, it’s crucial for us to comprehend that image resolution and aspect ratio greatly influence the visual quality and adaptability of any digital image.
Image Resolution and Quality
Resolution refers to the amount of detail an image holds, commonly measured in pixels per inch (PPI) or dots per inch (DPI). A 200×200 pixel image has a fixed count of 40,000 pixels in total. High-resolution images have more pixels, which translate to finer detail and a higher quality appearance when viewed at an appropriate size or from an appropriate distance.
Quality, on the other hand, is subjective and depends on resolution but also on factors like compression and the original source of the image. Pixel information is paramount; more pixels typically mean a clearer, sharper image, but if those pixels are compressed too much, the image quality can degrade.
Aspect Ratio and Dimension Explained
Aspect ratio is the proportional relationship between an image’s width and height. For a 200×200 pixel image, the aspect ratio is 1:1, meaning it’s perfectly square.
- Width: 200 pixels
- Height: 200 pixels
Every image has dimensions measured in pixels, which define the total image size. Modifying the dimensions without altering the aspect ratio preserves the image proportions.
| Aspect Ratio | Dimensions | Example Usage |
|---|---|---|
| 1:1 | 200px x 200px | Profile pictures |
| 4:3 | 800px x 600px | Standard photography |
| 16:9 | 1920px x 1080px | High-definition video |
Understanding the aspect ratio is essential when resizing images to prevent distortion. When we change the dimensions of an image to fit a certain space, ensuring the aspect ratio stays consistent means our image won’t look stretched or squashed.
Converting Images to 200px x 200px
When we need to resize images to a specific dimension, such as 200px by 200px, we focus not only on achieving the exact size but also on maintaining the image quality. Whether it’s for profile pictures, product thumbnails, or application requirements, getting the perfect 200×200 pixel image often requires the use of online tools or image editing software.
Using Online Image Resizer Platforms
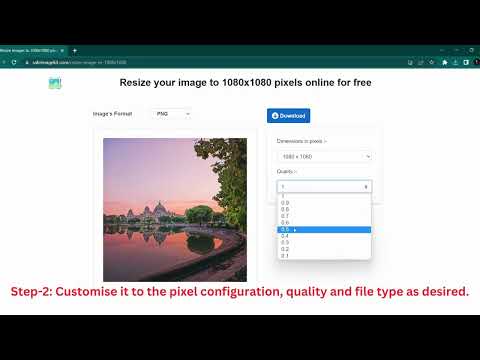
Various online platforms offer free services to resize images. These web-based tools allow us to conveniently convert our images without the need to download or install dedicated software. We simply upload our photo to the website, select the desired output resolution of 200×200 pixels, and use the image resizer to adjust the dimensions. Some platforms also provide a preview feature, enabling us to see how our photo will look after resizing.
Step-by-Step Guide to Resizing Images
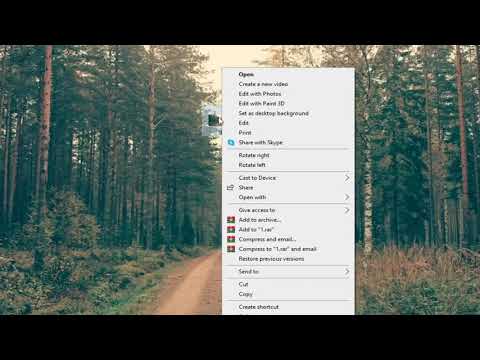
- Choose a reliable online image resizer platform or image editing software.
- Upload the image you want to convert from your device.
- Select the crop tool if necessary to modify the aspect ratio before resizing.
- Enter the desired dimensions (200px x 200px) into the resize settings.
- Apply the changes and use resampling if offered, to enhance quality.
- Save the resampled image, making sure to keep an eye on the file size if that is a constraint.
Tips for Maintaining Image Quality
- Always start with the highest quality image you have to prevent degradation.
- If cropping is required, ensure that it focuses on the most important part of the image.
- Look for an image resizer that offers resampling, which adjusts the image’s pixel count in a way that retains image quality.
- After you resize images, check the result at 100% zoom to ensure no visible loss of quality.
Technical Considerations for Image Conversion

In converting images to a 200 x 200 pixel size, we must prioritize maintaining the quality and ensuring compatibility across different platforms. Selecting the proper file format and understanding pixel density are crucial steps in this process.
Choosing the Right Image File Format
When downsizing or resizing an image to 200px by 200px, the choice of image file format significantly affects the output quality. Here are the most common formats and their typical uses:
- PNG: Offers lossless compression, suitable for images with text or transparent backgrounds.
- JPEG: Best for photographs due to its efficient compression, balancing quality and file size.
- GIF: Ideal for simple animations but limited to 256 colors, making it less suitable for high-quality images.
- TIFF: Preserves high quality with lossless compression; commonly used in the printing industry.
- BMP: Bitmap images that are uncompressed and therefore large in file size; not recommended for web use.
- WebP: A modern format that provides excellent quality with smaller file sizes; well-supported in web browsers.
- SVG: Vector format that’s best for logos and illustrations; scalable without any loss in quality.
Here’s a breakdown:
| File Format | Best Use Case | Pros | Cons |
|---|---|---|---|
| PNG | Web images with transparency | Lossless, supports transparency | Larger file size than JPEG |
| JPEG | Digital photography | Good quality with smaller file sizes | Lossy, doesn’t support transparency |
| GIF | Simple web animations | Supports animation | Limited color palette |
| TIFF | Printing and archiving images | Lossless, high quality | Large file size, less web-friendly |
| BMP | No specific web use | Lossless, no compression | Very large file size |
| WebP | Efficient web images | Good quality, small file size | Not supported by all browsers |
| SVG | Logos and illustrations on web | Scalable, lossless | Not suitable for complex images |
Understanding Pixel Density and Size
Pixel density refers to the number of pixels in a given area, often measured in pixels per inch (PPI). It is crucial when considering how an image will appear on various devices. For a 200 x 200 pixel image, the pixel density determines its physical size when displayed on screens.
- High pixel density (300 PPI or above): The image appears sharper, especially important for high-resolution displays.
- Low pixel density (72 PPI): Suitable for web use where file size and load speed are prioritized over fine detail.
When converting an image to 200 x 200 pixels, we ensure the end result has an aspect ratio of 1:1, meaning the height and width are equal. This is crucial for maintaining the original image’s proportionality and avoiding distortion.
| Aspect Ratio | Pixel Size | Ideal Usage |
|---|---|---|
| 1:1 | 200 x 200 | Profile pictures, icons |
By carefully considering these technical details, we safeguard the integrity of the image during the conversion process.
Online Safety and User Considerations
When using a 200 x 200 pixel image converter, it is crucial that we address privacy and security while enhancing the tool’s accessibility and usability. We are committed to ensuring that the user experience is protected and straightforward.
Ensuring Data Privacy and Security
Privacy: When you upload an image to our converter, your privacy is guaranteed. We ensure that all data privacy protocols are adhered to decisively.
- Security Measures: Every image uploaded is protected with advanced encryption techniques to prevent unauthorized access.
- Automatic Deletion: We guarantee that your images are deleted automatically following the conversion, leaving no traces behind.
Login Credentials: If the service requires a log in, we apply stringent security practices to protect your account.
Improving Accessibility and Ease of Use
We focus on making the converter easy to use regardless of your proficiency with technology or the devices you use.
- Compatibility: Our service works equally well across various browsers and is tailored for both Android and iOS platforms.
- Simple Interface: To select an image, it’s as simple as a few clicks directly from your device or via Facebook or Instagram.
- Guidance: We maintain a section for frequently asked questions to assist you in using our tool without confusion.
Accessibility isn’t just about ease, it’s about making sure the internet is a safer, more welcoming space for everyone.

