
Instructions on Using the Tool

When discussing a 1 x 2 pixel image converter, we are dealing with the most basic unit of a digital image: the pixel. A 1px x 2px photo consists of only two pixels, offering the smallest visible indication of color and placement in an image. The ratio in this context is 1:2, which means the height is half the width, or conversely, the width is double the height. The resolution of such an image is minimal, but it’s the microscopic precision of pixel manipulation that interests graphics programmers and algorithm developers.
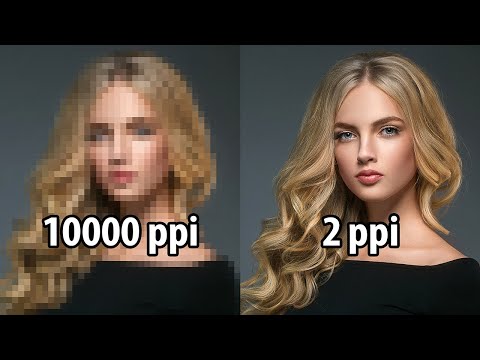
Pixel density refers to the number of pixels within a given area and is particularly relevant when scaling images up without losing quality. In the context of a 1 x 2 pixel image, pixel density would be hypothetically measured in a tight space, but practically, such metrics are more applicable to broader images where clarity and detail retention are paramount. Our interest in tiny images like a 1px x 2px picture is not for its detail or visual appeal but for the technical understanding of image processing and the foundation it provides for larger, more complex operations.
Key Takeaways
- We address the basic digital imaging unit—the pixel—through a 1 x 2 pixel image converter.
- The tiny, two-pixel image serves as a tool for understanding fundamental image processing techniques.
- Although minuscule in size, a 1px x 2px photo aids in exploring the principles of scaling, quality, and digital image creation.
Understanding 1px x 2px Image Fundamentals

To effectively use a 1px x 2px image, it is crucial to understand its resolution, pixel density, and how it’s affected by aspect ratio. This understanding ensures we can create and utilize such images for specific applications.
Image Resolution and Pixel Density
Resolution is a term that describes the number of pixels in an image, typically represented as width x height. In the case of a 1px x 2px image, we’re looking at a width of 1 pixel and a height of 2 pixels. Consequently, the image has a total of 2 pixels. Pixel density, on the other hand, refers to the number of pixels in a given area, often measured in pixels per inch (PPI). For a minuscule image like 1px x 2px, pixel density becomes a less relevant measure because the image is too small to yield meaningful measurements in standard PPI values.
Aspect Ratios and Their Importance
The aspect ratio is the proportional relationship between an image’s width and height. For a 1px x 2px image, the aspect ratio is 1:2, which means the width is half the height. Common aspect ratios, like 4:3, 16:9, 1:1 (square), and 3:2, are not applicable to a 1px x 2px image due to its unique dimensions. Understanding aspect ratio is critical as it affects how the image will display on different devices and screens without distortion or unexpected cropping. A 1px x 2px image, given its non-standard aspect ratio, would need specific use cases or design considerations.
Creating and Converting Tiny Images

When working with images, especially tiny ones like a 1px x 2px image, understanding the technical aspects of resizing, converting, and choosing the right formats is key to maintaining quality and achieving the desired outcome.
Methods to Resize and Convert Images
Resizing Images:
To resize an image, particularly to convert it to a minuscule dimension such as 1px x 2px, one must use a reliable image resizer. We recommend using online tools that offer free services for quick tasks:
- Online Image Resizer: Simply upload your photo, enter the desired pixel dimensions, and scale it down.
- Image Converter Plus: Offers options to convert images into multiple formats while resizing.
Pixel Density and Aspect Ratio:
In a 1px x 2px image, the pixel density pertains to the number of pixels within a given area, while the aspect ratio is 1:2. We cannot display much detail, but it’s crucial for icons or design elements within web design.
Conversion Process:
Use a converter that can handle the small size without quality loss. Here are some steps we follow:
- Choose your image and upload it to the converter.
- Specify the “1×2” resolution.
- Convert the image to the desired format (e.g., PNG, JPG, GIF).
Remember: When reducing to such a small size, the original image’s details will not be preserved.
Choosing the Right Image Formats
Selecting the appropriate image formats is essential for compatibility and quality. For tiny images, the best formats typically are:
- PNG: Preserves transparency and detail.
- GIF: Suitable for small, simple graphics.
- ICO: Ideal for favicons.
- SVG: Vector format that remains sharp at any size.
Raster vs Vector: Small raster images like BMP or TIFF can lose detail when resized. In contrast, vectors like SVG are resolution-independent and scale without quality loss.
Quick Reference Table:
| Format | Best Use | Transparency | Lossy/Non-Lossy |
|---|---|---|---|
| PNG | Small images with transparency | Yes | Non-Lossy |
| GIF | Simple graphics and animations | Yes | Non-Lossy |
| ICO | Favicons for websites | Yes | Non-Lossy |
| SVG | Icons and illustrations that can scale | Yes | Non-Lossy |
| JPG | Not ideal for tiny images | No | Lossy |
| TIFF | Not recommended for web use | No | Non-Lossy |
| BMP | Rarely used for web | No | Non-Lossy |
| WebP | Modern, good for web efficiency | Yes | Lossy or Non-Lossy |
| EPS | For print graphics | Yes | Non-Lossy |
By carefully considering the resize methods and image formats, we ensure that our tiny images maintain their purpose and clarity across various applications.
Ensuring Image Quality

When considering the creation of a 1px x 2px image, we understand how critical maintaining image quality is, regardless of size. With the right techniques, we can adjust quality and file size without compromising clarity, ensuring that even at such a tiny resolution, the integrity of the image is preserved.
Adjusting Image Quality and File Size
Quality: In a 1px x 2px image, each pixel is crucial. We must ensure the highest quality by selecting the appropriate file format that offers the best compression ratio, which in turn affects file size. PNG is often recommended for its lossless compression.
- JPEG: Good for photos, offers adjustable compression levels.
- GIF: Limited to 256 colors, suitable for simple graphics.
- PNG: Supports transparency, best for high-quality, lossless images.
Remember, a smaller file size might speed up web loading times, but it shouldn’t come at the cost of image quality. We’ll consider the balance between file size and image fidelity to make informed decisions.
Utilizing Image Filters and Enhancements
Filters play an essential role in achieving the desired quality. A sharpen filter can enhance details, but for a 1px x 2px image, subtlety is key; overuse can lead to unwanted noise. Brightness and contrast adjustments can be used to ensure that the tiny image maintains its visibility under different viewing conditions.
- Sharpen: Use minimally to clarify without adding noise.
- Brightness/Contrast: Tweak to ensure the image is visible and clear on all screens.
Filters should be used judiciously, as over-filtering can detract from the highest quality we aim to maintain. Our approach is to enhance only what’s necessary to convey the image’s intended message.
Practical Applications and Optimization
When dealing with 1px x 2px images, we need to understand that optimization revolves around their specific use cases, chiefly in web and mobile environments, where performance, speed, and visual integrity are paramount.
Optimizing Images for Web and Social Media
For web and social media, image optimization is critical to enhance load times and maintain visual quality. A well-optimized image should have the lowest file size possible without compromising clarity. Formats like WebP provide excellent compression rates and quality, making them ideal for use on the internet. For social media platforms like Facebook and Instagram, ensuring images maintain the correct aspect ratio (vertical for Instagram Stories, square for profile pictures, widescreen for landscape posts) is essential for seamless integration into users’ feeds.
- Aspect Ratios for Social Media:
- Square: 1:1
- Vertical: 4:5 (Instagram), 2:3 (Pinterest)
- Widescreen: 16:9 (Facebook and Twitter cover photos)
Using online tools for image conversion and optimization, we can easily create images that are both high in quality and tailored for web and social media requirements, including adjusting resolutions and pixel densities.
Image Use On the Go and Accessibility
Optimization also extends to mobile usage or “on the go,” where bandwidth and screen sizes are a constant concern. For users requiring quick access to information, optimized images need to load swiftly and be accessible across various devices and network conditions. Accessibility is also a key aspect; we ensure that our images can be accessed by individuals with disabilities, keeping in mind the online dynamics.
Using responsive design principles, we make our images automatically adjust to fit various screen sizes:
- Example Responsive Design Code:
img {
  max-width: 100%;
  height: auto;
}
This way, images are not only easy to use but also inclusive, providing everyone with an optimal viewing experience regardless of the device used, making the internet a more accessible place for all.
By adopting these practices, we are able to deliver high-quality images that are fine-tuned for performance and accessibility, ensuring a positive user experience across the digital landscape.

