
Instructions on Using the Tool

When discussing image resolution and conversion, the specific dimensions of 1584 x 396 pixels serve as an example of how digital images can vary in size and aspect ratio. Understanding the ratio, resolution, pixel density, and conversion of such an image is crucial, especially given how it might be used across different platforms, like on social media where banner images are often required to meet exact specifications. Knowledge of these concepts ensures that your images retain their quality and are properly optimized for your intended purpose.
The image with dimensions of 1584 pixels in width by 396 pixels in height has a unique aspect ratio that is important when considering design and layout on digital platforms. The aspect ratio, which in this case is exactly 4:1, can affect how the content within the image is displayed, making it essential for banner-like images used on various websites and applications. Knowing how to adjust and maintain the right pixel density and resolution during image conversion is equally important to ensure that the image does not lose sharpness on screens with different resolutions.
Key Takeaways
- Understanding pixel dimensions is essential for maintaining image quality.
- Knowledge of aspect ratios like 4:1 is important for designing web and social media content.
- Proper image conversion practices ensure optimal display across various devices.
Understanding 1584 x 396 Pixels
We will explore the specific characteristics of an image with dimensions of 1584 by 396 pixels, which includes its aspect ratio and resolution, as well as details on pixel density.
Aspect Ratio and Resolution
An image with dimensions of 1584 x 396 pixels has an aspect ratio, which is the ratio of its width to its height. To calculate this, we simply divide the width by the height. For our specific dimension:
- Width: 1584 pixels
- Height: 396 pixels
- Aspect Ratio: 1584 / 396 = 4:1
This aspect ratio means that for every 4 units of width, there is 1 unit of height. It’s a relatively wide format that is not standard among popular media sizes.
Resolution generally refers to the total number of pixels, which in this case is the product of the width and the height:
- Resolution: 1584 pixels * 396 pixels = 627,264 pixels
The resolution tells us how much detail the image holds. The term “quality” is often used to describe the clarity and detail of an image, which can be influenced by the resolution.
Pixel Density
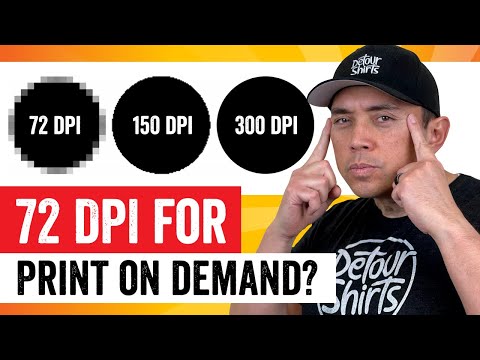
The pixel density, often measured in dots per inch (DPI), is crucial for determining the quality of the image when printed or displayed on various devices. To determine the pixel density, we need to know how large the image will be when printed or displayed. Without specific physical dimensions, we can’t calculate an exact DPI.
For digital screens, pixel density is predetermined by the device’s specifications and is typically referred to as PPI (pixels per inch). Higher DPI or PPI values indicate more pixels in a given area, resulting in a sharper image. An aspect ratio calculator can be used to resize images while maintaining the same aspect ratio, preventing distortion. For an image with the dimensions of 1584 x 396 pixels, maintaining the correct aspect ratio is essential when adjusting the image size to ensure clarity and avoid image stretching.
Image Conversion Basics

In this section, we’ll guide you through the crucial aspects of converting to a 1584×396 pixel image, including understanding file formats and how quality and file size affect the final output.
Image File Formats
When we convert images, choosing the right file format is crucial because each has its own benefits and uses. PNG (Portable Network Graphics) is favored for its lossless compression, making it ideal for detailed graphics with transparent backgrounds. GIF (Graphics Interchange Format) is best for simple animations. JPG or JPEG (Joint Photographic Experts Group) are widely used for photographs due to their balance of quality and file size, allowing for lossy compression. Formats like WebP, BMP (Bitmap Image File), TIFF (Tagged Image File Format), EPS (Encapsulated PostScript), SVG (Scalable Vector Graphics), ICO (Icon File Format), TGA (Targa Image File), and EXR (OpenEXR) cater to more specific needs, such as web compatibility, high-quality printing, icons, vector representations, and high dynamic range imaging, respectively.
Quality and File Size Considerations
The quality of an image and its file size are in a constant tug of war. Higher quality images are often larger in size, which can be a concern for website loading times or sharing via the internet. Conversely, reducing file sizes for convenience can lead to loss of image detail and clarity. Understanding the resolution, which is the amount of detail an image holds, and pixel density, which is the number of pixels within a given area, helps us make informed decisions when converting images. It’s about finding the right balance for your specific needs, be it for a crisp web graphic or a detailed print photo.
How to Resize and Convert Images
Resizing and converting images to a specific resolution such as 1584 x 396 pixels is essential for consistency across various platforms. We ensure images meet exact dimensions without distortion for optimal display.
Online Tools and Software
When we need to resize or convert images, there are numerous online tools and user-friendly software options at our disposal. For quick tasks, online image resizers are convenient; we simply upload our image, enter the desired dimensions—1584px by 396px in this case—and let the tool do the rest. It’s ideal for downsizing images for web use where high resolution is not critical. These tools are compatible with various operating systems including iOS, Windows, Linux, and Android and work across all major browsers. We often recommend using cloud storage services like Google Drive or Dropbox for an easy upload and download process, as most online tools integrate easily with these cloud storage services.
-
Pros:
- Accessible through the internet, no software installation needed
- Often free to use for basic conversions
- Supports multiple images for batch resizing
-
Cons:
- Limited more advanced editing features
- Reliant on internet speed and connection
Step-by-Step Conversion Guide
- Choose your tool or software: We select from reliable online resizers or downloadable software that suits our needs.
- Upload your image: We use the upload option, often through drag and drop or by browsing files from our mobile devices or cloud storage.
- Enter dimensions: We specify ‘1584’ and ‘396’ in the width and height fields to maintain the ratio.
- Select any additional options: We choose to maintain the aspect ratio to avoid distortion or select any other options that match our requirements.
- Convert: We hit the convert button, allowing the tool to adjust the image accordingly.
- Download and save: We save the converted file back to our device or directly to our cloud storage.
- Note: For software options especially like Photoshop (PS), we might navigate through more complex menus but have more control over the end result.
By following these steps, we effectively resize and convert images ensuring they are perfect for whatever the task at hand is, be it for a professional presentation or a personal project.
Optimizing Images for Social Media
When we’re optimizing images for social media, understanding the desired dimensions is crucial. A 1584 x 396 pixels image offers a wide, panoramic aspect ratio, often used for banners such as LinkedIn cover photos. Most platforms, however, utilize different requirements.
Facebook: As one of the most popular social networks, adhering to Facebook’s image dimensions ensures our content looks its best. They recommend 16:9 for link previews, while profile pictures maintain a 1:1 ratio.
Instagram: Known for its visual content, Instagram favors the 4:3 aspect ratio for normal posts, but also supports 1:1. For stories, a 9:16 ratio is preferred, corresponding to most smartphone screens.
Aspect Ratios:
- 1:1 ratio: Perfect square, commonly used for profile pictures across various platforms.
- 4:3 ratio: Slightly wider than it is tall, ideal for Instagram posts.
- 16:9 ratio: A widescreen format suitable for Facebook cover photos or video content.
Pixel Density: A higher pixel density can mean a sharper image but requires more storage space. Each social media platform has its guidelines, but in general, a resolution of 72 PPI (pixels per inch) suffices for most digital uses.
| Platform | Aspect Ratio | Resolution Tip |
|---|---|---|
| 16:9 | 72 PPI for images, especially links and covers | |
| 1:1, 4:3 | Maintain resolution but mind the cropping on posts |
Color and Privacy: We should consider color schemes that blend well with each platform’s interface. For privacy, never compromise personal information through uploaded images.
Creating a 1584px x 396px Photo: Use an image converter or editing software, select the desired resolution, and crop or adjust to the needed size. Ensure that the final product aligns with the requirements of the chosen social media platform.

