
Instructions on Using the Tool

If you’ve ever come across the dimensions “1280 x 720 pixels” and wondered about the specifics, you’re not alone. Often referred to as HD or 720p, this format has a 16:9 aspect ratio, which is widely used for video formats because it matches most modern screens and TVs, ensuring the content fills the screen without unsightly letterboxing. The pixel density, however, depends on the size of the screen on which the image is displayed; the same number of pixels spread over a larger area results in a lower pixel density and potentially less sharp images.
Working with images of this size might involve converting or resizing photographs to fit specific criteria, which is a common task for both professional and amateur work in graphic design, digital marketing, or social media content creation. High resolution is often sought after for the clarity it provides, but it’s balanced against file size, which can affect loading times on web pages and bandwidth usage. Fortunately, there are numerous online tools and software solutions that can assist in efficiently converting and resizing images to 1280 x 720 pixels without a noticeable loss in quality.
Key Takeaways
- A 1280 x 720 pixel image has a 16:9 aspect ratio, making it suitable for modern displays.
- The pixel density of such an image depends on the screen size, affecting image clarity.
- Many tools exist to convert and resize images to 720p while maintaining quality and managing file size.
Understanding Resolution and Aspect Ratio
In understanding the quality and specifications of an image, we must consider both its resolution and aspect ratio, as these attributes are fundamental to image clarity and format.
Pixel Dimensions and Image Quality
The term resolution refers specifically to the width and height of an image measured in pixels. For instance, an image with a resolution of 1280px x 720px is often referred to as 720p and is characteristic of the high-definition (HD) standard. It contains exactly 921,600 pixels (1280 multiplied by 720).
The pixel density, measured in pixels per inch (PPI), affects the image quality – the higher the PPI, the finer and crisper the image appears. When a photo has more pixels packed into the same physical space, we perceive it as higher quality because of the additional detail that can be represented.
Common Aspect Ratios for Images
Aspect ratio describes the proportional relationship between the width and height of an image. It is expressed as two numbers separated by a colon, like 16:9 or 4:3. Our 1280px by 720px example has an aspect ratio of 16:9, which is standard for most HD screens and is known for its cinematic look.
Other common aspect ratios include:
- 4:3 – Often seen in standard-definition television and early computer monitors.
- 1:1 – A square format commonly used on social media platforms.
- 3:2 – Usually found in digital cameras and corresponds closely to a 35mm film frame.
Choosing the correct image aspect ratio ensures that the image fits well with various display devices, without unnecessary cropping or stretching that might degrade the image quality. We always aim to match the height and width of our images to the display needs, considering both viewing experience and the preservation of original image content.
How to Resize and Convert Images
When we want to adjust our images to a specific resolution, such as 1280×720 pixels, or convert them to different formats for various uses, it is essential to understand the steps and tools available for resizing and conversion. Doing this correctly will ensure that our images maintain the highest quality for their intended purpose.
Resizing Images to 1280×720
To resize an image to 1280×720, which is an aspect ratio of 16:9, we need to ensure that the dimensions of the current image can scale down to this size without distortion. It may involve cropping the original image before resizing to maintain the aspect ratio. Here’s a brief how-to:
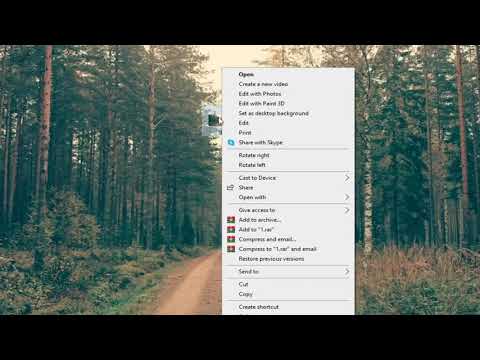
- Open the image in a photo editing software.
- If the aspect ratio needs changing, crop the image to the correct proportions first.
- Look for the “Resize” or “Image Size” option.
- Enter 1280 for the width and 720 for the height, ensuring that the option to maintain the aspect ratio is checked.
- Apply the changes and save the new resized image.
Choosing the Right Image Format
After resizing, we must choose the appropriate image file format. Common formats include JPG for photos, PNG for images with transparent backgrounds, and WEBP for a balance of quality and file size. More specialized formats like BMP, TIFF, EPS, and GIF are used for specific requirements and compatibility with different software and platforms.
- JPEG is ideal for photographs.
- PNG preserves transparency.
- WEBP offers good quality with smaller file sizes.
- GIF is best for simple animations.
Image Conversion Tools and Techniques
Once we have the image at the desired resolution, converting it to a different format is often the next step. We can use a variety of image conversion tools—both online and offline—to do this:
- Online converters offer quick and easy conversion without the need to download software.
- Dedicated image editing programs provide more control over the conversion process including quality settings and batch processing.
Here are the general steps:
- Upload or open the resized image in the converter tool or software.
- Select the target format (e.g., JPG, PNG, WEBP, etc.).
- Adjust settings like quality and color if the tool allows.
- Convert the image and download or save the new file.
Using the right tools and techniques, we can resize and convert our images to meet our requirements, ensuring they retain quality and functionality across various platforms and devices.
Optimizing Image File Size and Quality

When working with images, especially at a resolution of 1280 x 720 pixels, we aim to maintain the highest quality while keeping the file size manageable, ensuring that our images remain sharp and detailed without consuming excessive storage space or bandwidth.
Balancing Quality with File Size
To maintain image quality while optimizing file size, we focus on a few key strategies. Firstly, it is essential to choose the correct format for our needs. JPEG is often preferred for photographs due to its effective compression, while PNG is beneficial for images requiring transparency. We carefully select the compression level; higher compression leads to smaller file sizes but may reduce quality. During downsizing, we ensure that the resulting image maintains its sharpness and detail by using proper resampling methods.
Image Compression Options
Several tools and methods are at our disposal for compressing images:
- Lossy compression: Reduces file size by permanently eliminating certain information, especially in JPEG format. This method can significantly decrease file size, but we must be cautious to not overly degrade the image quality.
- Lossless compression: PNG and GIF formats use this technique to decrease file size without sacrificing any image data, preserving the original quality.
- Selective compression: Some software allows us to apply different compression settings to various areas within an image, helping us reduce file size while keeping crucial areas of the image at the highest quality.
By employing these methods thoughtfully, we ensure that our 1280px by 720px images are optimized for both web and print use, reflecting a balance between file size and image fidelity.
Using Online Tools and Platforms

When converting images to specific resolutions like 1280 x 720 pixels, we often turn to online tools and platforms for a quick and easy solution.
Finding Free Image Conversion Services
We can find a range of free image conversion services on the internet that allow us to change the dimensions and file formats of our photos without the need for complex software. Here are some key features to look for in these online tools:
- No Registration Required: Look for platforms where we can convert our images without the need to create an account.
- User Experience: The platform should have an intuitive interface, guiding us through the upload and conversion process seamlessly.
To use these tools, we typically follow these steps:
- Visit the online tool’s website.
- Click on an “Upload” button to select our image.
- Input or select the desired output resolution (1280 x 720 pixels).
- Hit “Convert” and download the new image once the conversion is complete.
Ensuring Privacy and Security When Uploading
Privacy and security are paramount when we upload personal or sensitive images to an online platform. Here’s how we can help ensure our data remains secure:
- Encrypted Connection: Only use services that offer an encrypted link (HTTPS) to protect our data during transfer.
- Privacy Policy: Check the platform’s privacy policy to understand how our images and information will be handled.
- Temporary Storage: Confirm that the platform stores our images only temporarily and deletes them after the conversion process.
By being mindful of these aspects, we ensure that our images and privacy are safeguarded.

