
Instructions on Using the Tool

When working with digital images, understanding the technical aspects is crucial for achieving the desired outcome. A 120 x 120 pixel image is often used for avatars, thumbnails, and various web graphics, where a small, square format is standard. The term “pixel” refers to the smallest unit of a digital image, with “120 x 120 pixels” denoting the dimensions of the height and width, respectively. This gives the image a 1:1 aspect ratio, which means the width and height are equal, resulting in a perfect square. The resolution of an image this size is limited, as it contains exactly 14,400 pixels in total (120 multiplied by 120). Pixel density, which is often measured in pixels per inch (PPI), is not a fixed value for a given image size as it depends on the display or the output device’s capacity to render the image.
When creating or converting an image to the dimension of 120px by 120px, it is vital to maintain the integrity of the original image, ensuring that there is no loss of quality. To achieve this, specific tools and methods are used to resize images, and these tools also allow adjustments in terms of aspect ratio and resolution. Once an image is scaled down to these dimensions, its detail and clarity can be affected, which is why the original image should have a high resolution to begin with. Balancing these elements is a delicate process, wherein the right software and knowledge of image editing play a key role.
Key Takeaways
- Square images with a size of 120px by 120px are essential for specific digital media applications.
- Proper tools and techniques must be used to resize images to maintain their quality at this dimension.
- A high-resolution original image helps ensure better results when scaling down to a 120 x 120 pixel size.
Understanding Image Basics
When we discuss image basics, we’re focusing on critical concepts like pixels, aspect ratios, and resolution, all of which directly affect the image quality. We’ll also touch on the various image formats, from traditional bitmap files to scalable vector graphics.
Pixels and Resolution
Pixels are the tiny dots that make up a digital image. Resolution refers to the number of pixels contained within an image, usually expressed in terms of width and height. For a 120 x 120 pixel image, there are exactly 14,400 pixels (120 pixels wide by 120 pixels high). The more pixels an image contains, the higher its resolution, which typically leads to a crisper and more detailed appearance.
- Example of resolution:
- Low Resolution: 120 x 120 pixels
- High Resolution: 1080 x 1080 pixels
Aspect Ratio and Dimension
Aspect ratio is the proportional relationship between an image’s width and height. A 120 x 120 pixel image has an aspect ratio of 1:1, indicating that the width and height are identical, creating a perfect square.
- Common aspect ratios:
- Square Image: 1:1
- Widescreen: 16:9
Proper understanding of aspect ratio is essential to ensure that images display correctly across different devices without stretching or squishing.
Image Quality and File Formats
The quality of an image can be influenced by the file format used to save it. Common raster image formats include JPG, PNG, GIF, TIFF, BMP, and WEBP. Each has unique characteristics, such as file size, color depth, and transparency support. For example, PNG supports transparency and is often used for web graphics, while JPG is typically used for photographs due to its efficient compression.
- Formats supporting transparency:
- PNG
- GIF
- WebP
Vector image formats, such as SVG, EPS, PS, and ICO, are not made up of pixels but instead use mathematical formulas to represent images. This allows them to be scaled without loss of quality, making them ideal for logos and other graphics that need to be resized frequently.
By understanding these basics, we are equipped to create, convert, and use images effectively in our digital work while maintaining their intended quality and appearance.
How to Convert and Resize Images
To effectively handle digital images, it’s crucial to understand how to accurately resize and convert them, ensuring the output resolution meets specific requirements without compromising on image clarity.
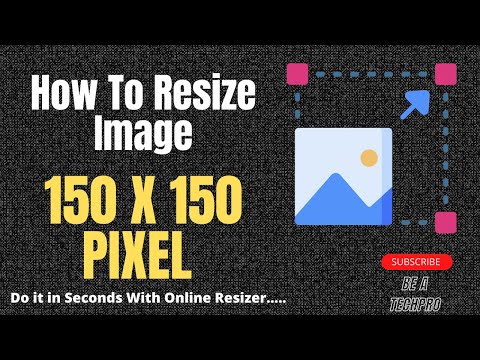
Using an Online Image Resizer
We utilize an online image resizer when we need a convenient tool that’s accessible from any device with an internet connection. These resizers provide an easy-to-use interface where you can upload your image, specify the desired height and width, and execute the resize. It’s important to ensure that the final image maintains its aspect ratio to avoid distortion.
Steps to Convert Image to 120px by 120px
- Choose the Right Tool: Start by selecting a reliable online image resizer that supports custom dimensions.
- Upload Your Image: Click the upload button to add your image to the platform.
- Input Custom Size: In the provided fields, enter 120 for both height and width to get a 120×120 pixel image.
- Crop if Necessary: Some tools offer a cropping feature. Use it if you need to focus on a specific area of the image, ensuring the content you want is within the 120×120 frame.
- Review and Download: Preview the resized image to confirm it meets your expectations before downloading it.
Adjusting Pixel Density for Clarity
When resizing an image to 120px by 120px, you must also consider the DPI (dots per inch) to maintain quality. A higher DPI is essential if your resized image will be printed; typically, a DPI of at least 300 is recommended to avoid losing quality. For digital use, a lower DPI, around 72, is often sufficient. Adjust these settings in the image resizer to ensure the pixel density offers the clarity needed for your specific application.
Maintaining Image Integrity

In this section, we explore the crucial steps to ensure that a 120px x 120px photo retains its original quality during conversion. Our focus will be on avoiding a loss of quality, using image rotation and flipping wisely, and understanding the relationship between print size and resolution.
Avoiding Loss of Quality
When converting images to a 120px x 120px dimension, it’s important to prevent any loss of quality. You may need an image file size calculator to ensure that the file size corresponds appropriately with the desired resolution. Here is a simple checklist to maintain high quality:
- Pixels to Print Size Calculator: This helps determine the optimal resolution for print, ensuring that the quality of pixels (px) is sufficient for the desired print size.
- Resample Carefully: If the conversion requires resampling, choose the right resampling algorithm to preserve sharpness without adding artifacts.
Image Rotation and Flipping Options
Rotating or flipping an image can alter its pixel arrangement and potentially affect the overall quality. Here’s how we maintain image integrity during these processes:
- Rotate with Caution: Use rotation tools that maintain the original quality, avoiding loss of detail or pixelation.
- Flip Intelligently: Flipping an image, horizontal or vertical, should not change the file size or aspect ratio. It’s a mirror operation that must be lossless to keep the integrity intact.
Understanding Print Size and Resolution
Print size and resolution are interconnected; a higher resolution will typically result in better print quality. Here’s what to keep in mind:
- Resolution: For a 120px x 120px image, ensure that the resolution is high enough for the intended print size.
- Dimension and Print Size: Maintain a balance between the physical dimension of the print and the pixel dimension of the image to avoid quality degradation.
Advanced Considerations and Tools
When we discuss advanced considerations and tools for 120 x 120 Pixel Image Conversion, we focus on nuanced aspects such as copyright and privacy, choices of storage, and the importance of iterative feedback.
Image Copyright and Privacy Concerns
Copyright is a serious consideration when converting images. When we use an image, we must ensure that we have the right to modify and redistribute it, especially if we’re posting the resulting photo on platforms like Instagram. As for privacy, we must take care not to inadvertently expose private details through images, especially when they contain metadata that can reveal much more than what’s visible on the surface.
Choosing Between Cloud Storage and Local Downloads
Our choice between cloud storage and local downloads depends on our needs for accessibility and security. Cloud storage allows for easy access from any device with an internet connection, and these are often equipped with tools for image conversion. Local downloads give us control and ownership of our files but require us to manually manage and back up our data.
Feedback and Revisions for Image Conversion
Iterative feedback is paramount in achieving the desired outcome. When we convert images to a specific resolution, such as 120px x 120px, having a tool that allows for quick feedback and revisions is beneficial. This could involve tweaking the resolution, aspect ratio, and pixel density to ensure the image meets our needs.

