
Instructions on Using the Tool

When working with images, understanding the ratio, resolution, and pixel density is crucial. For a 1128 x 191 pixel image, the aspect ratio is approximately 5.91:1. This ratio is essential for maintaining the image’s integrity during resizing or cropping.
Pixel density, typically measured in pixels per inch (PPI), influences the sharpness and clarity of an image. Most modern screens operate at various PPIs, so knowing how to adjust for your device is key. To create a 1128 x 191 pixel photo, using an image editing tool like Photoshop or GIMP can provide precision and control over the conversion process.
By optimizing the image for its intended use, we can ensure it is both high-quality and appropriately sized. Proper techniques include maintaining the original resolution and using efficient file formats. This guide will help you navigate these steps effectively, ensuring your image looks its best.
Key Takeaways
- The aspect ratio for 1128 x 191 pixels is 5.91:1.
- Pixel density affects image sharpness and clarity.
- Use image editing tools for precise resizing and conversion.
Understanding Image Resolution and Aspect Ratios

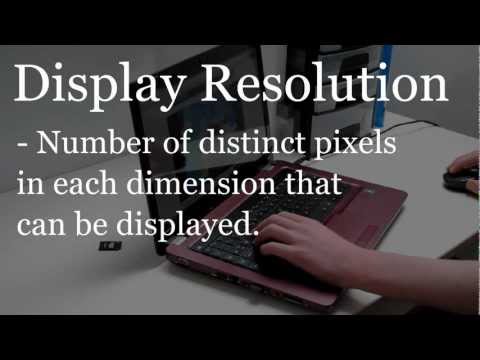
Understanding image resolution and aspect ratios is crucial for creating high-quality visuals. Let’s explore the basics of pixel dimensions, the importance of pixel density, and how resolution affects image quality.
Basics of Pixel Dimensions and Aspect Ratios
Pixel dimensions define the width and height of an image in pixels. For example, an image that is 1128 x 191 pixels has a width of 1128 pixels and a height of 191 pixels. This particular dimension corresponds to an aspect ratio of approximately 5.9:1.
Aspect ratios describe the proportional relationship between the width and height of an image. Common aspect ratios include 16:9 for widescreen displays and 4:3 for standard screens. Ratios also impact how an image fits on different screens and can influence the visual appeal.
Determining the Pixel Density
Pixel density refers to the number of pixels per inch (dpi or PPI) and is vital for assessing image clarity. Higher pixel density means more detail and sharper images.
To determine pixel density, divide the pixel dimensions by the physical dimensions in inches. For our 1128 x 191 image, if printed on a 6-inch wide surface, the pixel density would be approximately 188 dpi (1128 pixels ÷ 6 inches). Higher dpi values yield sharper images, especially useful in printing or high-resolution displays.
Resolution and Quality Correlation
Resolution often determines the quality of an image. A resolution of 1128 x 191 pixels is relatively low in terms of height, better suited for narrow and wide visuals. Higher resolutions equate to more pixels, enabling greater detail and clarity.
Quality depends not just on pixel count but also on pixel density and the display medium. For instance, an image with a resolution of 1080p (1920 x 1080 pixels) displayed on a full HD screen ensures a clear and detailed view, benefiting from a higher pixel density. Images optimized for specific resolutions and pixel densities guarantee the highest quality, fitting their intended use.
Process of Resizing Images to 1128px x 191px
Resizing an image to 1128px x 191px requires selecting appropriate tools, following a specific resizing process, and ensuring the highest possible quality for the resized image. We will guide you through the necessary steps to achieve the best results.
Choosing the Right Image Resizer Tools
For resizing images, selecting the right tool is crucial. Online tools like Canva, software such as Adobe Photoshop, and apps on mobile devices all offer solutions.
Browser-based tools are convenient as they often offer easy uploading and quick adjustments. Software provides more control and higher quality outcomes, while apps offer flexibility. Each has its own support for image formats like JPEG, PNG, GIF, and WebP.
Step-by-Step Image Resizing
- Choose an appropriate tool: Based on your needs and available resources.
- Upload the image: This typically involves selecting a file from your device.
- Select the dimensions: Enter 1128px x 191px into the dimension fields.
- Adjust cropping options: Ensure the essential parts of the image are retained.
- Resize by percentage: Some tools allow resizing proportionally via percentage.
- Download the resized image: Save the file in your desired format.
These steps ensure a smooth and accurate resizing process, maintaining the aspect ratio when necessary.
Ensuring Optimal Quality in Resized Images
Quality is paramount when resizing. Start by using high-resolution images. Many online tools can downscale without significant quality loss. Formats such as JPEG and PNG are ideal for maintaining clarity.
Avoid excessive compression to keep the highest quality. Preview the image after resizing to check for artifacts or blurriness. Consider using specific settings in tools like Photoshop to enhance sharpness and clarity.
Achieving optimal quality involves a balance between file size and clarity, ensuring the resized image serves its purpose effectively.
Image Conversion and Optimization Techniques

Successful image conversion and optimization involve selecting the appropriate formats and compressing images without sacrificing quality. Let’s examine the most effective techniques for achieving this.
Image Format Conversion for Various Needs
Different image formats serve various purposes. For web use, JPG and PNG are popular for their balance of quality and file size. JPG is particularly efficient for photographs due to its ability to compress images well, while PNG supports transparency, making it suitable for logos and graphics.
GIF is ideal for simple animations, whereas WEBP offers superior compression and quality, supporting both lossy and lossless methods. BMP files, although less common, can be used for retaining high quality in printing scenarios.
To convert images efficiently, tools like GIMP, Adobe Photoshop, and online converters allow us to switch between formats. The choice of format depends on the intended use, which dictates the optimal balance between image fidelity and file size.
Compressing Without Compromising Quality
Image compression aims to reduce file size while maintaining visual quality. Lossy compression methods, like those used in JPG and WEBP, discard some data to achieve smaller files, which is often unnoticeable in images for web use. Lossless compression, found in formats like PNG and WEBP, keeps all the original data, preserving every detail.
For effective compression, tools such as TinyPNG or JPEGmini can significantly reduce file size. Adjusting quality settings during saving in programs like Adobe Photoshop also helps strike a balance.
Choosing the appropriate compression method ensures we achieve the highest quality with the smallest file size, optimizing load times and saving storage space.
Best Practices and Considerations
When converting images to a resolution of 1128 x 191 pixels, it’s important to maintain the aspect ratio, safeguard your privacy, and adapt the images for use on social media platforms.
Maintaining Aspect Ratio and Image Integrity
Maintaining the aspect ratio is crucial to ensure the image doesn’t appear stretched or squished. Aspect ratio represents the proportional relationship between width and height. For a 1128 x 191 image, calculate the aspect ratio as 1128 divided by 191, equating to almost 5.9:1. Consistently use this ratio for edits to maintain visual integrity.
To make this practical, use image editing tools that allow you to lock the aspect ratio. This ensures that any adjustments maintain the correct proportions, resulting in a clean, professional appearance. Always review the final output before saving.
Privacy and Data Security During Image Conversion
When converting images, privacy and data security are critical. It’s essential to use tools that respect your privacy. Look for services guaranteeing privacy by deleting uploaded images automatically after processing. This reduces the risk of unauthorized access.
Choose platforms with clear privacy policies and robust security measures. We should always select image conversion tools that don’t store or misuse your data. Consider opting for services that provide end-to-end encryption for added security. This approach ensures your data remains protected throughout the conversion process.
Adapting Images for Social Media Platforms
Different social media platforms have varied image dimension requirements. For platforms like LinkedIn, Twitter, and Facebook, the 1128 x 191 resolution aligns well with cover photos, banners, and headers. Knowing these specifications improves the brand’s image quality on social media.
Adjusting the aspect ratio according to each platform’s guidelines is vital. For example, LinkedIn cover images have a specific recommended ratio, so ensure the edited image fits within optimal dimensions without distorting.
Consider using easy-to-use image editing tools that offer preset dimensions for social media. This makes the process straightforward, saving time while ensuring your images meet the platform’s standards. Always check the platform’s latest dimension guidelines for any updates.

