
Diving into the world of web or app development, you often bump into situations where you gotta shrink or stretch pictures to fit just right. Imagine you need a picture that’s 100 by 120 pixels – that’s like making a photo fit into a tiny, specific box. This magic trick is all about changing the size to these exact numbers. So, what’s the big deal with this resizing act? Think of the image having a shape that’s a bit more up than it is across, like a 5:6 ratio, meaning it’s stretching more towards the sky than spreading out wide. Since we’re playing with just a handful of pixels, don’t expect the clarity to be top-notch if you’re gonna blow it up on a big screen. It’s like trying to stretch a small blanket over a big bed – you might end up seeing more of the bed (or pixelation) than you’d like! If you’re curious about how to make these fits perfectly without losing the vibe of your visuals, stick around. There’s a neat trick to keep the pixie dust right, even when the numbers seem small.
Pixel density, commonly measured in pixels per inch (PPI) or dots per inch (DPI), is crucial in determining the quality of an image. In the context of 100 x 120 pixels, the pixel density would depend on the physical size of the image when printed or displayed. To make a 100px x 120px photo, you’d use image converter tools that provide options for resizing without significant loss of quality. These tools also allow for adjustments in aspect ratio and pixel density, ensuring that the final image meets the required specifications for your project.
Key Takeaways
- Image converters resize images to specified dimensions such as 100 x 120 pixels.
- Technical aspects like ratio and pixel density are critical for maintaining image quality during resizing.
- Utilizing appropriate tools ensures efficient editing and customization for specific project requirements.
Image Basics
To effectively create and manipulate images, it’s crucial to understand the core concepts of image properties. Let’s dive into pixel dimensions, image resolution, and aspect ratios to see how they affect the quality of a picture.
Understanding Pixel Dimensions
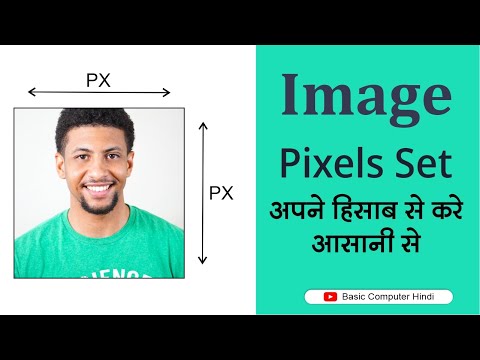
We define pixel dimensions by the width and height of an image in pixels, which are the tiny dots of color that make up a digital image. For example, an image that is 100 pixels wide and 120 pixels high has a total of 12,000 pixels. These dimensions determine the amount of detail an image holds. To illustrate:
- Width: 100px
- Height: 120px
- Total Pixels: 12,000
The more pixels an image contains, typically, the more detail it holds, affecting its overall quality.
Exploring Image Resolutions
Resolution, often measured in dots per inch (DPI), indicates how densely these pixels are packed together. Higher DPI values usually signify higher image quality, as there are more pixels within a given area. In digital terms, an image designed for a computer screen at 72 DPI might look crisp on display, but the same image at 300 DPI is better suited for high-quality print.
- 72 DPI: Suitable for screens
- 300 DPI: Recommended for print
It’s important to remember that increasing the DPI of an image without changing the pixel dimensions doesn’t add detail—it simply compresses the existing pixels into a smaller area.
Aspect Ratios and Quality Implications
Aspect ratio tells us the proportional relationship between an image’s width and height. It’s critical in maintaining the composition and elements of the image when resizing. A 100px by 120px photo has an aspect ratio of 5:6, meaning that for every 5 units of width, there are 6 units of height. Incorrectly adjusting this ratio can lead to a distorted image, so we must keep the aspect ratio consistent to preserve image quality. Here’s a breakdown:
- Aspect Ratio: 5:6
- Width Units: 5
- Height Units: 6
Staying true to the image’s original aspect ratio ensures that we maintain the quality and integrity of the visual content.
Image Converter Tools
When it comes to converting images, particularly to specific dimensions like 100px x 120px, the right tools can make the process simple and preserve image quality. We’ll discuss the factors to consider when choosing software, address concerns with online tools, and list the supported image formats.
Choosing the Right Software
When selecting software for resizing images, it’s imperative to opt for one that’s easy to use but also offers flexibility in terms of graphics manipulation. Programs like Adobe Photoshop (PS) are robust options that provide an array of features beyond mere resizing, such as adjusting pixel density and image quality. However, for those who prefer free alternatives, GIMP constitutes an excellent choice capable of yielding professional results.
Online Tools and Privacy
An abundance of online tools are available that allow us to upload and resize images directly from the internet. Although these are convenient options—often capable of converting to and from formats like jpg, png, gif, webp, svg, and jpeg—we must be cautious about privacy. It’s crucial to choose services that explicitly state privacy guaranteed to ensure your data is protected. Feedback from other users can also be indicative of the tool’s reliability and respect for privacy.
Supported Image Formats
The ideal image converter software or tool should offer extensive support for various image file formats. Common formats we look for include:
- JPEG/JPG: Ideal for real-world scenes with smooth variations of tone and color.
- PNG: Supports transparency and is suited for the web.
- GIF: Limited to 256 colors, but good for simple graphics and animations.
- WebP: Offers superior compression, balancing quality and size.
- SVG: Vector-based and perfect for images that require scaling without a loss of quality.
To summarize, the choice of image converter tools should be made with a clear understanding of the specific task requirements. Consider software for its features and ease of use, online tools for their convenience and approach to privacy, and ensure the tool supports essential image formats for a seamless experience.
Editing and Customization

In the realm of image editing, specifically for achieving a 100px x 120px photo, we focus on precision in resizing and cropping, as well as the array of enhancement options available for the desired outcome.
Resizing and Cropping Techniques
When we resize images, it’s crucial to maintain the aspect ratio to prevent distortion. A resize tool comes in handy to adjust the width and height proportionally. Here’s a simple guide:
- Open the image in your preferred image resizer.
- Enter
100for width and120for height to resize the image. - Select
Constrain Proportionsto maintain aspect ratio (if your image is not already in a 5:6 ratio). - Apply the changes to resize.
For cropping:
- Choose the crop tool in your image editing software.
- Define the crop area to be 100px in width and 120px in height.
- Select and remove unwanted areas, keeping the important features intact.
Advanced Editing Options
After resizing and cropping, we often find the need to fine-tune our images further. This is where advanced editing options elevate our image’s quality.
- Filters: Apply filters to enhance color, contrast, or to add special effects.
- Rotate and Flip: Adjust the image’s orientation to best fit the frame.
- Animation: Introduce motion to images where the device supports animated formats.
- Templates: Utilize pre-set templates that conform to the 100px x 120px size for consistency.
Tip: Always save your original image. Apply editing on duplicates so you can revert if necessary.
Practical Tips and FAQs
When converting images, we must pay careful attention to aspect ratios, file sizes, and the intended device usage to ensure optimal performance and quality. Our focus here is to guide you through optimizing images for web use and troubleshooting common issues associated with a photo that has dimensions of 100px by 120px.
Optimizing Images for Web Use
For web purposes, images with a dimension of 100×120 pixels must maintain a tight balance between file size and visual quality. It’s essential to understand that the aspect ratio for a 100×120 image is roughly 5:6, which remains consistent regardless of scaling. Keeping the file size low, ideally under 100KB, helps the image load faster on web pages, which is crucial since webpages are expected to load in a few seconds to retain user attention.
- Formats: Different image formats like JPEG, PNG, BMP, ICO, and TIFF have unique properties. For 100×120 images, JPEG offers the most efficient balance between quality and file size, making it suitable for web usage.
- Tools: Use an online image resizer that allows you to upload your image, specify dimensions, and it will adjust the size maintaining the highest quality.
- Storage: Once uploaded, images are often stored in cloud storage, which may be configured to have files deleted automatically after a certain period, ensuring efficient storage management.
To maintain image clarity on all devices, consider the pixel density of the device screens where your image will be displayed. Mobile devices, in particular, have higher pixel density screens, which require images of higher resolution to look clear.
Common Issues and Solutions
Encountering problems when resizing images is a common occurrence. Here are some frequently asked questions and their solutions:
- Distorted Images: If your 100×120 image looks stretched or squashed, it may be due to an incorrect aspect ratio. Always maintain the original aspect ratio to prevent distortion.
- Loss of Quality: This can occur if the image is not saved at the highest quality possible. Use the highest quality settings that balance file size and quality for your needs.
- File Does Not Upload: Check if the image format is accepted by the website. Formats like BMP might not be supported everywhere. Also, ensure the file size is not too large for the upload limits.
- Image Not Displaying on Mobile Devices: This could be due to high file size or incorrect dimensions. Resize the image using a suitable tool to ensure compatibility with mobile devices.
When printing a 100×120 pixel image, the resolution is critical as printers require a higher number of dots per inch (DPI) compared to on-screen displays. This means converting the image to a resolution suitable for printing, generally between 300 to 600 DPI, depending on the printer’s capabilities and the desired print quality.

