You are about to spend tens of thousands of dollars on a new website. The design is sharp, the dev team is confident, stakeholders are excited. Then it launches — and organic traffic drops off a cliff.
It happens constantly. Not because the site looks bad, but because invisible technical missteps slipped past every visual review. The most common culprit: nobody built a redirect map. Months of accumulated search equity, erased overnight.
Key Takeaways
- The #1 cause of post-launch traffic loss is skipped redirect mapping. Every old URL with backlinks, rankings, or traffic needs a 301 redirect to its new equivalent — or that SEO value vanishes overnight.
- Pre-launch technical setup determines whether Google can see your site at all. A misconfigured robots.txt or leftover noindex tag makes an entire site invisible to search engines while looking perfectly fine in a browser.
- Core Web Vitals are a confirmed ranking factor. Target LCP under 2.5 seconds, INP under 200 milliseconds, and CLS under 0.1 — and monitor field data for 28 days post-launch.
- Analytics must be configured before launch, not after. Without a clean baseline from day one, you cannot distinguish normal post-launch fluctuation from real problems.
- Post-launch monitoring is non-negotiable for 30–90 days. Problems caught in the first two weeks are fixable. Problems ignored for a month compound silently.
This new website SEO checklist — your complete website launch checklist — covers every step across three phases: pre-launch, launch-day, and post-launch. Nothing falls through the cracks.
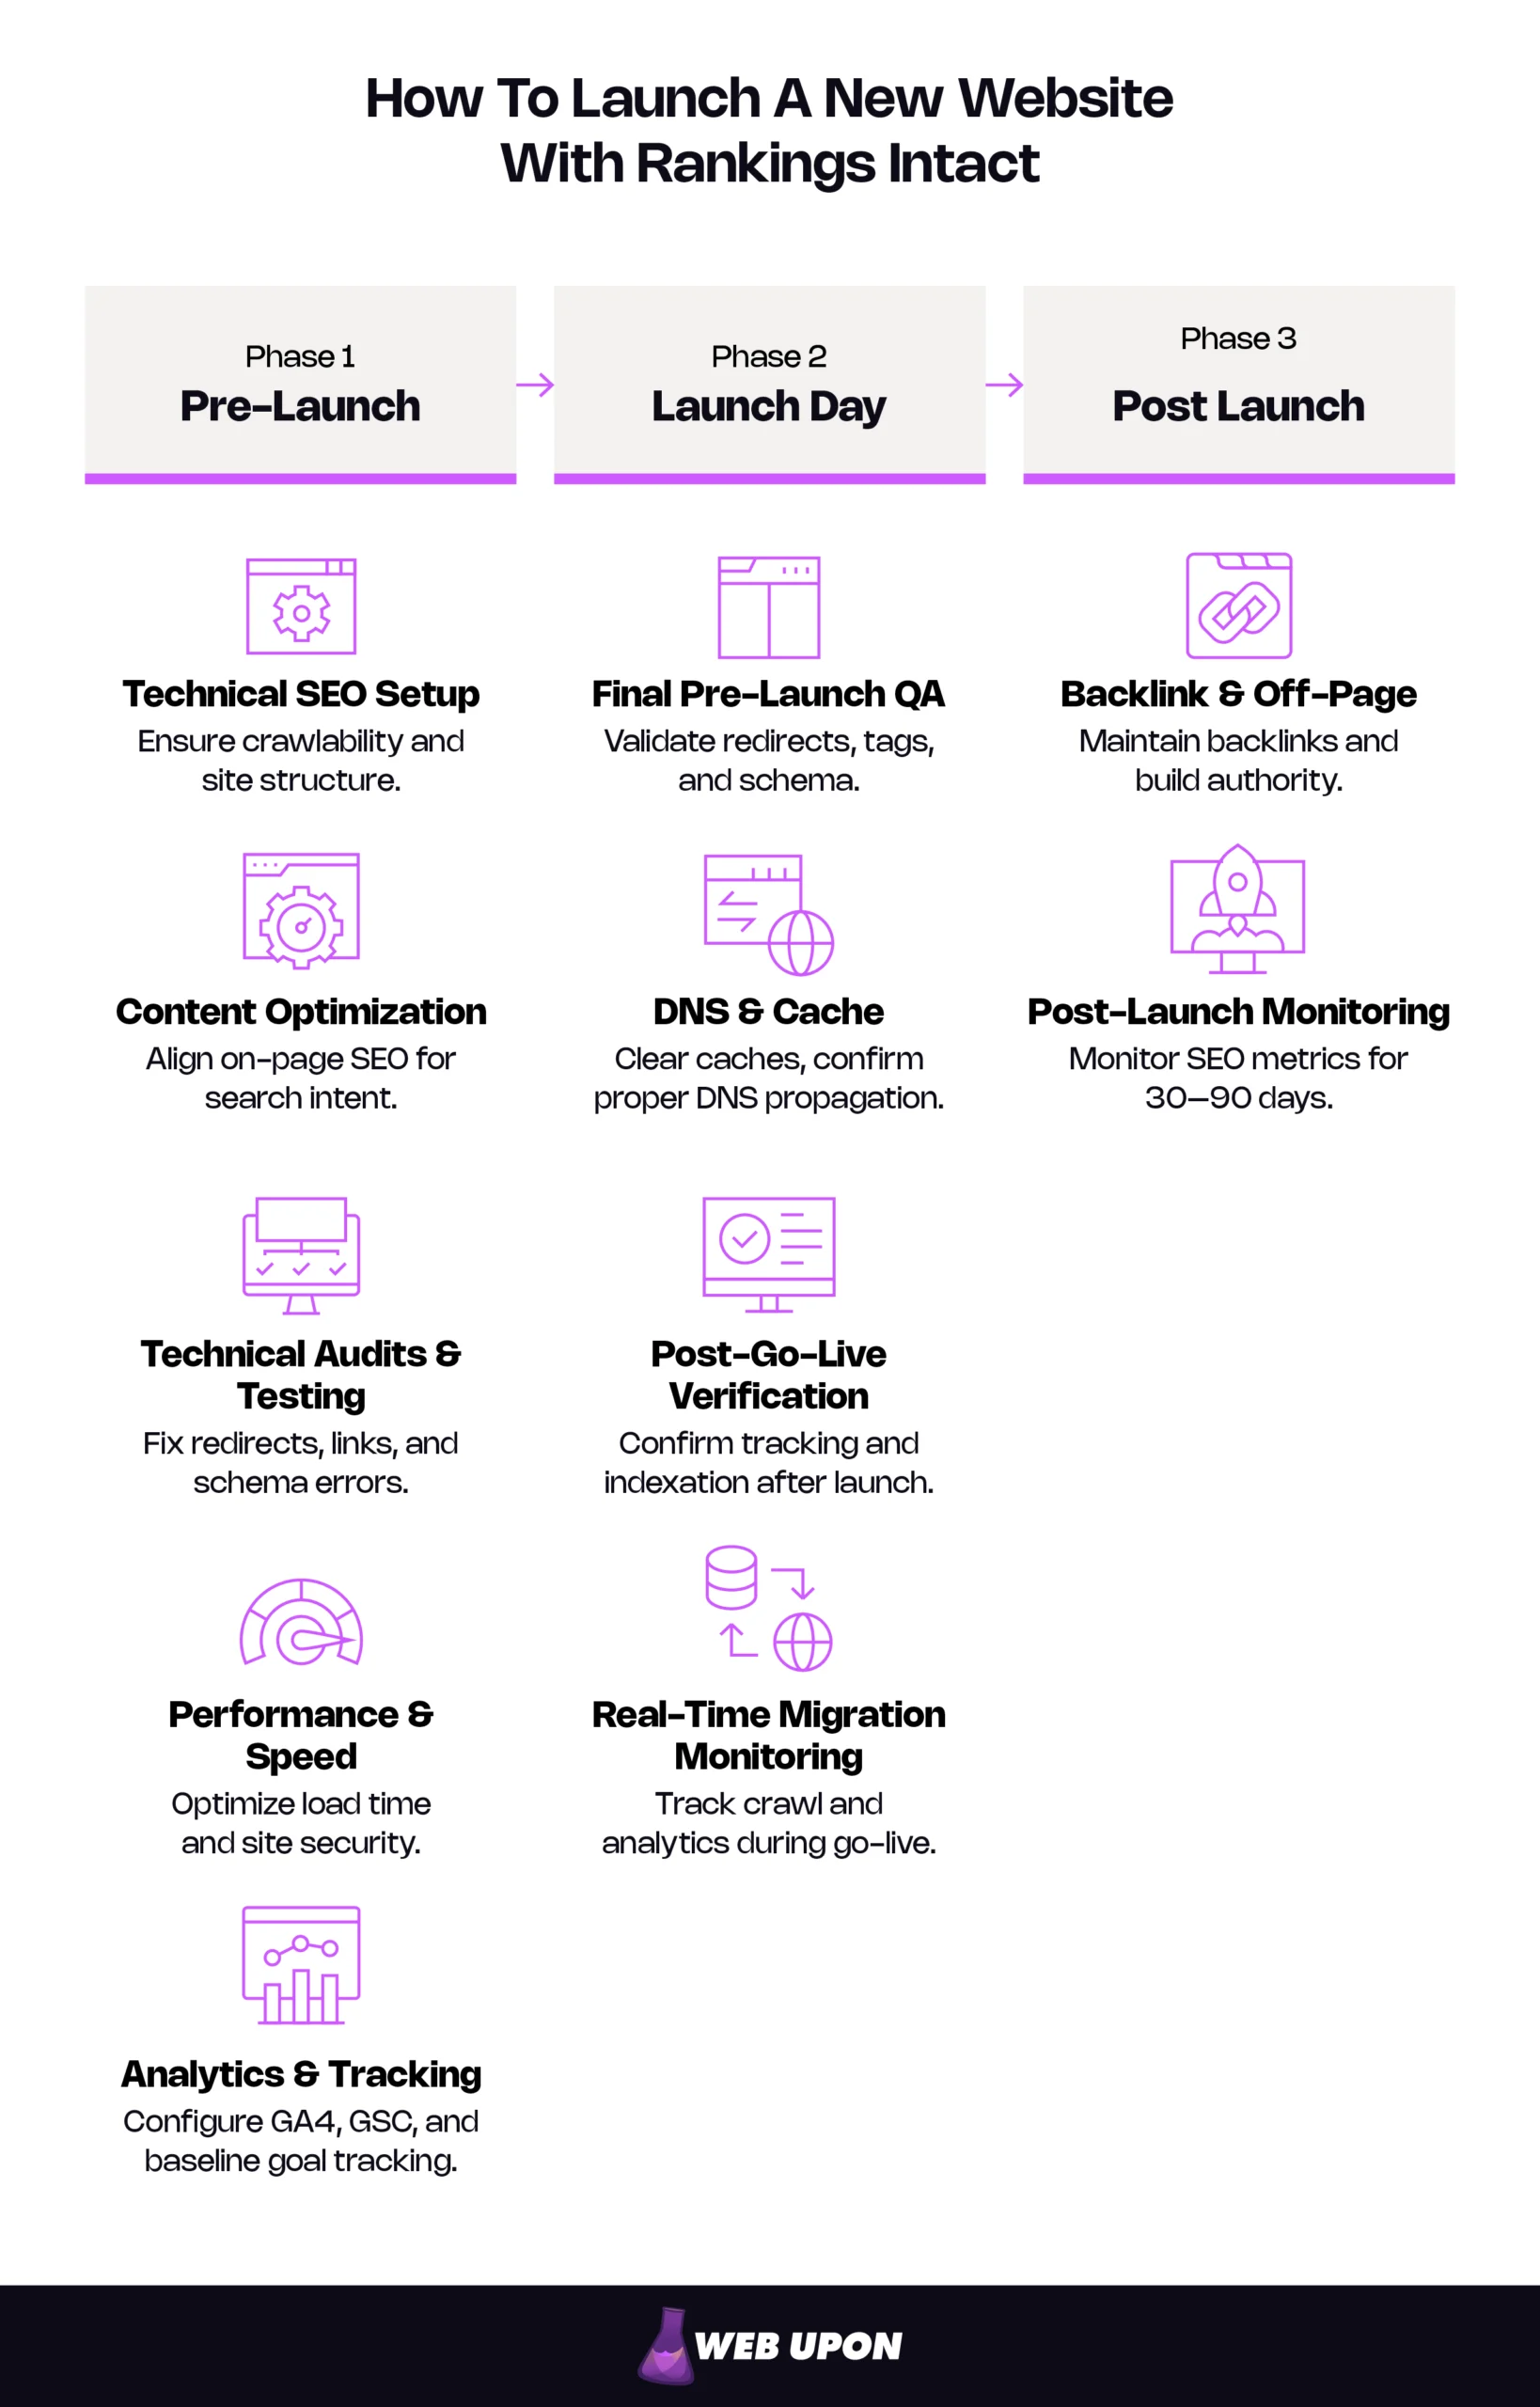
Here are all 50 steps across three phases.
All 50 Steps at a Glance
Pre-Launch (Steps 1–39)
| Section | Steps | What’s Covered |
| Technical SEO Setup | 1–9 | Crawlability, indexability, XML sitemaps, URL structure, canonical tags, mobile responsiveness, Core Web Vitals |
| Content Optimization | 10–18 | Keyword mapping, title tags, meta descriptions, OG/social meta, E-E-A-T signals, image alt text, internal linking, orphan page elimination |
| Technical Audits & Testing | 19–27 | Pre-migration audit, migration plan, redirect mapping, broken link repair, custom 404 page, structured data, schema markup, publish date signals |
| Performance & Speed | 28–33 | Image optimization, code minification, hosting benchmarks, HTTPS, mixed content, cookie consent/privacy compliance |
| Analytics & Tracking | 34–39 | GA4 setup, conversion goals, Search Console verification, heatmaps, Google Business Profile, staging migration test |
Launch Day (Steps 40–43)
| Section | Steps | What’s Covered |
| Final Pre-Launch QA | 40 | Full-site crawl against baseline, redirect verification, noindex/canonical check, schema validation |
| DNS & Cache | 41 | DNS propagation monitoring, CDN/server/application cache clearing, multi-device testing |
| Post-Go-Live Verification | 42 | Critical page spot-checks, redirect testing, GA4 real-time confirmation, GSC indexation requests |
| Real-Time Migration Monitoring | 43 | Crawl data, GSC, analytics, and server log monitoring during go-live window |
Post-Launch (Steps 44–50)
| Section | Steps | What’s Covered |
| Backlink & Off-Page | 44–45 | Backlink audit, link acquisition strategy |
| Post-Launch Monitoring | 46–50 | Indexation monitoring, traffic analysis, ongoing optimization, 30–90 day migration tracking, external reference updates |
If this checklist feels overwhelming, that is exactly what a launch partner is for. Web Upon’s SEO team has managed hundreds of these launches — let us help with yours.
Below, we break down each item on this new website SEO checklist with why it matters and how to verify it is done right.
Pre-Launch: Your New Website SEO Checklist Starts Here (Steps 1–39)
These technical foundations determine whether search engines can find, crawl, and understand your pages at all. This pre-launch SEO checklist phase is non-negotiable — skip it and you are optimizing a site Google cannot see.
Technical SEO Setup
Crawlability and Indexability
Step 1: Configure robots.txt to allow search engine crawling of all important pages. A misconfigured robots.txt is one of the most common reasons brand-new sites get zero organic traffic. Here is how it happens: a developer copies the staging robots.txt — which intentionally blocks all crawlers — to production. The entire site becomes invisible to search engines while looking perfectly fine to anyone with a browser.
A production-ready robots.txt:
User-agent: *
Allow: /
Sitemap: https://yourdomain.com/sitemap.xml
The staging version that causes disasters:
User-agent: *
Disallow: /
That single forward slash after “Disallow” blocks your entire site. How to verify: Fetch robots.txt at yourdomain.com/robots.txt. Confirm no critical directories are blocked. Test in Google Search Console’s robots.txt tester.
Step 2: Verify meta robots tags across all page templates. A leftover noindex tag from staging is among the most damaging post-launch SEO mistakes. Your site looks perfect. Everything works. But Google ignores every page because a single meta tag — invisible to anyone not inspecting the code — tells it to. How to verify: Crawl the pre-launch site and filter for “noindex” in meta robots or X-Robots-Tag headers. Check every template type, not just a sample. Blog posts, landing pages, category pages, and utility pages each run on different templates, and any one of them can carry the leftover tag.
Step 3: Run a full site crawl and review the crawl report. Automated crawling catches orphan pages, redirect loops, duplicate content, and broken status codes that no manual review will find. A crawl tool sees your site the way search engines do. How to verify: Crawl the full site and review the health summary for errors, warnings, and blocked resources. A website audit checklist ensures nothing gets overlooked. Watch for 5xx server errors especially — these signal backend problems that worsen under the load of a public launch.
XML Sitemap and Submission
Step 4: Generate, validate, and submit an XML sitemap. A sitemap is your site’s roadmap for search engines — a file listing every page you want indexed. Without one, discovery relies entirely on crawling, which is slow for new sites with no inbound links. Submission to Google Search Console and Bing Webmaster Tools accelerates discovery and gives you a feedback loop — Google will tell you which pages in your sitemap it cannot index. How to verify: Open the sitemap URL. Confirm only canonicalized, indexable pages appear — no noindexed pages, no redirects, no 404s. Reference the sitemap in your robots.txt. Check the GSC Sitemaps report. Confirm “Success” status and that page count matches expectations.
URL Structure Optimization
Step 5: Implement clean, consistent, keyword-informed URLs. URLs are a lightweight ranking signal and a real usability factor. /services/seo-audit communicates its content instantly. /page?id=4728&cat=3 communicates nothing. If the same page is accessible at multiple URLs — trailing slash vs. none, www vs. non-www, HTTP vs. HTTPS — search engines split ranking signals across those duplicates. How to verify: Review URLs from your crawl. Confirm none contain dynamic parameters, session IDs, excessive subfolder depth (three or more levels), or meaningless strings. Test each URL variant and confirm they redirect or canonicalize to a single preferred version.
Canonical Tags and Duplicate Content
Step 6: Implement canonical tags and audit for duplicate and thin content. A canonical tag tells search engines which version of a page is the official one. Without it, engines guess — and often guess wrong, splitting ranking power across duplicates. Duplicate content and thin pages compound the problem: e-commerce sites are especially vulnerable, where product variations, filtered views, and paginated categories can generate dozens of near-identical pages without anyone noticing. Thin content gets flagged by Google’s quality systems and can drag down your entire domain’s perceived quality. How to verify: Crawl the site and confirm every indexable page has a canonical tag pointing to its own preferred URL. Use your crawl tool’s duplicate content detection. Manually review pages with similar titles or headings.
Mobile Responsiveness and Core Web Vitals
Step 7: Test mobile responsiveness across devices and screen sizes. Google uses mobile-first indexing. The mobile version is what gets evaluated for rankings — not desktop. A compromised mobile experience means a compromised rankings ceiling, no matter how polished the desktop site looks. How to verify: Test using Lighthouse in Chrome DevTools (Google’s standalone Mobile-Friendly Test is retired). Check multiple breakpoints for tap-target issues, horizontal scrolling, and unreadable text.
Step 8: Measure and optimize Core Web Vitals — LCP, INP, and CLS. Core Web Vitals are a confirmed Google ranking factor. Use this as your core web vitals checklist — the three metrics that matter:
| Metric | What It Measures | Good Threshold |
| LCP (Largest Contentful Paint) | Loading — how quickly main content becomes visible | Under 2.5 seconds |
| INP (Interaction to Next Paint) | Interactivity — how quickly the page responds to input | Under 200 milliseconds |
| CLS (Cumulative Layout Shift) | Stability — how much layout shifts during loading | Under 0.1 |
Note: INP replaced FID (First Input Delay) as the official interactivity metric on March 12, 2024. Update any internal documentation still referencing FID.
How to verify: Run Lighthouse and PageSpeed Insights pre-launch. Post-launch, review the Core Web Vitals report in GSC once field data accumulates (typically 28 days).
Step 9: Ensure responsive design adapts without content loss. Content hidden or collapsed on mobile may be invisible to Google under mobile-first indexing. If it only exists on desktop, it effectively does not exist for rankings. How to verify: Compare desktop and mobile renders. Confirm all critical content and structured data appear on both.
Content Optimization for SEO
Technical foundations get you crawled. Content optimization gets you ranked. This phase of website launch SEO determines whether your pages match what searchers are actually looking for — and whether they click your result over every other option on the page.
Keyword Research and Mapping
Step 10: Conduct keyword research and map target keywords to specific pages. Without deliberate mapping, you risk keyword cannibalization — multiple pages on your own site competing for the same term, diluting both. How to verify: Create a keyword map spreadsheet: each page gets a primary keyword, secondary keywords, and the search intent it serves (informational, transactional, navigational). No keyword assigned to more than one page. A total addressable market analysis reveals the full scope of terms worth targeting.
Step 11: Identify content gaps and keyword opportunities. A new launch is your best chance to start with clean content architecture — no legacy baggage, no accumulated conflicts. How to verify: Compare your keyword map against competitor rankings to find uncovered terms. A structured competitor analysis makes this systematic.
Title Tags, Meta Descriptions, and Social Meta
Step 12: Write keyword-optimized title tags and compelling meta descriptions for every page. The title tag is one of the most impactful on-page SEO elements — it influences both rankings and click-through rate. Front-loading the primary keyword carries slightly more weight than burying it at the end. Meta descriptions do not directly affect rankings, but they heavily influence whether searchers click your result or scroll past it. Think of them as ad copy for organic search. How to verify: Export all title tags and meta descriptions. Check title length (under 60 characters), uniqueness, keyword inclusion, and brand consistency. Confirm each meta description (under 155 characters) is unique and includes a clear value proposition.
Step 13: Configure Open Graph and social sharing meta tags for every key page. When someone shares your new site on LinkedIn, Facebook, or Slack, OG tags control the preview image, title, and description that appear. Missing or misconfigured OG tags mean a blank preview card — a wasted first impression during your highest-visibility launch window. How to verify: Test key pages with Facebook’s Sharing Debugger and Twitter/X Card Validator. Confirm each page has og:title, og:description, og:image, and og:url tags with correct values.
On-Page Content Quality and E-E-A-T
Step 14: Ensure key pages demonstrate E-E-A-T — Experience, Expertise, Authoritativeness, and Trustworthiness. Google’s quality rater guidelines use E-E-A-T as a core evaluation framework, closely aligned with their helpful content guidelines. For a new site with no domain history, these signals matter enormously — you have no track record, so the site has to prove credibility from day one.
That means author bios linked to established professional profiles, citations to authoritative sources, and a complete About page with verifiable company information. You also need a physical address, a privacy policy, and professional credentials where relevant. Case studies and client testimonials serve as first-party evidence of real experience — exactly the kind of signal that separates a credible site from an anonymous one. How to verify: Audit key pages for visible trust signals. Confirm author bios link to verifiable profiles. Check that About, Contact, and Privacy pages are complete.
For a deeper evaluation, a content audit identifies gaps in quality, coverage, and E-E-A-T signals before launch.
Step 15: Optimize heading hierarchy with relevant keywords. A clear H1 → H2 → H3 hierarchy helps both users and search engines parse page structure. How to verify: Every page gets exactly one H1 with the primary keyword. H2s and H3s nest logically, no skipped levels.
Step 16: Write descriptive alt text for every meaningful image. Alt text serves two purposes: accessibility for screen readers and context for search engines. Google Images is a significant traffic source, and without alt text, your images are invisible to it. How to verify: Crawl the site and filter for images missing alt attributes. Each alt tag should describe the image content concisely and include a relevant keyword where natural — never keyword-stuffed.
Internal Linking Strategy
Step 17: Build a deliberate internal linking structure with descriptive anchor text. Internal links distribute link equity — ranking authority passed between pages — and signal topical relationships. Your most important pages should receive the most internal links. Anchor text should describe what the linked page is about. Never “click here.” How to verify: Crawl and review internal link distribution. Confirm high-priority pages are well-linked. Eliminate generic anchors.
Step 18: Eliminate orphan pages. An orphan page receives zero internal links — meaning it lacks the link equity signals that help search engines prioritize it for crawling and ranking, even if it appears in your sitemap. How to verify: Your crawl report flags orphans (pages in the sitemap but not linked from anywhere). Every important page should be reachable within three clicks of the homepage.
Technical SEO Audits and Testing
Foundations are set. Now stress-test everything. These audits catch the problems that look fine during a demo walkthrough but break under real-world conditions.
Pre-Migration Audit and Planning
Step 19: Conduct a full SEO audit of the existing site before building the redirect map. You cannot preserve what you have not documented. This is the foundation everything else builds on — without a clear picture of what you have, redirect mapping is guesswork. How to verify: Document current keyword rankings. Export all indexed URLs. Catalog backlinks. Screenshot GSC metrics as a dated baseline. A comprehensive SEO audit ensures nothing is missed. A website audit checklist can help structure the process.
Step 20: Create a migration plan with timeline, redirect strategy, and rollback procedure. Unplanned migrations routinely lose rankings — sometimes permanently. A rollback plan is insurance: if something goes catastrophically wrong, you revert within hours rather than scrambling to fix a broken new site. How to verify: Plan includes complete redirect map, staging protocol, go-live timeline with assigned responsibilities, and clear rollback criteria.
Redirect Mapping and 301 Redirects
Step 21: Create a comprehensive redirect map for every old URL to its new equivalent. Redirect mapping is the single most critical SEO step when replacing an existing site — and the one most frequently skipped.
Think of it as a forwarding-address list. Every old URL that has backlinks, ranks for a keyword, or receives traffic must point to the most relevant new page. Skip this and you erase months — sometimes years — of SEO value overnight.
| Old URL | New URL |
| /about-our-company | /about |
| /services/search-engine-optimization | /expertise/seo |
| /blog/2024/03/seo-tips | /blog/seo-tips |
| /products/widget-pro | /solutions/widget-pro |
How to verify: Export all indexed URLs from your existing site (crawl data + Google Search Console). Map each to its new equivalent. No high-traffic or high-authority URL left unmapped. A comprehensive SEO audit identifies every URL that carries ranking value.
Step 22: Implement 301 redirects and test for chains and loops. A 301 redirect (permanent redirect) tells search engines to transfer ranking signals to the new URL. Chains (A→B→C) dilute signals with each hop. Loops (A→B→A) break the page entirely. How to verify: Bulk-test every redirect. Each should resolve in a single hop, return a 301 status code (not 302, which signals a temporary move), and land on the correct destination.
Fix Crawl Errors, Broken Links, and 404 Page
Step 23: Identify and resolve all crawl errors and broken links before launch. First impressions matter. Google allocates a crawl budget to each site, and wasting it on error pages means fewer real pages get discovered. Broken links — internal and outbound — compound the problem by stopping visitors cold. How to verify: Run a full crawl using a free website audit tool or paid crawler. Filter for 4xx and 5xx status codes. Review the broken-link report and fix or remove every broken link. Resolve every error before go-live. Post-launch, check the GSC Pages report daily for two weeks.
Step 24: Create a custom 404 error page that retains visitors. Broken links will happen post-launch despite your best efforts — users will mistype URLs, external sites will link incorrectly, and cached search results will outlive old pages. A default server 404 is a dead end. A custom 404 with navigation, a search bar, and links to popular content keeps visitors on your site instead of bouncing. How to verify: Navigate to a nonexistent URL on your site. Confirm the 404 page returns a proper 404 status code (not a 200 soft 404), includes site navigation, and offers a path back to useful content.
Structured Data and Schema Markup
Step 25: Implement schema markup for key page types. Schema markup is code that helps search engines understand content context — and unlocks rich results (star ratings, FAQ accordions, breadcrumb trails, how-to steps) that increase click-through rates significantly. How to verify: Identify applicable schema types: Organization, LocalBusiness, FAQ, HowTo, Product, BreadcrumbList. Validate with Google’s Rich Results Test.
Step 26: Prioritize launch-critical schema; plan post-launch additions. You do not need everything on day one.
| Launch-Day Priority | Post-Launch Additions |
| Organization or LocalBusiness (homepage) | FAQ schema (support/resource pages) |
| BreadcrumbList (site-wide) | HowTo schema (tutorial content) |
| Page-specific schema (Product, Article) | Review/Rating schema (testimonials) |
How to verify: Confirm minimum: Organization or LocalBusiness on the homepage, BreadcrumbList site-wide, page-specific schema on relevant content pages.
Step 27: Configure content publish dates and freshness signals in structured data. Google uses published and modified dates as freshness ranking signals, and these dates appear directly in search results. Missing or incorrect dates mean your brand-new content looks undated — or worse, gets deprioritized against competitors with clear freshness signals. How to verify: Confirm Article schema includes datePublished and dateModified fields with accurate values. Verify dates render correctly in Google’s Rich Results Test. Set up a process to update dateModified whenever content is substantively revised.
Technical audits like redirect mapping and schema implementation are where most DIY launches go wrong. If these steps feel outside your team’s wheelhouse, a professional SEO audit can catch what you might miss.
Performance and Speed Optimization
A technically sound, well-optimized site still needs to be fast. Page speed directly impacts both rankings and conversion rates — a Deloitte study commissioned by Google found that a 0.1-second improvement in mobile load time increased retail conversions by 8.4%. Every additional second of load time costs you visitors who will never come back.
Page Speed and Load Time
Step 28: Optimize images with modern formats and compression. Images are among the most common causes of slow load times and inflated LCP scores. A single uncompressed hero image can add seconds to your page load. How to verify: Audit for WebP or AVIF format, appropriate dimensions (never serve a 4000px image in an 800px container), and compression. Implement lazy loading for below-the-fold images. A speed optimization audit identifies every performance bottleneck systematically.
Step 29: Minify CSS, JavaScript, and HTML; eliminate render-blocking resources. Unminified code and render-blocking scripts delay page rendering — the browser cannot paint your page until it finishes downloading and parsing these files. How to verify: Run Lighthouse, review the “Opportunities” section. Target a performance score above 90. Third-party scripts (analytics, chat widgets, ad tags) are frequent offenders.
Hosting and Server Configuration
Step 30: Confirm hosting meets performance benchmarks. No front-end optimization compensates for a slow server. Time to First Byte (TTFB) — the time between a browser’s request and receiving the first byte of response — is your baseline minimum load time. Everything else stacks on top. How to verify: Target TTFB under 800 milliseconds. Confirm cache-control headers for both browser and CDN caching. Verify a CDN is active if your audience is geographically distributed.
HTTPS and Security Protocols
Step 31: Confirm HTTPS with a valid SSL/TLS certificate. HTTPS is a confirmed ranking signal. Browsers flag HTTP sites as “Not Secure” — a trust killer for any business. How to verify: Validate that the certificate is current, properly installed, and covers all subdomains.
Step 32: Redirect all HTTP traffic to HTTPS and resolve mixed content. Mixed content — a secure page loading resources over insecure HTTP — triggers browser warnings and undermines the security your certificate provides. HTTP duplicates also split ranking signals. How to verify: Crawl for mixed-content warnings. Confirm every HTTP URL redirects to HTTPS via 301.
Step 33: Implement cookie consent and privacy compliance before launch. GDPR, CCPA, and similar regulations require consent mechanisms before tracking cookies fire. Non-compliance carries legal risk — and poorly implemented consent banners frequently break analytics tracking, inject render-blocking scripts, or cause layout shifts that tank your CLS score. How to verify: Confirm your consent banner loads without breaking page speed or analytics. Test that GA4 and other tracking scripts fire only after consent is granted in regions that require it. Verify your privacy policy page is published, linked in the site footer, and accurately describes your data practices.
Analytics and Tracking Setup
You cannot manage what you cannot measure. Your new site SEO setup is incomplete without analytics configured before launch — not after — so you have a clean baseline from day one rather than flying blind during the most critical period.
Google Analytics and Tag Manager
Step 34: Install and configure Google Analytics 4 with event tracking. GA4 tracks behavior, sources, and conversions. Pre-launch install means clean data from the start — no retroactive setup, no gaps. How to verify: Install via a tag management system. Verify with Preview mode or DebugView. Confirm page views, form submissions, and CTA clicks are tracking.
Step 35: Configure conversion goals and attribution. Without goals, analytics is just traffic numbers with no business meaning. How to verify: Define three to five key conversion events — form submissions, phone clicks, demo requests, purchases — whatever maps to revenue. Test end-to-end. Confirm attribution settings match your sales cycle.
Search Console and Performance Monitoring
Step 36: Verify the site in Google Search Console and configure monitoring alerts. GSC is the only tool showing exactly how Google sees your site — what it has indexed, what errors it has found, how pages perform in search. Post-launch issues are time-sensitive; a crawl error unnoticed for two weeks is two weeks of lost rankings. How to verify: DNS verification (most reliable method). Submit sitemap. Confirm data flows. Set up email alerts in GSC. Plan for daily review during the first two weeks, then weekly.
Heatmaps and User Behavior Tools
Step 37: Install heatmap and session-recording tools on key pages. Analytics tells you what users do. Heatmaps show you why — where they hesitate, where they abandon. This identifies UX friction before it becomes a ranking problem. How to verify: Install on the homepage and top-traffic pages. Run a test recording to confirm scroll, click, and session data capture.
Google Business Profile
Step 38: Connect your new site URL to Google Business Profile. For businesses with a physical location or service area, GBP is a critical local SEO asset. A relaunch that changes your URL structure without updating GBP means your listing points to old pages — or worse, to 404s. Even for new sites, connecting GBP from day one establishes your local presence in search. How to verify: Log into Google Business Profile. Confirm the website URL points to your new homepage. Update any UTM parameters. If your NAP (name, address, phone) has changed, update it simultaneously. Verify the listing is live and approved.
Staging Migration Test
Step 39: Test the complete migration on staging before touching production. Staging catches issues where mistakes are invisible to users and search engines. This is your last controlled environment — once you go live, every problem becomes public. How to verify: Crawl staging with the production domain simulated. Verify redirects resolve correctly, canonicals point to production URLs (not staging), schema validates, and all tracking code fires. Compare against the audit baseline from Step 19.
Launch Day: The Go/No-Go Checklist (Steps 40–43)
Everything above happens before the day itself. What follows is your website go-live SEO protocol — concise, sequential, no room for ambiguity.
Final Pre-Launch QA Pass
Step 40: Run a final full-site crawl on the production-ready staging environment. Last-minute changes — a quick copy edit, a plugin update, a config tweak — can reintroduce issues you already fixed. How to verify: Compare against your baseline crawl. Confirm: redirects resolve, no noindex tags reintroduced, canonicals point to production (not staging), schema validates.
DNS Propagation and Cache Verification
Step 41: Monitor DNS propagation and clear all caching layers. DNS changes translate your domain name to a server address. Propagation can take minutes to 48 hours, though most updates complete within a few hours. During that window, some visitors see the new site while others still see the old one. How to verify: Use a DNS propagation checker across regions. Clear CDN, server, and application caches. Test from multiple devices and networks — not just your office connection.
Real-Time Post-Go-Live Verification
Step 42: Verify critical pages, redirects, tracking, and indexability in production. Staging is not production. Server configs, CDN behavior, and DNS resolution can all cause differences. How to verify: Manually check 10–20 critical pages. Test 10–20 redirects. Verify GA4 real-time data. Request indexation of key pages in GSC.
Real-Time Migration Monitoring
Step 43: Monitor the migration in real time through the go-live window. Even well-planned migrations hit surprises — a server hiccup under load, a CDN that behaves differently in production, a redirect rule that conflicts with another. These are not failures of planning. They are the reality of complex operations. How to verify: Active monitoring of crawl data, GSC, analytics, and server logs during the go-live window. Escalation paths defined before you start.
Post-Launch: Protect What You Built (Steps 44–50)
On-site SEO is half the equation. Your backlink profile — links from other websites pointing to yours — carries significant ranking weight and needs deliberate management through a launch.
Backlink and Off-Page SEO Considerations
Backlink Audit and Cleanup
Step 44: Audit your backlink profile for quality, relevance, and toxic links. On a relaunch, your backlink profile follows you. On a new domain, this establishes your baseline. How to verify: Export backlink data from GSC or a backlink analysis tool. Review linking domains. Identify spammy or irrelevant links.
Important caveat about Google’s Disavow Tool: Most sites do not need it. Google has said so explicitly. The Disavow Tool is warranted only when you have a significant volume of spammy or artificial links AND a manual action (or credible risk of one). Overzealous disavowing — preemptively rejecting links that look suspicious but are actually harmless — removes legitimate link equity and does more harm than good. Do not treat disavowing as routine maintenance.
Link-Building Strategy Post-Launch
Step 45: Develop a post-launch link acquisition strategy. New and relaunched sites need fresh backlinks to signal authority. A launch is a natural link-building opportunity — you have news to share. How to verify: Build a content marketing calendar with linkable assets. Notify sites that linked to your old content about new URLs. Pursue PR opportunities around the launch.
Post-Launch SEO Monitoring
Launch day is the starting line, not the finish. No SEO checklist for a new site is complete without a structured monitoring plan for the first 30–90 days — the critical window where problems either get caught early or compound silently.
Indexation and Crawl Monitoring
Step 46: Monitor indexation and crawl health daily for the first two weeks. This is when indexation issues surface. Google is processing your new structure, discovering pages, evaluating redirects. Misconfigurations reveal themselves now. How to verify: GSC Pages report, daily. Compare indexed count against expected. Investigate “Excluded” pages — they may reveal noindex tags, canonical conflicts, or crawl blocks you missed.
Performance and Traffic Analysis
Step 47: Compare pre- and post-launch metrics systematically. Some fluctuation in the first two to four weeks is normal as Google reprocesses your site. Sustained drops beyond that window signal real problems.
| Frequency | Timeframe | What to Check |
| Daily | First 2 weeks | Indexation count, crawl errors, redirect failures, real-time analytics |
| Weekly | Weeks 3–12 | Traffic trends, keyword positions, Core Web Vitals, conversion rates |
| Monthly | Ongoing | Content performance, backlink growth, competitive position, CWV field data |
How to verify: Week-over-week traffic, impressions, and average position in GSC. Flag any page dropping 10+ positions. In GA4, compare bounce rate, session duration, and conversion rate against your pre-launch baseline.
Continuous Optimization and Updates
Step 48: Establish an ongoing optimization cadence. SEO is not a one-time project. Search engines reward consistent activity, fresh content, and ongoing maintenance. How to verify: Monthly checklist: content updates, crawl error review, Core Web Vitals check, backlink monitoring, ranking tracking. Regular competitor analysis keeps you ahead of shifting dynamics.
Post-Migration Tracking
Step 49: Track traffic, rankings, and indexation against your pre-launch baseline for 30–90 days. Two to four weeks of fluctuation is normal as Google reprocesses your site. Sustained drops beyond that window mean something is unresolved. How to verify: Weekly comparison against the pre-migration baseline you captured in Step 19. Investigate any page losing 10+ positions. Spot-check old URLs from the redirect map to confirm they resolve correctly.
Step 50: Update all external references to old URLs. Old URLs in email signatures, social profiles, directories, and partner sites send visitors to redirected pages at best, broken ones at worst. Redirects work, but direct links are always better. How to verify: List all known external references. Update each to the new URL. Prioritize Google Business Profile, major directories, and partner sites.
Preparation, Verification, Follow-Through
A successful website launch comes down to three things: redirect mapping to preserve what you have built, pre-launch crawl verification to catch what humans miss, and post-launch monitoring to detect problems before they compound.
This new website SEO checklist covers every phase — pre-launch, launch-day, and post-launch — because each depends on the one before it. A perfect redirect map means nothing if a noindex tag blocks the whole site. Flawless technical setup means nothing if nobody is watching the data in the weeks that follow. And 30 days of diligent monitoring means nothing if the fundamentals were never right.
The difference between a launch that protects your investment and one that erases it is not luck. It is preparation, verification, and follow-through — an SEO launch plan executed with the same rigor you brought to the design and development.
A checklist is only as good as the team executing it. If you want a partner who has managed hundreds of these launches without traffic loss, contact us today for custom SEO services.

