
Instructions on Using the Tool

Grasping the details of image resolutions, like a 512 x 256 pixel dimension, is essential for graphic designers, photographers, and web developers. These measurements indicate the image’s width and height in pixels, the small color dots that constitute a digital picture. The aspect ratio for an image measuring 512px by 256px stands at 2:1, indicating the image’s width is double its height. Although this specific resolution might not align with the standard for numerous displays, it fulfills several unique functions within the realm of digital technology.
The number of pixels alone, however, does not tell us about the pixel density, which is the number of pixels per inch (PPI). This measure is related to the clarity and sharpness of an image, particularly when printed. Higher pixel densities generally lead to crisper images, although the difference becomes less noticeable beyond a certain threshold. Converting an image to a resolution of 512px by 256px can be a straightforward process using various image editing software, as long as one understands the implications on aspect ratio and maintains a balance between quality and file size.
When converting images to different resolutions for various platforms—whether for print, web, or mobile devices—we must consider the end use to optimize visual clarity and load times. Resizing and conversion should be done thoughtfully to ensure that the final image meets the requirements without sacrificing quality.
Key Takeaways
- A 512 x 256 pixel image has a 2:1 aspect ratio.
- Pixel density, distinct from resolution, plays a key role in image clarity.
- Proper resizing techniques ensure image quality is maintained across platforms.
Understanding Image Basics

Before we explore the specifics of a 512×256 pixel image converter, let’s get to grips with the key aspects of image formats and types and how they pertain to resolution and image quality. These foundation elements are critical in understanding how we can manipulate and utilize digital images effectively.
Image Formats and Types
The format of an image is a crucial factor determining its compatibility and use. Common image formats include JPEG, PNG, GIF, and BMP. Each format comes with its own advantages and trade-offs. JPEGs, for example, typically offer a smaller file size at the cost of some image quality loss due to compression. PNGs, on the other hand, maintain a higher image quality thanks to lossless compression, making them ideal for images that require transparency or lack large uniform color areas.
- JPEG: Best for photos with complex color patterns, balancing quality and file size.
- PNG: Ideal for web images requiring transparency without sacrificing quality.
- GIF: Suited for simple animations and small icons.
- BMP: Offers high quality but with larger file size, not recommended for web.
Understanding Resolution and Image Quality
Resolution, in terms of image dimensions, refers to the width and height of an image in pixels. It directly influences the level of detail a picture holds—more pixels generally mean a sharper and more detailed image. However, resolution isn’t the sole factor in determining image quality. Pixel density, or the number of pixels per inch (PPI), also affects how an image looks, especially in print. A higher PPI will display a sharper image on a smaller surface, whereas the same number of pixels spread out over a larger surface will have a reduced pixel density and may appear less sharp.
- Resolution: 512×256 pixels – width by height.
- Pixel Density: Determined by the output device, higher for sharp prints.
When creating a 512px by 256px photo, it’s essential for us to use an image converter that respects these basics to achieve the best quality.
Image Resizing and Conversion
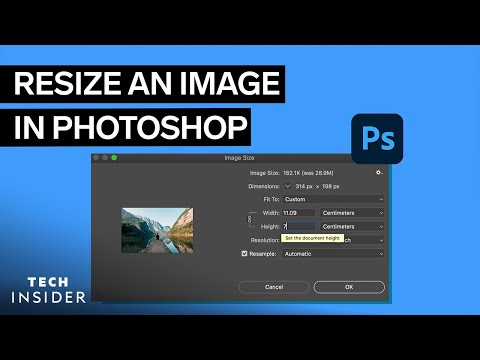
When resizing an image to a 512px x 256px dimension, we’re adjusting its width and height while maintaining the essential pixel information. The process affects aspects such as aspect ratio, resolution, and pixel density, which are crucial for the image’s final use.
How to Resize Images
We can resize images using various methods while preserving the clarity and integrity of the picture. To change an image to the specific dimension of 512 pixels in width and 256 pixels in height, we follow this process:
- Select an Image Resizer: Choose an online image resizer or software that supports your image format.
- Input Desired Dimensions: Enter 512 as the width and 256 for the height.
- Maintain Aspect Ratio: Ensure the aspect ratio is correct. For a 512×256 image, the aspect ratio is 2:1, meaning the width is twice as long as the height.
- Adjust Quality: Apply any necessary filters or adjustments to minimize quality loss.
- Review & Confirm: Preview the resized image to ensure it meets specifications then save the new image.
Resizing can often mean a change in pixel density depending on the size of the display or print.
Image File Format Conversion
Image file conversion involves changing the image from one file format to another. This can affect the image’s quality, file size, and compatibility with different software and devices. Here’s how we convert an image’s file format:
- Select File Conversion Tool: Use a reliable tool that supports conversion between common file formats such as JPEG, PNG, TIFF, etc.
- Upload Image: Open the image file in the chosen converter tool.
- Select Target Format: Pick the desired format that suits your needs, which may be based on quality, size, or compatibility considerations.
- Convert and Save: Execute the conversion process and then download or save the newly formatted image.
When we’re resizing and converting images, it’s crucial we ensure that the conversion process preserves as much of the image’s original quality as possible, unless a reduction is necessary for the image’s intended use.
Optimizing for Different Platforms

When converting images to 512px x 256px, it’s crucial to consider the varying requirements of different platforms to ensure image clarity and appropriate engagement.
Social Media Optimization
For platforms like Facebook and Instagram, images often appear in different sizes depending on where they’re viewed. We must tailor our photos to each platform’s specifications. For instance, Facebook generally favors images with a 1:1 or 4:3 ratio for feed posts. Instagram also utilizes the 1:1 ratio prominently but allows 4:5 for portrait posts and 16:9 for landscape.
-
Facebook: Optimize your image at 512x256px, ensuring it’s in a jpg or png format for the best quality. Remember that the platform compresses images over 100 kilobytes.
-
Instagram: When scaling to 512x256px, the image may need cropping to fit Instagram’s aspect ratios. Use a jpg or png to maintain quality within Instagram’s preferred file size.
Web and Mobile Optimization
The key to web and mobile optimization is balancing resolution and file size for quick loading without sacrificing image quality. We must consider the display requirements of mobile devices and various web browsers.
-
Mobile Devices: Aim for high pixel density while keeping file sizes small, preferably under 100 kilobytes, to ensure quick loading times over mobile networks.
-
Web Browsers: Support a range of file formats like gif, png, jpg, jpeg, bmp, webp, svg, ico, tiff, ps, eps, and exr. Vector image formats are excellent for scalability without quality loss on web platforms.
To store and retrieve images efficiently, consider using cloud storage services which often have built-in optimization for different formats and can serve the correct file type per platform or device request.
By adhering to this advice, we can deliver high-quality images that are appropriately optimized for user engagement across various media platforms and devices.
Advanced Topics in Image Conversion

When we delve into the realm of image conversion, we often encounter complex scenarios that go beyond simple resizing tasks. If we’re working with 512px x 256px photos, it’s crucial to understand the intricacies of vector and raster images, as well as the privacy and storage concerns when using online conversion tools.
Handling Vector and Raster Images
Vector images stand out due to their scalability without loss of resolution. When we convert images to a specific size like 512px x 256px, it’s essential to note that vector formats, such as SVG or AI, maintain the highest quality irrespective of pixel dimensions. On the other hand, raster images, saved in formats like JPEG, PNG or TGA, are pixel-based and can lose quality if not resized carefully. Here’s a quick look at the characteristics:
- Vector Image Formats: Infinite scalability, often used for logos and illustrations.
- Raster Image Formats (JPEG, PNG, TGA): Fixed number of pixels, best for detailed photographs.
To ensure a raster image fits a resolution of 512×256 while maintaining quality, we may need to consider resampling, which recalculates and alters pixel information.
Privacy and Storage Concerns in Online Conversion
When we convert images online, privacy becomes a paramount issue. Many free online tools offer quick conversions in seconds, but they may store our images on their servers. For images stored in formats like HEIC or TGA, online tools can provide an easy way to convert them to more widely-used formats, but we should always verify if they comply with strict privacy policies.
- Privacy: Always check the service’s privacy policy before uploading images.
- Storage: Look for services that offer secure, temporary cloud storage and ensure that our images are deleted promptly after conversion.
By being mindful of these advanced topics in image conversion, we preserve the integrity of our 512px x 256px images, whether for personal use or professional purposes, and safeguard our privacy in the process.

