
Instructions on Using the Tool

Diving into online photos? Grasping the nitty-gritty of size specifics is key. Take the 300 by 80 pixel size; it punches above its weight in web design, where squeezing into tight spots is the name of the game. This size whips out an aspect ratio of 3.75:1, basically how wide it is compared to how tall. Although the pixel count stands firm, how packed those pixels are—pixels per inch (PPI)—changes based on where you spot the image. Why keep reading? Because mastering these image tricks opens a world of slick design doors just waiting for you.
Converting an existing image to a 300px by 80px photo involves resizing it while attempting to maintain the original’s aspect ratio and image quality. To ensure the integrity of an image isn’t compromised during this process, several factors must be taken into account, such as compression artifacts or pixelation. Resizing can be a straightforward task with the help of various graphic editing tools and web-based converters specifically tailored for this purpose. These tools also offer the option to adjust resolution and pixel density to match the requirements of different display mediums, whether it’s for high-resolution screens or thumbnail images on websites.
Key Takeaways
- Aspect ratio and resolution are key components in image resizing.
- Maintaining image quality requires consideration of pixel density and compression.
- Tools for image conversion help tailor visuals to specific online requirements.
Understanding Image Resolution and Aspect Ratios
When we discuss image resolution and aspect ratios, we focus on the composition of an image in terms of pixels, the significance of these pixels in defining both the size and the quality of the image, and how these elements correlate to create the visual clarity of a photo.
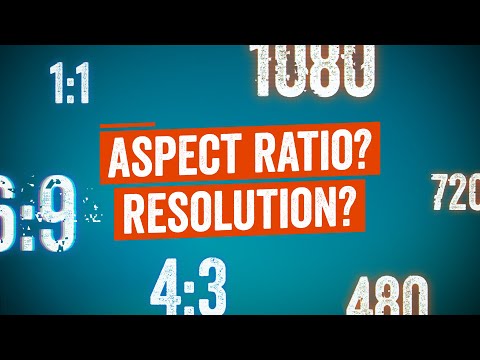
The Role of Pixels and Aspect Ratio
Pixels are the smallest units that make up an image on a digital display, where each pixel is a dot of color. An image file’s dimensions, measured by width and height in pixels, determine its aspect ratio—the ratio of its width to its height. Common aspect ratios include 16:9, which is widescreen format, 4:3, which offers a more square frame, and 1:1, which is perfectly square. A 300 x 80 pixel image, therefore, has an aspect ratio of 15:4, which is unconventional and may be more panoramic in appearance.
Pixel Density and Its Impact on Quality
Pixel density, expressed in pixels per inch (ppi) or dots per inch (dpi), measures how many pixels are in a one-inch line of a digital image, affecting the image’s resolution and quality. The more pixels per inch, such as 300 ppi, the higher the level of detail and sharpness the image will have, enhancing visual quality. On the contrary, if we enlarge an image with fewer pixels to a larger size, we risk losing quality, resulting in a pixelated or blurry image. Maintaining a high pixel density is crucial for achieving clear and detailed printouts or displays, whereas for digital purposes, the pixel density should match the display’s specifications to ensure the best viewable quality.
Converting and Resizing Images
When we need to tailor an image to fit specific dimensions or formats, converting and resizing are essential techniques. Both play crucial roles in managing file size and quality while ensuring the image meets the required criteria.
Step-by-Step Image Resizing
- Select Image: We start by choosing the image we want to resize. It’s essential to note the current dimensions and file size.
- Determine New Dimensions: We calculate the desired dimensions, making sure to maintain the aspect ratio to prevent distortion. For a 300px by 80px image, we aim for a 3.75:1 ratio.
- Resize: Using an image resizer, we input the new dimensions (300px x 80px). We have tools to either manually enter values or to use sliders for visual adjustments.
- Review: Before saving, we examine the resized image. We ensure the quality has not been compromised and the new dimensions are correct.
- Save: Once satisfied, we save the image in the desired format. Popular formats include JPG, PNG, GIF, BMP, TIFF, ICO, EPS, SVG, and WebP.
Recommended Tools for Image Conversion
- Online: For free and easily accessible options, online tools like Adobe Photoshop Express, Pixlr, or Web Resizer are solid choices. They allow us to convert and resize images in various formats.
- Windows and Mac: Built-in programs such as Paint for Windows and Preview for Mac offer basic resizing functions. For a more advanced approach, we recommend professional software such as Adobe Photoshop or GIMP.
- Image File Size Calculator: To predict the new file size after conversion, we can use online calculators. These are helpful in estimating space requirements and maintaining quality.
In conclusion, with the right tools and techniques, we can accurately convert and resize images to fit specific requirements like the 300px by 80px dimension, ensuring that they maintain their quality and are compatible with different platforms and devices.
Maintaining Image Quality during Conversion

When converting a 300 x 80 pixel image, it is critical to prioritize preserving quality. Our focus is to retain the sharpness and detail without increasing the file size unnecessarily.
Understanding Image Formats and Quality
Common image formats include JPG (or JPEG), PNG, BMP, TIFF, WebP, SVG, and EPS. Each format uses a different method to compress and store image data; therefore, understanding their characteristics is essential. For instance, JPG is a lossy format, meaning it reduces file size by compressing the image, which can lead to a decrease in quality if not handled correctly. PNG is lossless but can result in larger file sizes, making it suitable for maintaining the highest quality for simple graphics.
If our image is needed for print, using formats like TIFF ensures minimal loss of quality, whereas SVG or EPS can be excellent choices for graphics due to vector-based scalability.
Optimizing Images for Web and Print
For web use, optimizing an image’s size and resolution matters greatly. We must resize images carefully to prevent losing quality. Using a pixels to print size calculator can assist in achieving the appropriate image dimensions for print, like converting pixel dimensions to inches.
Ensuring the image retains its sharpness at 1920×1080 can involve upsampling the image in a calculated manner. Precise feedback mechanisms, perhaps through a preview option or a bookmark feature for adjustments, can provide an opportunity to make corrections.
When preparing to upload, using reliable tools will ensure the final link directs users to an image that’s been optimized for its intended purpose. Whether for crisp web graphics or high-quality print work, the right tools and techniques ensure image quality remains professional.
Practical Tips and Tricks

We’ll cover some essential strategies for working with 300px by 80px images, from utilizing modern tools to personalizing and troubleshooting.
Utilizing Aspect Ratio Calculators
When resizing images, maintaining the correct aspect ratio is crucial to prevent distortion. For a 300px by 80px image, the aspect ratio is 3.75:1. Using an aspect ratio calculator simplifies this task, ensuring that we maintain proportions while changing sizes. We bookmark our favorite calculator for easy access.
- Enter current dimensions (300px x 80px)
- Enter new width or height
- Calculator provides correct corresponding value
By utilizing online tools, we maintain the image’s integrity during resizing without losing quality.
Image Editing and Personalization
To create or edit an image to a specific size, such as 300px by 80px, image editing software is indispensable. Whether we’re on an iPhone or a computer, the process typically involves:
- Upload or open the image file.
- Select image within the editing tool.
- Access the resize or crop feature.
- Resize image to the desired dimensions, ensuring the aspect ratio matches our needs.
- Apply any personalization or quality adjustments, keeping an eye on the final file size.
Consistently monitor resolution and pixel density to achieve the desired quality without losing quality.
Troubleshooting Common Issues
When we encounter obstacles like an image not saving at the correct dimensions, or losing quality, we assess the scenario systematically:
- Verify that the aspect ratio is preserved. If not, adjust using the aspect ratio calculator.
- Check file size restrictions when attempting to upload; some platforms limit size affecting quality.
- Confirm the image is saved in the correct format.
For persistent issues, we seek feedback through user forums or customer support for the software being used.

