Originally posted on March 22, 2024 @ 3:31 am

Instructions on Using the Tool

As we explore the world of digital imagery, grasping the intricacies of image resolution and dimensions is vital. A frequently observed resolution in mobile devices and specific graphics stands at 240 x 320 pixels. This dimension is described by its width and height in that order and adheres to a conventional aspect ratio of 3:4. This indicates that for every 3 units of width, it possesses 4 units of height, which results in a portrait orientation. Pixel density, which is calculated in pixels per inch (PPI), varies with the size of the screen and significantly influences the quality of the image. Generally, a higher pixel density translates to an image that is sharper and clearer.
Converting images to this resolution might be needed for various applications ranging from web design to creating content for devices that support this specific resolution. It’s important to ensure that the aspect ratio is maintained during conversion to prevent distortion. Many image converters available are easy to use and can automatically adjust the image to the desired size.
Creating a photo with the 240px x 320px resolution can be done using these image converters without compromising on quality. It might involve cropping or scaling the image to fit into this dimension. While scaling down maintains quality, enlarging an image from a lower resolution may result in pixelation. Hence, it’s advisable to start with an image that is at least as large as the desired conversion size. Ensuring the final image’s clarity and usability across platforms is key.
Key Takeaways
- A 240 x 320 pixel resolution adheres to a 3:4 aspect ratio and is commonly used in mobile devices and specific graphics.
- Converting an image to this size should maintain the aspect ratio to prevent distortion and can be done using various online converters.
- When resizing images, maintaining image quality is crucial, and it’s best to use high-resolution originals for conversion to avoid pixelation.
Understanding Pixels and Aspect Ratio

In the realm of digital images, understanding pixels and aspect ratio is essential as they dictate the quality and proportion of the photo. A 240px by 320px image is our focus, and we’ll explain its specifications.
Pixels and Image Resolution
Pixels, short for picture elements, are the tiny dots that make up a digital image. The resolution of an image, often measured in pixels, refers to the amount of detail it contains. Larger resolutions mean more pixels, which usually translates to finer details. For a 240px by 320px image, the resolution indicates its width and height in pixels. It is important to use images with appropriate resolutions because fine details might get lost when viewing on larger displays if the pixel count is too low.
Aspect Ratios Explained
The aspect ratio of an image describes the proportion between its width and height. It’s often presented as two numbers separated by a colon, such as 3:4. This proportion is crucial because it affects how the image displays across different devices without being distorted. For a 240px by 320px image, the aspect ratio is 3:4, which means the width is three-quarters the size of the height.
Calculating Pixel Density
Pixel density measures how closely packed the pixels are within a given space, often in pixels per inch (PPI). To calculate it, divide the number of pixels by the length of the screen in inches. High pixel density indicates a sharper image as more pixels fit into a smaller area, making individual pixels less discernible. The pixel density of a 240px by 320px image will vary depending on the screen size it’s displayed on.
By understanding the details of pixels, aspect ratio, and pixel density, we can ensure that our 240px by 320px photos display clearly and correctly on various devices.
Converting Images for Different Media

When we deal with different media formats, whether it’s a website, a print project, or mobile applications, understanding how to convert 240px x 320px photos to maintain clarity and proper resolution is essential. Each medium has its own requirements for image formats and dimensions.
Image File Formats
In the realm of digital media, we encounter a variety of image file formats. The most common ones include JPEG (or JPG), which is widely used due to its balance of quality and file size. Meanwhile, PNG provides transparency and is preferred for web graphics. GIF is great for simple animations. Formats like TIFF and BMP offer high-quality images at the cost of larger file sizes. For logos and illustrations, vector image formats like SVG or EPS are ideal since they scale without loss of quality. For online icons, ICO is standard and WebP is an efficient format for web images offering good quality at smaller file sizes.
- JPEG/JPG: Best for photographs and real-world images
- PNG: Good for web graphics with transparency
- GIF: Suitable for simple web animations
- WebP: Efficient for the web, balancing quality and size
- TIFF: High-quality images, often used in printing
- BMP: Large file size, used for high-quality graphics
- Vector Formats (SVG/EPS): Scale without quality loss, perfect for illustrations
Print Size and Online Usage
For print, our images need a much higher resolution, typically starting at 300 dots per inch (DPI), whereas online images are typically displayed at 72 to 96 DPI. Converting a 240px x 320px photo for print might involve increasing the resolution, which could affect the crispness of the image. It’s essential to ensure the photo is of high quality to begin with. For online usage, including platforms like Facebook, Instagram, and websites, we need to balance quality with load times; hence, a lower resolution may be acceptable.
- Print: 300 DPI or higher for clarity
- Online: 72 to 96 DPI to optimize load times and maintain visual quality
Mobile-Friendly Dimensions
Creating mobile-friendly images requires us to resize the photo to dimensions that display well on mobile devices. Since screen sizes and resolutions vary, we often aim for a balance that looks good on most devices. A 240px × 320px photo is typically suitable for low-resolution smartphones, but newer devices might need higher resolution images to avoid pixelation. We consider the aspect ratio, pixel density, and screen resolution when converting an image to make sure it fits mobile standards.
- Low-Resolution Mobile Screens: 240px x 320px may suffice
- High-Resolution Mobile Screens: Larger image dimensions needed for crisp display
By understanding the nuances of converting images for different media, we can ensure that our visuals are displayed optimally, regardless of where they are viewed.
Step-by-Step Guide to Resizing Images
Resizing an image to a specific dimension, such as 240 pixels by 320 pixels, can be easily achieved with the right tools and techniques. We’ll cover the use of online image resizers, how to retain the quality of your image during the resize process, and how to customize the dimensions to suit your needs.
Using Online Image Resizers
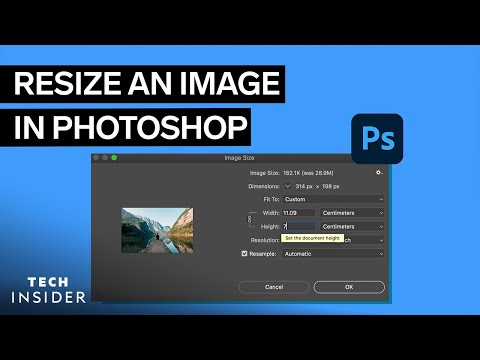
Online image resizers offer a convenient way to quickly resize images. To begin this process, we first select a reliable online image resizer. Once we upload our image, we can specify the desired width and height – in this case, 240px by 320px. Most online tools will also provide us with options to maintain the aspect ratio and choose the output file format. After adjusting the dimensions, we simply download the resized image.
- Find a trustworthy online image resizer.
- Upload the image file.
- Set the desired width and height.
- Maintain aspect ratio (if necessary).
- Choose a file format (JPG, PNG, etc.)
- Click resize and download the new image.
Strategies for Quality Retention
When resizing images, it’s crucial to retain as much of the original quality as possible. To do this, we look for online tools that allow us to adjust the DPI (dots per inch) settings and offer a pixel to print size calculator. If we are downsizing, we ensure that the percentage of the original size is appropriate to avoid pixelation.
- Adjust DPI settings for print quality.
- Use a pixel to print size calculator for accuracy.
- Opt for a minor reduction in dimensions to preserve quality.
- Review the resized image closely for quality loss.
Customizing Dimensions
To customize an image’s dimensions without compromising the quality, we need to understand the relationship between the image’s resolution and its file size. Ideally, we use an image file size calculator to help predict the outcome of resizing. We adjust the dimensions in small increments and check the results, especially when we’re trying to convert images to a particular pixel density for digital displays.
- Use an image file size calculator for precision.
- Adjust dimensions in small increments.
- Preview the image after each change.
- Aim for the highest quality within the required dimension.
Safeguarding Privacy and Security

When converting an image to a 240×320 pixel resolution, especially when using an Internet-based tool, privacy and security are paramount. Below, we outline some critical steps to maintain these aspects:
- Before Uploading: Ensure that the image does not contain sensitive information.
- Secure Connections: Always use services that provide a secure connection (HTTPS), preventing unauthorized interception during transfer.
- Cloud Storage Caution: If utilizing cloud storage post-conversion, check the provider’s privacy policy. Cloud services should offer encryption for stored images for additional security.
Privacy Measures:
- Anonymize Data: Remove or blur identifiable features within images before upload.
- Image Quality Control: Higher quality images can contain more metadata, which could be sensitive. Balance the need for image quality against the risk of exposing excess information.
Ease of Use:
- Choose a converter that is easy to use, but also offers robust privacy protection.
- Conversion tools, ideally, should not require extensive permissions or access to personal files.
For Mac Users:
- Mac users should verify that the converter is compatible with macOS and does not compromise system integrity.
| Aspect | Steps to Secure |
|---|---|
| Privacy Protection | Anonymize identifiable data |
| Secure Transmission | Use HTTPS for uploads |
| Cloud Security | Ensure encrypted storage and check privacy policy |
| Image Quality | Adjust to minimize metadata risk |
| Compatibility | Confirm the converter’s compatibility for Mac |
These listed precautions help us protect our privacy and keep our data secure while enjoying the benefits of an online 240×320 pixel image converter.

