
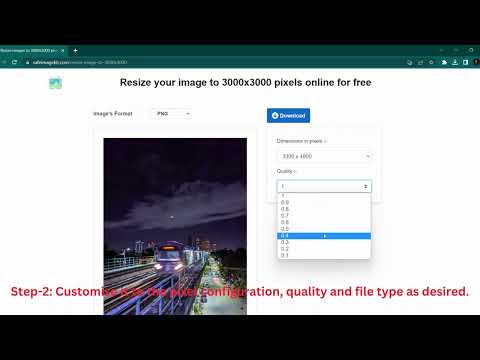
Instructions on Using the Tool

Diving into the world of digital photos, you gotta know a thing or two about how clear, crisp, and awesome these pictures look. Imagine a picture with 2400 x 2400 tiny dots, or pixels. Every single dot counts here, making the picture super detailed from top to bottom and side to side. This equal sides thing makes it a square, like your favorite Instagram photo! People love using this square shape for sharp profile pics, cool product shots, and eye-catching designs. The magic word here is “resolution.” It’s all about how many of these tiny dots pack together to make the image look as real as your pizza last night. Trust me, by the end, you’ll see your images in a whole new light!
Pixel density, expressed as pixels per inch (PPI), further describes the resolution of an image when displayed on various devices. A 2400px by 2400px image, for example, will have a higher pixel density on a smartphone screen than on a large monitor, resulting in a sharper appearance on the smaller display. To produce or modify an image to meet specific size requirements, it’s possible to use various tools and methods. Converting and editing an image to a 2400 x 2400 pixel resolution involves resizing techniques that maintain the image’s quality without compromising the level of detail.
Key Takeaways
- Understanding resolution and pixel density is essential for high-quality digital images.
- A 2400 x 2400 pixel image has a 1:1 ratio, suitable for various uses including profile pictures and design.
- Converting images to specific pixel dimensions can be achieved with online tools while preserving image quality.
Understanding Image Resolution and Quality

When we discuss image resolution and quality, we are primarily focusing on the clarity of an image, which is influenced by pixel density and how those pixels translate to print size.
Pixels and Pixel Density
Pixels are the basic building blocks of digital images. The more pixels we have in an inch of an image, known as pixels per inch (PPI), the higher the pixel density. High pixel density generally contributes to a sharper and clearer image. For example, a 2400 x 2400 pixel image has a significant number of pixels, which can suggest a high-quality image, especially when viewed on a display with sufficient resolution to showcase it.
Resolution and Quality
Resolution refers to the number of pixels that compose an image, with more pixels usually equating to higher resolution. Image quality is a subjective measure and is affected by the resolution but also involves factors like contrast, color depth, and noise. We must remember that higher resolution doesn’t automatically mean higher quality; it must be balanced with other aspects of image construction.
Pixel Dimensions and Print Size
The dimensions of an image, such as 2400px by 2400px, dictate its size when displayed on screen or printed. Print size relates to the actual physical dimensions an image will have when printed. Using a pixels to print size calculator, we can determine that at 300 dots per inch (DPI), which is a common print resolution for high-quality images, our 2400 x 2400 pixel image would print at 8 x 8 inches. This is under the assumption that PPI is equal to DPI, which it often is for printing purposes; however, DPI specifically refers to printer dots per inch.
Image Conversion Basics

When we talk about image conversion, we are referring to the process of changing an image from one size or format to another without compromising on its essential qualities: aspect ratio, resolution, and clarity.
Aspect Ratios and Their Importance
Aspect ratio is the width to height proportion of an image. Common ratios include 1:1 (perfect square), 4:3, 16:9 (widescreen), and 16:10. The aspect ratio affects how an image is viewed; maintaining the correct ratio is critical when resizing to prevent distortion. For simplicity, an aspect ratio calculator can be used to ensure accuracy.
How to Convert and Resize Images
Converting and resizing images can be done through graphic software or online tools. The key steps include:
- Choosing the new size or format: Determine the pixel dimensions (e.g., 2400px x 2400px) or the target format (e.g., PNG to JPG).
- Resizing: Use the resize function, often by inputting the desired measurements or using a preset size. Ensure the preserve aspect ratio option is selected.
- Cropping and rotating: If necessary, adjust composition by cropping or orient an image correctly by rotating.
- Saving: Save the new image with a different file name to preserve the original.
Supported Image File Formats
Numerous file formats are supported for conversion, including bitmap formats such as JPG, PNG, GIF, BMP, TIFF, and WebP. For images with transparency or for print, PNG and TIFF are often preferred. EPS, SVG, and ICO are examples of vector image formats, which are ideal for logos since they can be resized without loss of quality. Other formats, like TGA, EXR, and WebP, offer specific features for different use cases. Select the appropriate format based on the intended use of the image to ensure it displays correctly across various platforms.
Online Image Converter Tools
When we need to resize an image to specific dimensions like 2400px x 2400px, online image converter tools offer a convenient solution. These platforms typically provide easy-to-use interfaces that enable quick resizing without quality loss.
Choosing an Online Image Resizer Platform
When selecting an online image resizer, ease of use and a variety of features are key. We look for platforms that offer a resolution scale calculator to maintain the aspect ratio and quality of our images. Ideally, these tools should allow us to adjust width, height, and resolution. It’s invaluable when a platform can resize our images in just a few seconds and is free. Common features we expect include:
- An intuitive interface – making it quick to learn and use
- Flexible resizing options – allowing customization of dimensions and file format
- Real-time previews – so we see the result before finalizing the resize
Privacy and Data Security
We prioritize our privacy when using cloud-based image conversion tools. It’s essential to use a platform where privacy is guaranteed and files are deleted automatically after a certain time frame. We prefer a platform that employs advanced security measures to protect the files we upload. Typically, the commitment to privacy should be clearly stated in the platform’s policy. We should be able to download our images safely and some platforms may also offer cloud storage as an option for our resized photos. Here are the privacy considerations we keep in mind:
- Clear privacy policies – ensuring our data is handled with care
- Auto-deletion feature – where images are removed from the server after a short period
- Secure data transfer – using encryption methods like SSL during the upload and download process

