Originally posted on March 25, 2024 @ 12:43 pm

Instructions on Using the Tool

In the evolving world of digital imagery, the concept of a 1 x 1 pixel image might seem obscurely simple, yet it holds a distinctive place. Often used for tracking, web design, or even as placeholders, these tiny images carry with them a unique set of attributes in terms of ratio, resolution, and pixel density. A 1px x 1px image inherently possesses a 1:1 aspect ratio, meaning its width and height are identical, providing a perfect square. The resolution of such an image is as minimal as it gets — a single pixel representing the smallest controllable element of a picture on a screen.
Pixel density, typically measured in pixels per inch (PPI), is another crucial factor that influences the quality and clarity of an image. However, in the case of a 1 x 1 pixel image, pixel density is a moot point since there is only one pixel. When it comes to creating or converting into this minuscule format, a 1 x 1 Pixel Image Converter excels in simplifying the process. Converting an existing image into a single pixel requires consideration of color and transparency to serve its intended purpose effectively, whether it be for web optimization, as a design element, or for technical use.
Key Takeaways
- A 1 x 1 pixel image has a 1:1 aspect ratio and serves various technical and design functions.
- The concept of pixel density does not apply to a single-pixel image due to its singular pixel composition.
- Converting images to 1 x 1 pixels involves careful consideration of color and transparency to ensure functionality.
Understanding 1×1 Pixel Images

In discussing 1×1 pixel images, we quickly realize they are the most basic unit of a digital image, comprised of a singular square of color. They hold the minimum data necessary to render a color on a screen and possess unique characteristics in terms of resolution, pixel density, dimensions, and aspect ratios.
Pixel Density and Resolution
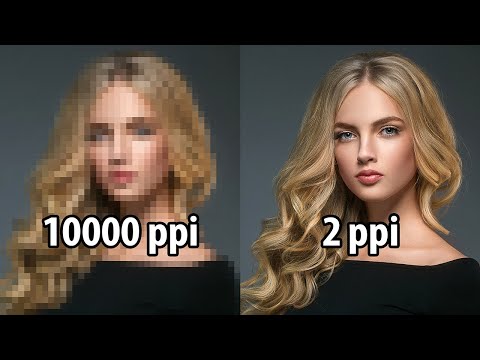
Pixel density is typically measured in pixels per inch (PPI) and refers to the number of pixels in a one-inch line on a display. A 1×1 pixel image inherently has no measurable density on its own as it’s a singular pixel. Its resolution is exactly that – one pixel. When we integrate a 1×1 pixel image into a display with known PPI, the pixel density equates to the PPI of the display. A device with a higher PPI will display the same 1×1 pixel image as sharper, while a lower PPI may result in a less crisp appearance.
Common Uses for 1×1 Pixels
We often utilize 1×1 pixels in various online applications, including web design and tracking user behavior. In web development, they help in spacing and layout design, often known as “tracking pixels” or “spacer GIFs”. Their function includes influencing the layout without altering the visible design. These invisible pixels can also track email opens or website visits, providing invaluable data while remaining inconspicuous due to their size and the fact they match the background where they’re implemented.
Creating and Converting 1×1 Pixel Images

Creating and converting a 1×1 pixel image is a specific task that involves using an image with a resolution where both the width and the height are exactly one pixel. The aspect ratio for such an image is necessarily 1:1, given its equal dimensions, and the pixel density is effectively the resolution of the singular pixel itself. Let’s look at how we can accomplish this through various online platforms and tools.
Online Platforms and Tools
We can use free online platforms that feature a converter capable of producing images in a wide range of formats, such as gif, png, jpg, jpeg, bmp, svg, webp, eps, ico, and tiff. These converters generally allow users to upload an image or provide a link to an image and then resize the image to a 1×1 pixel format.
- Online Converter: Easily convert existing images.
- Image Toolsets: Various tools for specialized format conversion.
- Format Selection: Allows for conversion to multiple image formats.
Image Conversion Process
To convert an image to 1×1 pixels, we typically follow a few steps:
- Upload or link to your desired image.
- Select the output format (e.g., png, jpg, etc.).
- Choose to resize the image, specifying a 1×1 pixel dimension.
- Initiate the conversion process.
The singular pixel’s data will represent the average color of the original image when resized, and the conversion often happens instantaneously given the minimal data of a 1×1 pixel image.
Supported Image Formats
Our tools support a variety of image formats, enabling flexibility for our needs:
- Raster Formats: gif, png, jpg, jpeg, bmp, webp, tiff and more.
- Vector Formats: svg and eps for scalable graphics.
- Icon Formats: ico for favicon creation.
Each format offers unique characteristics, such as transparency for png or animation for gif, which may influence our choice depending on the intended use of the 1×1 pixel image.
Optimizing Images for the Web and Social Media

When preparing images for the web and social media, it’s crucial to consider specific factors like aspect ratios and image resolution that affect both visibility and performance. We’ll explore how to adjust these properties to ensure your images look great across various platforms.
Image Quality and Aspect Ratios
The aspect ratio of an image is fundamental to how it is viewed on different devices and platforms. Common aspect ratios include 4:3, 16:9 (ideal for YouTube and TV broadcasts), 1:1 (perfect for Instagram’s profile pictures), and 3:2. It’s important to use an aspect ratio calculator when resizing images to maintain the correct proportions. For example, Instagram prefers square images, whereas Facebook can accommodate a variety of shapes and sizes.
- Instagram uses a 1:1 ratio for profile pictures, 4:5 for vertical images, and 1.91:1 for horizontal images.
- Facebook profiles and pages show cover images at 16:9, while shared images usually look best at a 4:3 or 1:1 ratio.
Optimizing for image quality includes ensuring the file size isn’t too large, as this can slow down page load times, which is critical for retaining viewer engagement.
Adjusting Image Properties
To effectively adjust a photo’s properties, consider using online tools to resize images. These tools can easily adjust the resolution and pixel density of an image—a critical step for images to display correctly on high-resolution devices. The pixel density of a screen, calculated as the ratio of screen resolution in pixels to the screen size in inches (PPI – pixels per inch), influences how an image appears.
When resizing images, select the percentage reduction or increase thoughtfully to prevent a loss of clarity. You can use filters prudently to enhance image quality without detracting from the original content.
- To resize for Instagram or Facebook, choose a reduction percentage that retains a high-quality visual while meeting the platform’s upload criteria.
- For consistent image dimensions across multiple platforms, a free online image resize tool can quickly adjust your images to the correct size without compromising quality.
Technical Considerations and Troubleshooting
When creating a 1 x 1 pixel image, understanding the technicalities of image file size and common issues ensures you achieve the highest quality output. We will guide you on how to calculate the file size and troubleshoot typical problems.
Calculating Image File Size
The file size of an image can be calculated using a simple formula. For a 1px x 1px photo, the file size is minimal but depends on the color depth (bits per pixel). The formula is:
File Size (bytes) = Image Width (pixels) x Image Height (pixels) x Color Depth (bits per pixel) / 8
Example: A 1 x 1 pixel image with a color depth of 24 bits would have a file size of 3 bytes (1 x 1 x 24 / 8).
An image file size calculator can automate this process, especially useful when dealing with larger images destined for the internet.
Identifying and Resolving Common Issues
We often encounter issues with pixels not translating correctly into print size. A pixels to print size calculator can assist in converting digital image dimensions to physical print sizes. For optimal clarity, the recommended resolution is 300 dots per inch (dpi) for print.
Common resolution feedback includes problems with images appearing blurred or pixelated. If you encounter such an issue, ensure your image adheres to proper resolution guidelines.
If you are experiencing issues with image quality on the internet, check your hosting service’s compression settings. Compressed images often lose quality to reduce file size, affecting the overall presentation. Always opt for the highest quality settings that your platform allows, without compromising load times.
By keeping these technical considerations in check and employing systematic troubleshooting, we can ensure that even a tiny 1 x 1 pixel image retains its intended quality and function.

