
Instructions on Using the Tool

Grasping the concepts of resolution and aspect ratio is crucial when handling digital images. A picture measuring 1900 pixels in width and 900 pixels in height possesses a unique aspect ratio; this term defines the ratio of its width to its height, which in this case is 19:9. This specific aspect ratio is a bit wider than the conventional 16:9 ratio that’s prevalent in a wide array of digital screens and video content. Meanwhile, the pixel density, which quantifies the number of pixels present per inch of the image, varies based on the size of the screen or print material and isn’t directly linked to the image’s resolution.
Resolution is an important factor in image quality, acting as a measure of the amount of detail an image holds. For instance, a 1900 x 900 pixel image contains a total of 1,710,000 pixels, with the more pixels usually translating to the potential for more detail. When creating a photo or graphic with these dimensions, knowing how to achieve the best quality depends on factors such as the initial resolution of your photos, the capabilities of the image conversion software, and how the image will ultimately be used or displayed.
Key Takeaways
- A 1900 x 900 pixel resolution carries a 19:9 aspect ratio, offering a wide, cinematic view.
- Understanding pixel density is crucial for optimizing image quality on various displays.
- Utilizing appropriate tools for image conversion ensures that 1900px x 900px photos maintain high quality.
Understanding Image Basics

In this section, we’ll clarify the important concepts of image dimensions and their corresponding aspect ratios, as well as delve into the technicalities of resolution and pixel density.
Image Dimensions and Aspect Ratio
Image dimensions are expressed in pixels and represent the width and height of an image. For a 1900×900 pixel image, the width is 1900 pixels and the height is 900 pixels. The aspect ratio is the proportional relationship between these dimensions. To calculate it, we simply divide the width by the height. Here, our aspect ratio is 1900:900, which simplifies to approximately 2.11:1. This means for every 2.11 units of width, there is 1 unit of height.
Resolution and Pixel Density
Resolution refers to the total number of pixels within an image and is calculated by multiplying width by height. Our image has a resolution of 1,710,000 pixels (1900 * 900). Pixel density, measured in pixels per inch (PPI) or dots per inch (DPI), describes how closely packed the pixels are. To find the PPI, we divide the pixel dimensions by the physical size of the image when printed. For instance, on a 6.3-inch-wide display, a 1900 pixel width yields a pixel density of approximately 301 PPI (1900/6.3). Higher pixel densities lead to crisper and more detailed images. We use dpi for print and ppi for digital screens to denote image sharpness. To convert a photo to match specific dimensions or pixel densities, image editing software can be utilized, adjusting the image proportionally to maintain the quality.
Image Formats and Conversion

When working with digital images, it’s crucial to understand the various formats available and how to convert between them effectively. This understanding ensures that we retain the quality needed for our specific use case.
Popular Image Formats
Among the many image formats, a few stand out due to their widespread use and compatibility:
- JPEG (JPG): A popular format for photographs, it uses lossy compression.
- TIFF: Suitable for high-quality images; supports lossless compression.
- BMP: An uncompressed bitmap format, resulting in large file sizes.
- PNG: Commonly used for web graphics; supports lossless compression and transparency.
- WEBP: Designed for the web, it provides both lossy and lossless compression.
- EPS: Used for vector graphic files; ideal for scalable images.
- SVG: Also a vector format, it’s XML-based and useful for web applications.
- ICO: Typically associated with favicons, icons for websites.
- GIF: Supports simple animations and transparency; uses lossless compression.
These formats serve different purposes; understanding their properties allows us to choose the right one based on our needs for quality, file size, and compatibility.
Conversion Tools and Techniques
Several methods are available for converting images to a 1900 x 900 pixel resolution:
- Online Converters: Convenient tools allow us to upload a photo, select the desired resolution, and then download the converted file.
- Software Programs: Applications such as Adobe Photoshop offer advanced features for converting and resizing images with control over the compression level and pixel density.
- Batch Conversion Tools: Ideal for processing numerous files at once. Some online platforms and desktop applications offer this feature, which streamlines the workflow for larger projects.
Using the appropriate conversion tools and techniques is paramount in achieving the desired image resolution without sacrificing quality. When selecting a converter, we look for one that supports a wide range of formats and offers a seamless user experience.
Optimizing and Resizing Images
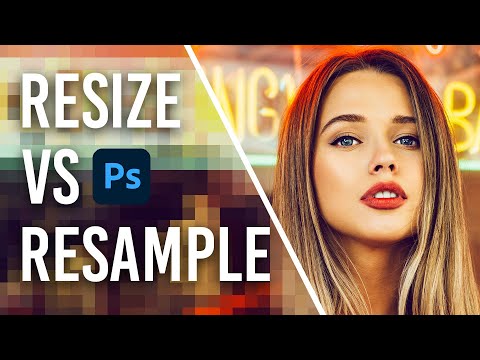
When we optimize and resize images, our goal is to adjust the image dimensions and file size without compromising on quality. Proper resizing can maintain the clarity of the image, while compression is crucial for managing file size and ensuring fast loading times.
Resizing Images without Losing Quality
To resize images without losing quality, we need to understand the concept of rescaling. When we downscale an image, we reduce its dimensions; while upscaling involves increasing them. Resizing should be done using a reliable image resizer tool that maintains the image’s aspect ratio to prevent stretching or skewing. Careful sharpening after resizing can also help restore clarity. To achieve the best result:
- Use high-quality originals: Starting with a high-resolution image gives us more flexibility to resize without quality loss.
- Maintain aspect ratio: Preserve the original aspect ratio to keep the photo from looking distorted.
- Downscale with caution: It’s generally safer to downscale than to upscale, as making an image smaller typically preserves more quality than enlarging it.
Compression and File Size Management
Effective compression reduces file size while trying to keep the image quality intact. It’s a balancing act between reducing the size and maintaining the visual fidelity of the image:
- Choose the right format: JPEG is great for photographs, while PNG is better for images with text or transparent backgrounds.
- Adjust compression settings: Most image editors allow you to choose the level of compression. Reducing the quality will reduce the file size, but too much compression can result in a loss of quality.
- Consider the use case: For a website, smaller file size for images is generally preferable to speed up page load times, but for printing, higher quality and resolution are necessary.
By employing careful tactics to adjust, compress, and resize images, we ensure that our photos remain sharp and clear while being suitably optimized for their intended use.
Advanced Topics in Image Conversion

In the realm of image conversion, understanding the nuanced topics such as calculating print size and resolution along with how images display on various screen sizes is essential. These advanced concepts ensure that images are optimized for their intended use, be it in print or on digital platforms.
Calculating Print Size and Resolution
To determine the print size of a 1900 x 900 pixel image, we utilize a pixels to print size calculator. For optimal quality, a print resolution of 300 dots per inch (DPI) is standard. Let’s do the math:
- Width: 1900px / 300 DPI = 6.33 inches
- Height: 900px / 300 DPI = 3 inches
If we choose a different resolution, say 150 DPI, the dimensions would double, resulting in a larger print size:
**Width:** 1900px / 150 DPI = 12.67 inches
**Height:** 900px / 150 DPI = 6 inches
The aspect ratio, crucial for maintaining the image’s proportional integrity, remains constant regardless of print size. For a 1900 x 900 pixel image, the aspect ratio is 16:9, which is the same as that for typical widescreen displays.
Understanding Screen Sizes and Image Display
When it comes to displaying images on screens, one must consider the screen size and resolution. Most modern displays follow standard aspect ratios such as 16:9, 4:3, or 16:10, and an image’s aspect ratio can be found using an aspect ratio calculator.
For a 1900 x 900 image, which adheres to the 16:9 widescreen format, it would naturally fit screens with the same ratio without needing adjustments. Here’s how this impacts various display considerations:
- Image Scaling: Using a resolution scale calculator, we can predict how our image will scale on different screen resolutions. In some cases, percentage scaling is needed to maintain clarity.
- Pixel Density: An image will look different on a screen with a higher pixel density, like a smartphone display. The density is measured in pixels per inch (PPI), and a PPI calculator can help determine the density specific to a device.
- Image File Size: The dimensions and resolution influence file size; larger images at higher resolutions typically result in larger file sizes. An image file size calculator is a useful tool to estimate the amount of space the image will take, which is particularly relevant for internet use where bandwidth and load times are considerations.

