
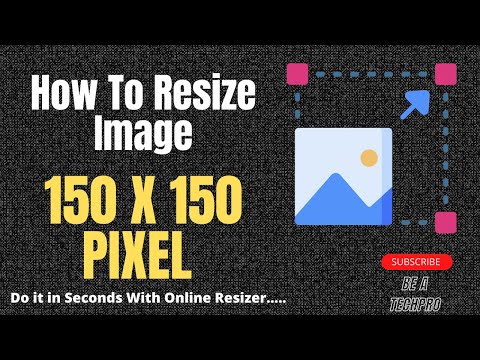
Instructions on Using the Tool

In digital imaging, a 16 x 16 pixel image stands as a small square of information, often used for icons or as a simplistic graphical representation. The ‘pixel,’ a term short for ‘picture element,’ is the smallest unit in a digital image, and at a 16 x 16 resolution, we’re working with 256 pixels in total. The aspect ratio of such an image is 1:1, meaning the width and height are equal, forming a perfect square. Pixel density refers to the number of pixels within a certain area of the screen and is particularly relevant when considering the clarity and sharpness of the image on various devices.
When it comes to creating a 16px x 16px photo, we’re focusing on precision and minimalism due to the limited space. The resolution and aspect ratio must be kept strictly to the stated dimensions to maintain the image’s intended appearance across different platforms. As with any digital image, the quality and file size are influenced by factors like color depth and compression. To optimize a 16 x 16 pixel image, attention must be paid to ensure that the key visual elements are discernible, even at such a small scale.
Key Takeaways
- A 16 x 16 pixel image is composed of 256 pixels with a 1:1 aspect ratio.
- Clarity in such small images is dependent on pixel density and image optimization techniques.
- Creating a 16px x 16px photo requires attention to detail and careful consideration of its visual elements.
Understanding Pixels and Image Resolutions

In this section, we will explore the fundamental concepts of pixels and image resolution, focusing particularly on the 16×16 size format. We’ll break down what pixel density means and its implications for image quality.
The Basics of Pixels and Resolution
Pixels are the smallest units of a digital image, displayed as dots or squares on a screen. When we talk about an image’s resolution, we’re referring to the number of pixels along the image’s width and height. Thus, a 16×16 pixel image consists of an array that’s 16 pixels wide and 16 pixels tall, totaling 256 pixels.
The Dots Per Inch (DPI) is a measure that reflects the resolution of an image when printed. Generally, the higher the DPI, the finer the detail in a print image, because there are more dots making up that image.
16×16 Pixel Density and Implications
A 16×16 image has a pixel density that depends on the size of the display or printed medium it’s viewed on. For on-screen display, the clarity of a 16×16 image is largely dependent on the monitor’s resolution. On a standard 72 DPI screen, each pixel is rather large, and the image would appear quite blocky.
In terms of image quality, a 16×16 resolution is extremely low and usually not adequate for detailed graphics. However, such a small pixel dimension is suitable for favicons (the tiny icons you see in browser tabs), small icons in user interfaces, or pixel art where a retro aesthetic is desired.
Aspect Ratios and Image Dimensions

In this section, we’re focusing on the intricacies of aspect ratios and how they relate to image dimensions, specifically for 16×16 pixel images.
The Concept of Aspect Ratio
An aspect ratio is the proportional relationship between the width and height of an image. It is often expressed as two numbers separated by a colon, signifying how many units wide the image is for every unit of height. For a 16×16 pixel image, the aspect ratio is 1:1, meaning the width and height are equal, creating a perfect square.
Calculating Dimensions for 16×16 Images
When dealing with dimensions for digital images such as 16×16 pixels, it’s important to understand that the size is represented by the number of pixels along the image’s width by the image’s height. This ratio of width to height for a 16×16 image signifies that each side of the image consists of 16 pixels, resulting in a total of 256 pixels. The resolution of an image in this context is simply the total number of pixels it contains, which directly influences the pixel density—how many pixels are displayed per inch of the image. To create a 16px by 16px photo, we ensure the image’s dimensions are precisely 16 pixels in width and 16 pixels in height, maintaining the aspect ratio and resolution required.
The Conversion Process Explained
In this section, we cover the necessary steps to effectively convert images to a 16×16 pixel format, focusing on the importance of choosing the right tool and the actual process of conversion.
Choosing the Right Image Converter Tool
When we look to convert images to a 16×16 pixel format, the first step is selecting an appropriate image converter tool. This tool should support multiple image formats such as jpg, jpeg, png, gif, bmp, tiff, eps, svg, webp, and ico. Additionally, it should allow us to resize, crop, flip, and adjust the resolution of an image. Options range from dedicated software to online platforms that provide these services without the need to download any applications.
Converting Images to 16×16
Once we’ve chosen a suitable tool, converting an image involves the following steps:
- Upload: Drag and drop or upload the original image into the converter tool.
- Resize/Crop: Adjust the image canvas to 16px by 16px. If necessary, crop the image to focus on the key elements.
- Format Selection: Choose the desired format, like png for transparency or jpeg for a smaller file size.
- Convert & Download: After adjusting settings, convert the image. Once conversion is complete, download the new 16×16 image.
It’s imperative to ensure that the chosen tool maintains the image’s quality during the resize, particularly as reducing dimensions to such a small size can often result in a loss of detail.
Optimizing Image Quality and File Size
When crafting 16×16 pixel images, we must ensure an effective balance between visual clarity and file size. This optimal balance supports faster website load times and respects user privacy and copyright, without compromising the image quality.
Balancing Quality and File Size
To maintain the quality of a 16×16 pixel image, it’s crucial that we choose the appropriate level of compression. Over-compressing can lead to loss of detail and create a pixelated effect, especially in such a small resolution. Under-compressing, on the other hand, can result in larger file sizes, leading to slower internet loading times and potential privacy concerns as users are inadvertently downloading larger files. We strive to find that middle ground where the image retains clarity yet the file size is minimized for optimal online use.
- Choose Compression: Use formats like PNG for lossless compression or JPEG for lossy compression.
- Test Quality: Assess the image visually to ensure there’s no significant quality loss.
- Check File Size: Confirm that the file size is as small as possible without affecting quality.
Supported Formats for Online Use
For our 16px by 16px images to function effectively on the internet, particularly on websites, we must utilize formats that are widely supported and optimized for web display. Formats such as PNG and GIF are recommended for their lossless compression features, which ensure no quality is sacrificed. On the other hand, JPEG can be used when a smaller file size takes precedence, but at the risk of some quality loss.
- PNG: Offers high quality with lossless compression, ideal for simple graphics.
- GIF: Suitable for small images and animations but limited to 256 colors.
- JPEG: Provides better compression but with lossy results; use when file size is a priority.
With these formats, we ensure our images are ready for immediate feedback, respect user privacy by not overloading their bandwidth, and uphold copyright by delivering crisp, legally-sourced representations online.

