
Instructions on Using the Tool

When dealing with digital images, resolution, aspect ratio, and pixel density are essential aspects to consider. A 1440 x 900 pixel image converter is a tool that allows us to transform the size and resolution of an image without compromising its aspect ratio. The aspect ratio of a 1440 x 900 image is 16:10, which is slightly wider than the standard 16:9. This format is often used for computer monitors and laptops. The specific resolution of 1440 x 900 pixels means that the image contains exactly 1,296,000 pixels in total.
Pixel density, which is the number of pixels per inch (PPI), will vary depending on the size of the display or the print. Higher pixel density correlates with a sharper, more detailed image. When it comes to making a 1440px by 900px photo, it’s important to ensure that the image conversion is done correctly to maintain the clarity and resolution of the original photo. By selecting the right software or online service for conversion, we can adjust the image size or convert it to different formats suitable for various applications, such as online content, print, or digital displays.
Key Takeaways
- A 1440 x 900 image converter maintains the unique 16:10 aspect ratio crucial for specific display needs.
- Proper conversion techniques ensure image clarity and optimal resolution during size adjustments.
- Selecting suitable tools for image conversion can optimize photos for diverse platforms, maintaining pixel density and quality.
Understanding Resolution and Aspect Ratio
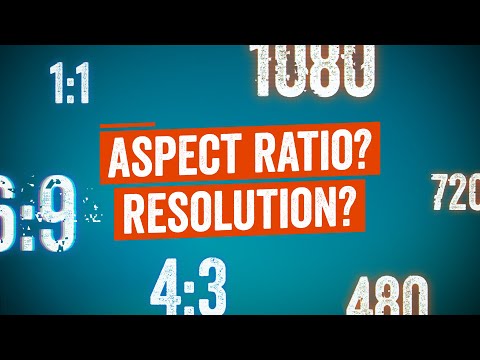
When we discuss image quality and display characteristics, resolution and aspect ratio are crucial factors. Understanding these concepts ensures we create and view images as intended.
Basics of Resolution
Resolution refers to the total count of pixels that compose an image. Pixels are the smallest units of a graphic that can be displayed and edited. Resolution is expressed by the width and height of the image in pixels. A typical resolution of 1440×900 means the image is 1440 pixels wide and 900 pixels tall. The formula to calculate the total number of pixels is the width multiplied by the height. For a 1440×900 image, this equates to 1,296,000 pixels in total.
- Width in pixels: 1440
- Height in pixels: 900
- Total pixels (Resolution):
1440 * 900 = 1,296,000
Interpreting Aspect Ratios
Aspect ratio describes the proportional relationship between the width and height of an image. It’s a comparison of the width to the height and is usually represented in the form of two numbers separated by a colon. For a 1440×900 image, the aspect ratio is calculated by finding the greatest common divisor for both the width and the height and then expressing these as a ratio.
- Width: 1440 (divisible by 120)
- Height: 900 (divisible by 120)
- Aspect Ratio:
1440 / 120 : 900 / 120which simplifies to 12:9, often reduced further to 16:10 for simplicity.
An aspect ratio calculator can help determine the aspect ratio of any image. Knowing the aspect ratio is important especially when preparing images or videos for various display mediums to ensure the dimensions are correct, and no unintended stretching or compressing occurs. It assists in maintaining the intended image composition and the visual integrity when viewed on different screens.
Image Conversion Techniques

In image conversion, it’s essential to understand resizing options, quality adjustments, and choosing the correct file format. By mastering these components, we can convert images like the 1440px x 900px efficiently, ensuring their use is optimized for different platforms.
Image Resizing Basics
When we resize images, we typically aim to change their dimensions to fit specific requirements without distorting the content. Tools known as image resizers can efficiently change the resolution of a photo. For example, converting a 1440px x 900px image to a 2K resolution involves upscaling the image. Conversely, downscaling refers to reducing an image’s size from a higher resolution. This process can be done online with various free tools that make resizing both easy to use and accessible. When resizing images, maintaining the aspect ratio is crucial to avoid stretching or squashing the image, preserving its original appearance.
Adjusting Image Quality
After resizing an image, the quality often needs to be adjusted, particularly if the image has been upscaled. Sharpening is a technique used to enhance the detail of an image that may be lost after enlargement. However, it’s important not to overdo it as this can introduce unwanted noise. We must also consider the pixel density (ppi), which affects the print quality of an image. For digital use, a lower ppi may suffice, but for printing, a higher ppi is generally required for a crisp output.
Choosing the Right Format
Selecting an appropriate image file format is a critical step in image conversion. Common formats include JPEG, PNG, GIF, BMP, TIFF, SVG, and WEBP. JPEG is widely used due to its compression capabilities, making it suitable for web usage. PNG files support transparency and are ideal for graphics with less detail. For animated images, GIF is a popular choice. Vector image formats like SVG are useful for designs that need to be scaled without losing quality. When converting, we should identify the format that best preserves the quality and characteristics of the original image, considering the intended use.
Optimizing Images for Online Use
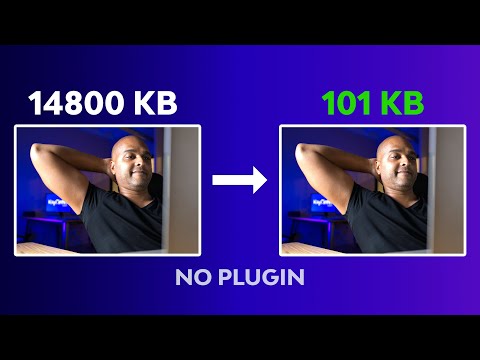
When optimizing images for online use, we focus on minimizing file size while maintaining visual quality. This delicate balance ensures images are web-ready and preserves bandwidth for both the uploader and viewers.
Preparing Images for the Web
Before we upload our image files to the internet, we take steps to ensure they are optimized. We start by using an online image resizer to adjust our photos to the exact dimension we need, in this case, 1440px by 900px. We choose a format like JPEG for its balance between quality and file size, paying attention to maintaining the highest quality at the lowest reasonable size.
- Resolution: 72 DPI (dots per inch), which is standard for web images.
- Quality: Aim for a 60-80% quality percentage, which reduces file size without a significant loss of visual fidelity.
- Aspect Ratio: Keep a horizontal to vertical ratio of 8:5 for 1440px by 900px images to prevent distortion.
Using Cloud Storage for Images
We leverage cloud storage for hosting our image files, which provides easy access and sharing capabilities. Platforms like Google Drive or Dropbox allow us to manage our images without overloading our website server.
- Accessibility: Store images in labeled folders for easy retrieval.
- Backup: Ensure a backup copy exists to prevent data loss.
Ensuring Fast Load Times
A key to optimization is ensuring our images load swiftly to provide a seamless user experience. We understand that slow loading can frustrate users and hurt our website’s performance. Here are steps to assure quick load times:
- Compression: Tools like TinyPNG reduce file size without deteriorating quality.
- CDN: Use a Content Delivery Network to distribute the load and decrease strain on our server.
- ISP Throttling: Be mindful of how internet speed can affect uploading and viewing images.
- Testing: Regularly check image load times using speed testing tools like Google PageSpeed Insights.
By following these actionable steps, we ensure our images are optimized for the online environment, from resolution and format to storage and load times.

